
Adding Dimension Lines
-
Access the Ruler Tool:
-
Click the ruler button located in the upper left corner of the model view.
-
Alternatively, press the ‘v’ button.
-
-
Select the types of Dimension:
-
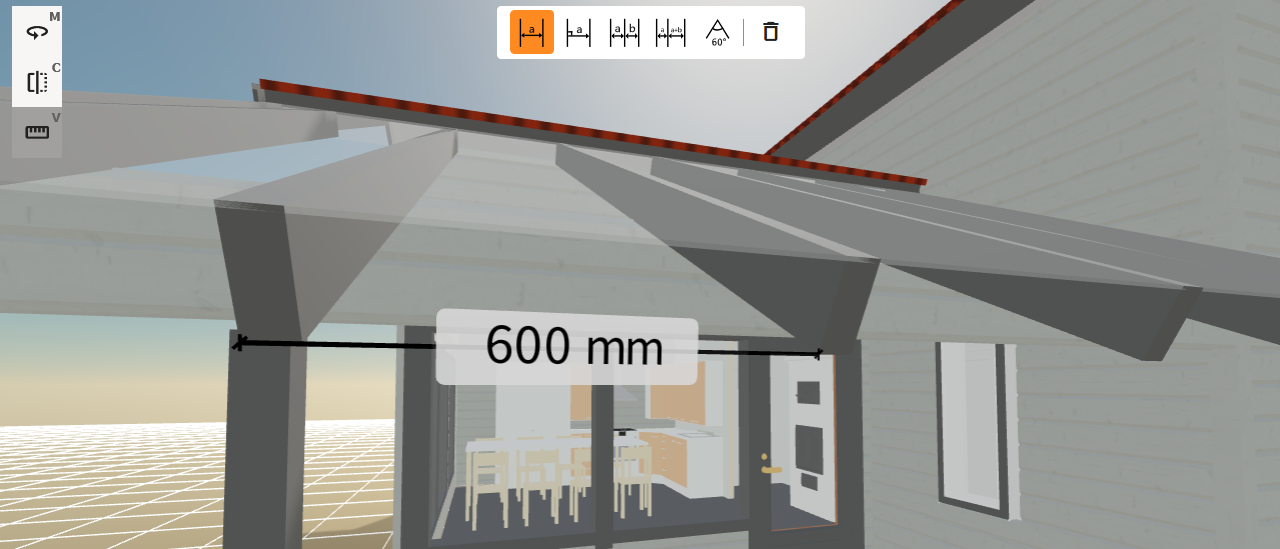
Single Line: Adds a single measurement.
-
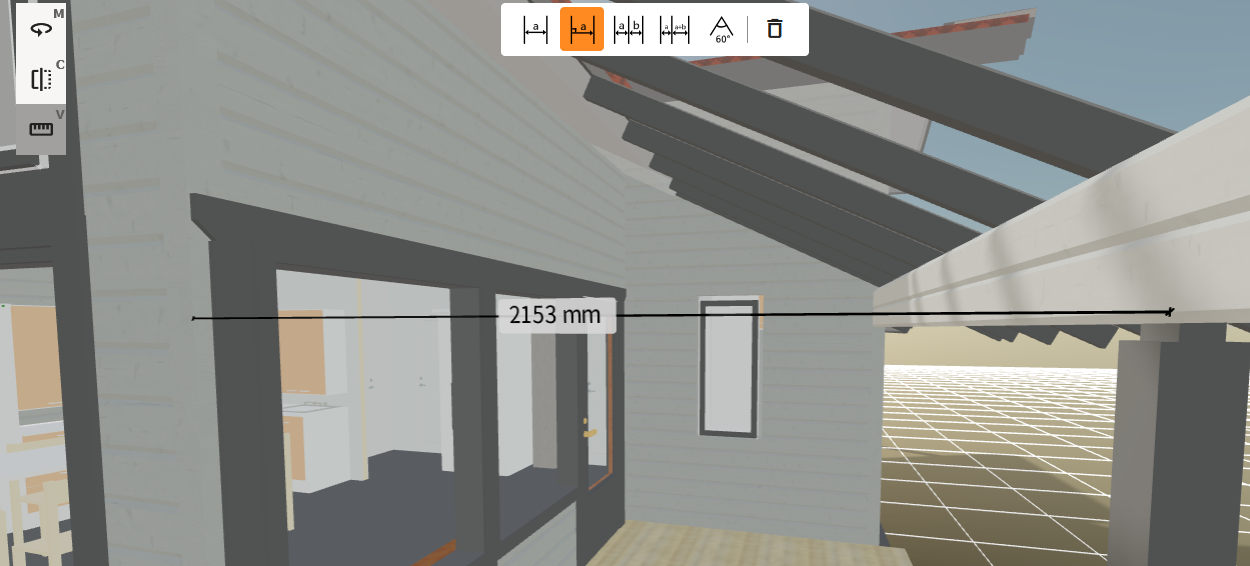
Perpendicular: Add a new dimension line perpendicular to a surface. The end point of the dimension line is set automatically on the first surface that the line hits.
-
Perpendicular shortest:
-
Shortest distance between objects: Measures automatically the shortest distance between objects
-
Selected Edge Line Measurement: Auto measure the line length.
-
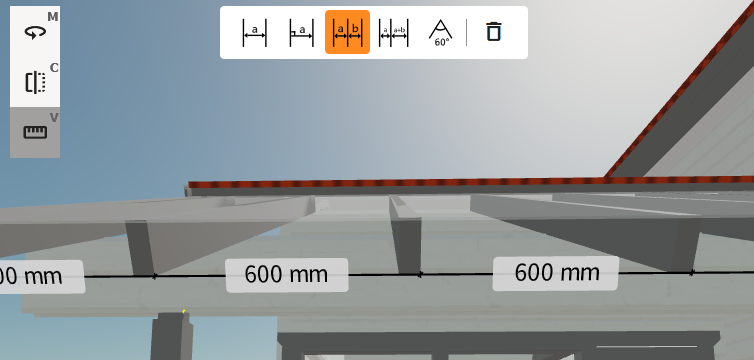
Chain: Adds measurements for individual segments.
-
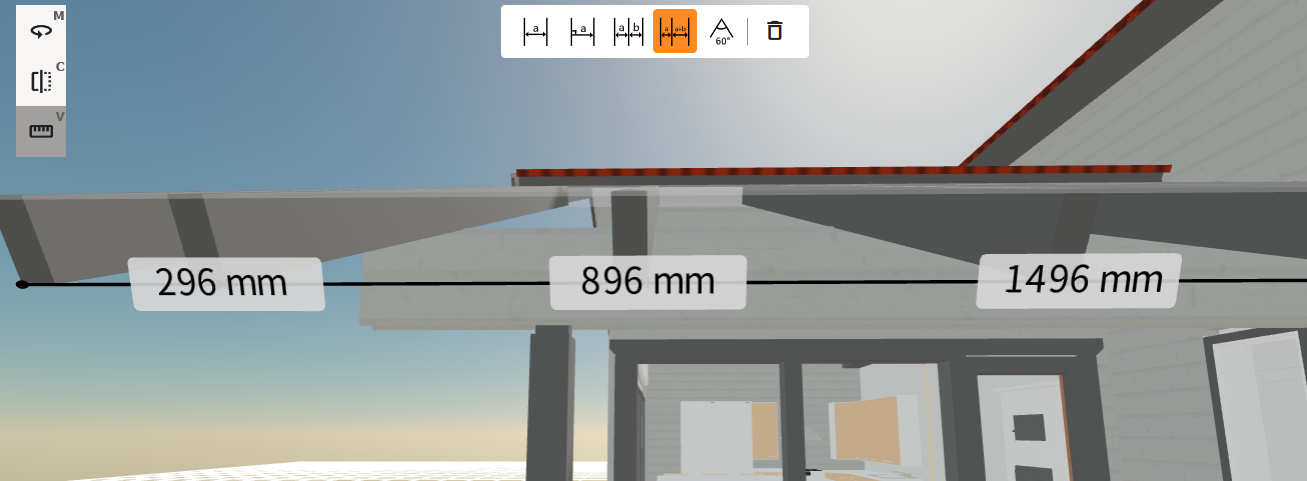
Baseline: Adds cumulative measurements along a path.
-
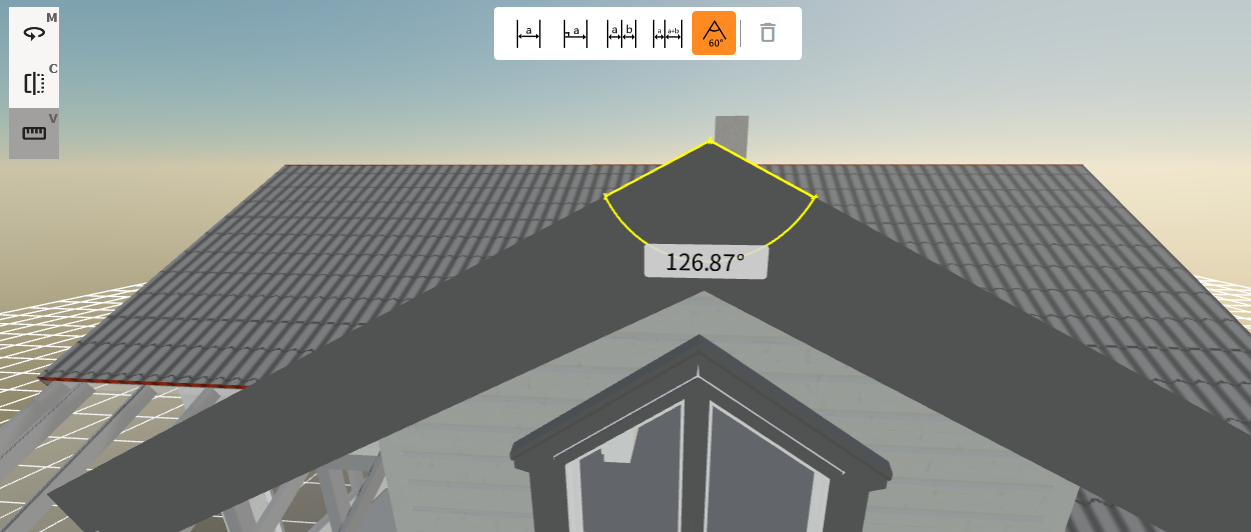
Angle: Adds an angle dimension to measure angles between lines.
-
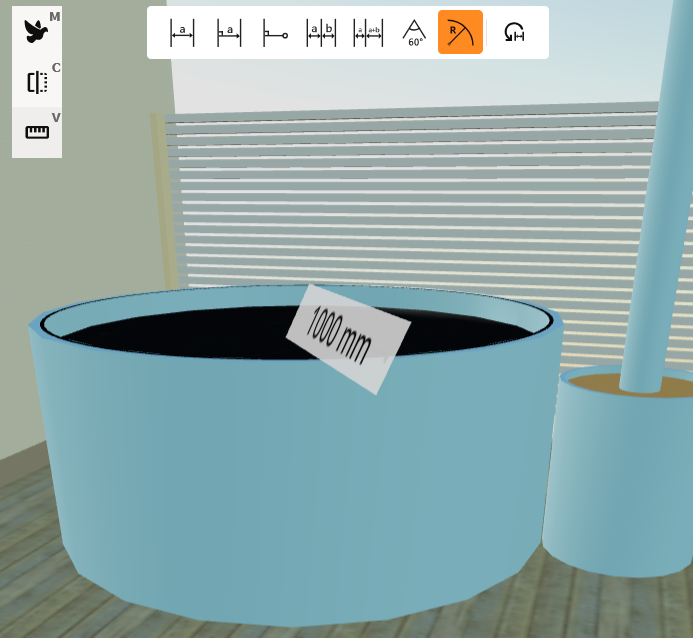
Radius: Adds a radius dimension.
-
Selected Edge Line: Adds a measurement for one selected edge line.
-
You can cancel measurement line adding process pressing ‘esc’ key.
Single Dimension Line

Adding a Single Dimension Line:
-
Select Start and End points:
-
Click the left mouse button (or tap on mobile) to select the start point.
-
Click again to select the end point. The system will add a new dimension line between these points.
-
-
Continue Adding Dimensions:
-
After selecting the end point, the system will prompt you to select a new start point for the next dimension line.
-
Perpendicular Single Dimension Line

Adding a Perpendicular Single Dimension Line:
-
Select the Start Point:
-
Click the left mouse button (or tap on mobile) to select the start point on the model.
-
-
Automatic End Point:
-
The system will automatically set the end point of the dimension line on the first surface that the line hits, ensuring it is perpendicular to the selected surface.
-
Perpendicular Shortest Dimension Line

Chain Dimension Line

Adding a Segment Dimension Line:
-
Select Points:
-
Click the left mouse button (or tap on mobile) to select the start point.
-
Continue clicking to select additional points along the path. Each segment between points will be measured.
-
-
Complete the Dimension Line:
-
Double-click the final point to complete the dimension line. The system will display measurements for each segment. Press the ‘esc’ button to stop adding new points.
-
Shortest distance between objects

Adding a Shortest Distance Dimension:
-
Select the Shortest Distance tool:
-
Open the measurement tools and select Shortest Distance.
-
-
Select the objects to measure:
-
Click the left mouse button (or tap on mobile) to select the first object.
-
Click again to select the second object.
-
-
Review the measurement:
-
The system automatically adds a new measurement line at the shortest distance between the selected objects.
-
Baseline Dimension Line

Adding a Baseline Dimension:
-
Select Points:
-
Click the left mouse button (or tap on mobile) to select the start point.
-
Continue clicking to select additional points along the path.
-
-
Automatic Cumulative Measurements:
-
The system will automatically calculate and display cumulative measurements from the start point to each subsequent point.
-
-
Complete the Dimension Line:
-
Double-click the final point to complete the dimension line. Press the ‘esc’ button to stop adding new points.
-
Angle Dimension

Adding an Angle Dimension:
-
Select Dimension Points:
-
Click the left mouse button (or tap on mobile) to select the first point (1).
-
Click again to select the second point (2).
-
Click once more to select the corner point (3).
-
-
Set Dimension Location:
-
Click to set the location of the dimension (4) where the angle measurement will be displayed.
-
Radius

Adding an Angle Dimension:
-
Select Dimension Points:
-
Showree points on a curve or circle to measure the radius
-
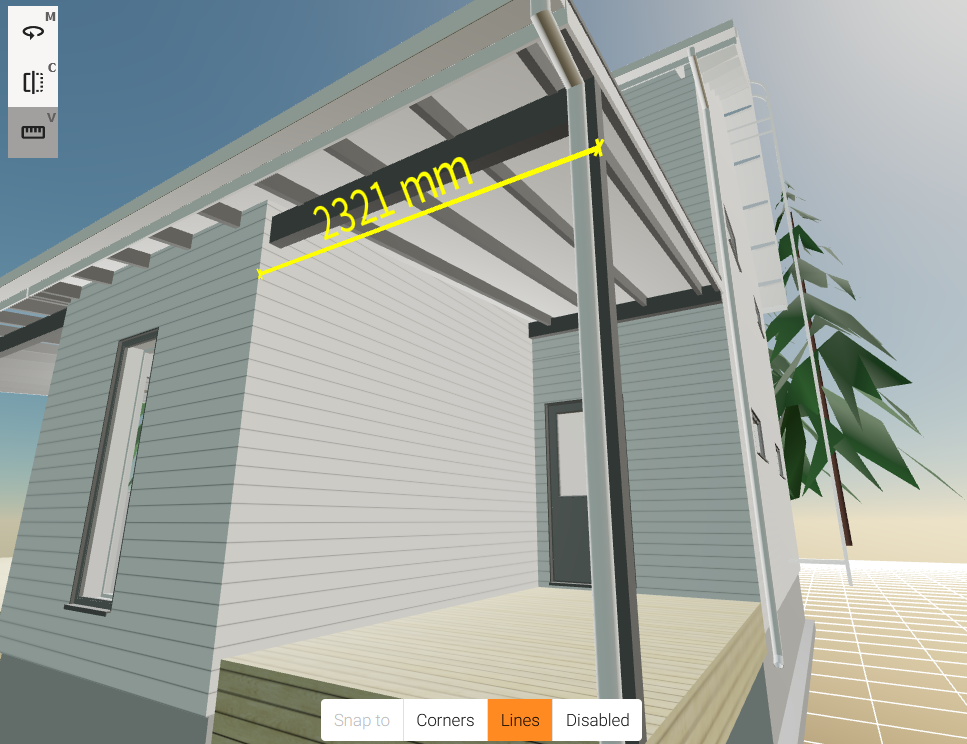
Selected Edge Line Measurement

Adding a Measurement from a Selected Edge Line:
-
Select the Edge Line tool:
-
Open the measurement tools and select the measurement type for measuring a selected singular edge line.
-
-
Select an Edge:
-
Click the left mouse button (or tap on mobile) on the edge line you want to measure.
-
The viewer uses the selected edge as the measurement line and automatically sets the start and end points from that edge.
-
-
Review the Measurement:
-
The system displays the length of the selected edge directly in the model view.
-
Use this measurement type when you need to check the exact length of one existing edge without manually selecting both end points.
-
Features
Remove All Dimension Lines:

-
To remove all dimension lines at once, click Remove all measurements button. Button is located at the end of the main measurement tool bar. If there’s no dimension lines, the button is disabled.
Magnifier Tool
The magnifier tool helps you place measuring points accurately by enlarging the area around the cursor while you are using the measuring tools. It is especially useful when the camera is far away from the model, when target points are close together, or when dense geometry makes the exact point difficult to see.
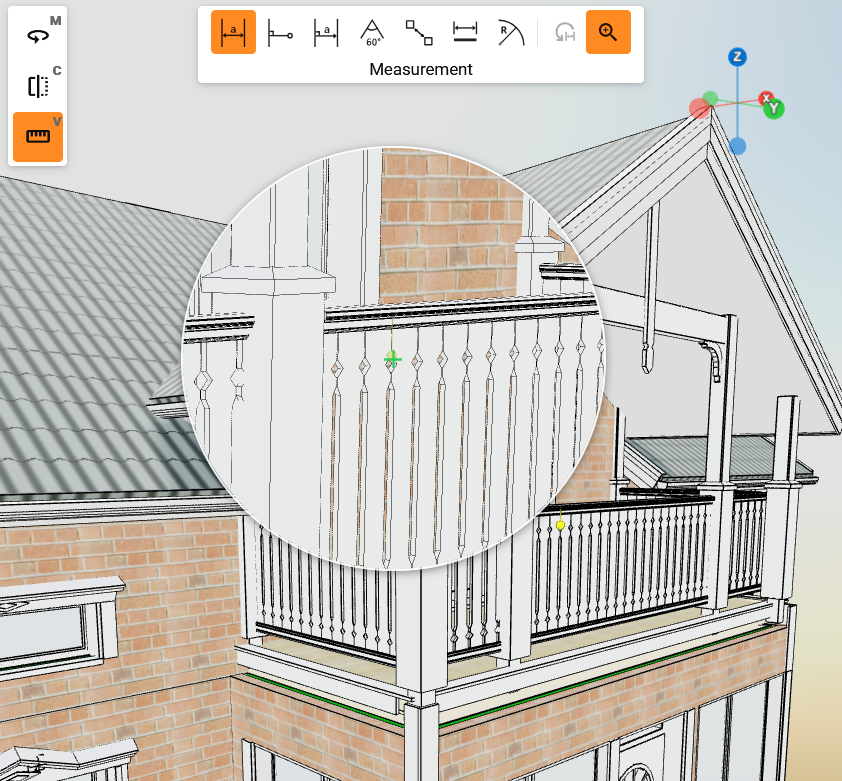
Use the magnifier to:
-
Get a clearer view of the point you are about to select.
-
Distinguish between closely located snap points, corners, and lines.
-
Place measuring points more accurately in detailed 3D views.
-
Keep line highlights and existing measure lines visible while using the enlarged view.
Turn the magnifier on from the measurement tools when you need extra precision. You can turn it off again when normal point selection is enough.
To adjust the magnifier size, open the viewer settings and change the magnifier window size. Increase the size when you need a larger detailed view, or decrease it when you want the magnifier to take less space on the screen.
Snapping Features
Snap to Corners:
-
When this feature is enabled, the system automatically snaps to the closest corner point, making it easier to align your dimensions precisely.
Snap to Lines:
-
When this feature is enabled, the system automatically snaps to the closest line, ensuring accurate placement to edges.
Snap to Surface:
-
To turn off the snapping feature to snap corners or edge lines, simply disable it in the settings. This allows for free placement on the surface.

Lock Direction Features
Lock to Axis
-
When this feature is enabled, measurement lines are lock to the selected axis direction only.
-
Surface option locks the measure line onto component surface.

-
To turn off the lock feature, simply disable it in the settings. This allows for free placement without direction lock.

Press ‘Shift’ to lock the measure line closest main main axis direction even lock feature is disabled.
Check measures in Sync 3D viewer. The measurement check tool offers a variety of options to ensure you can get information you need even on-site. Sync measurement check tool has several different measurement options from single line to segment measure line, angle measurements, radius measurements, and selected edge line measurements.
Read more about Measuring tools.
Released in version 1.0.0-beta.12