
To start using Vertex Sync, you first need to activate a subscription. You can do this by adding Vertex Sync to your shopping cart and following the steps in Proceed with Purchase. If you are a new Sync user, you can begin with a free trial period.
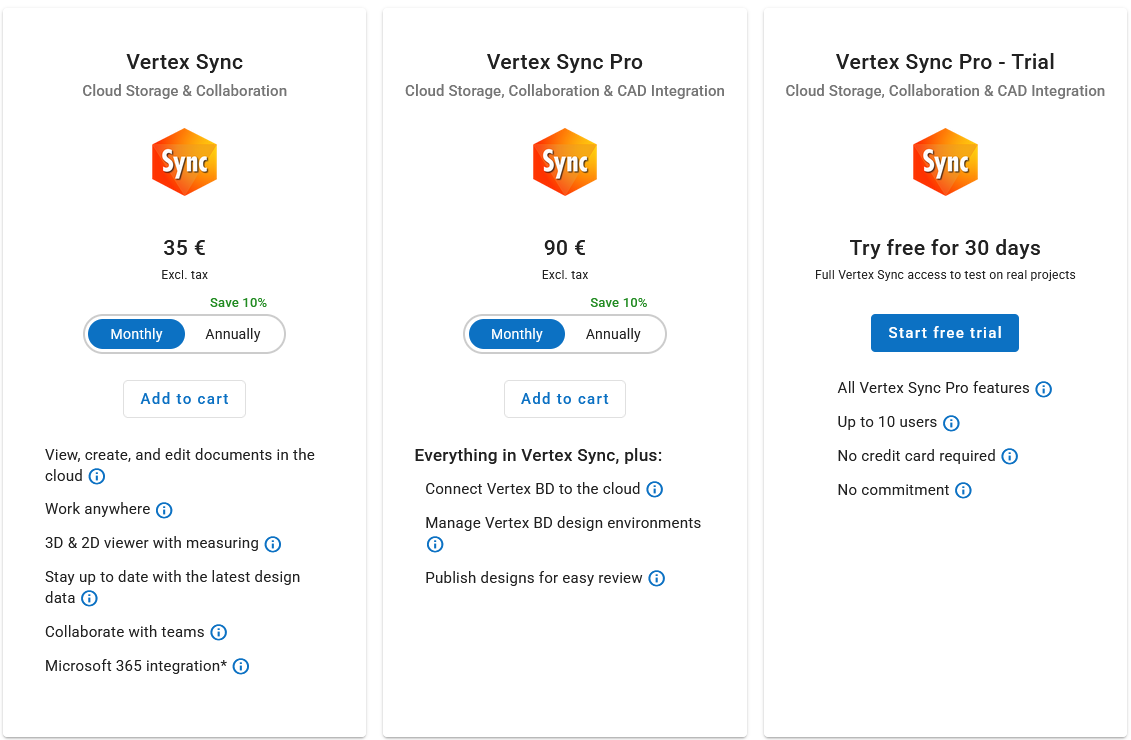
The free trial period does not require any payment information and will automatically deactivate once the trial ends. You can convert the trial into an active subscription by following these instructions.
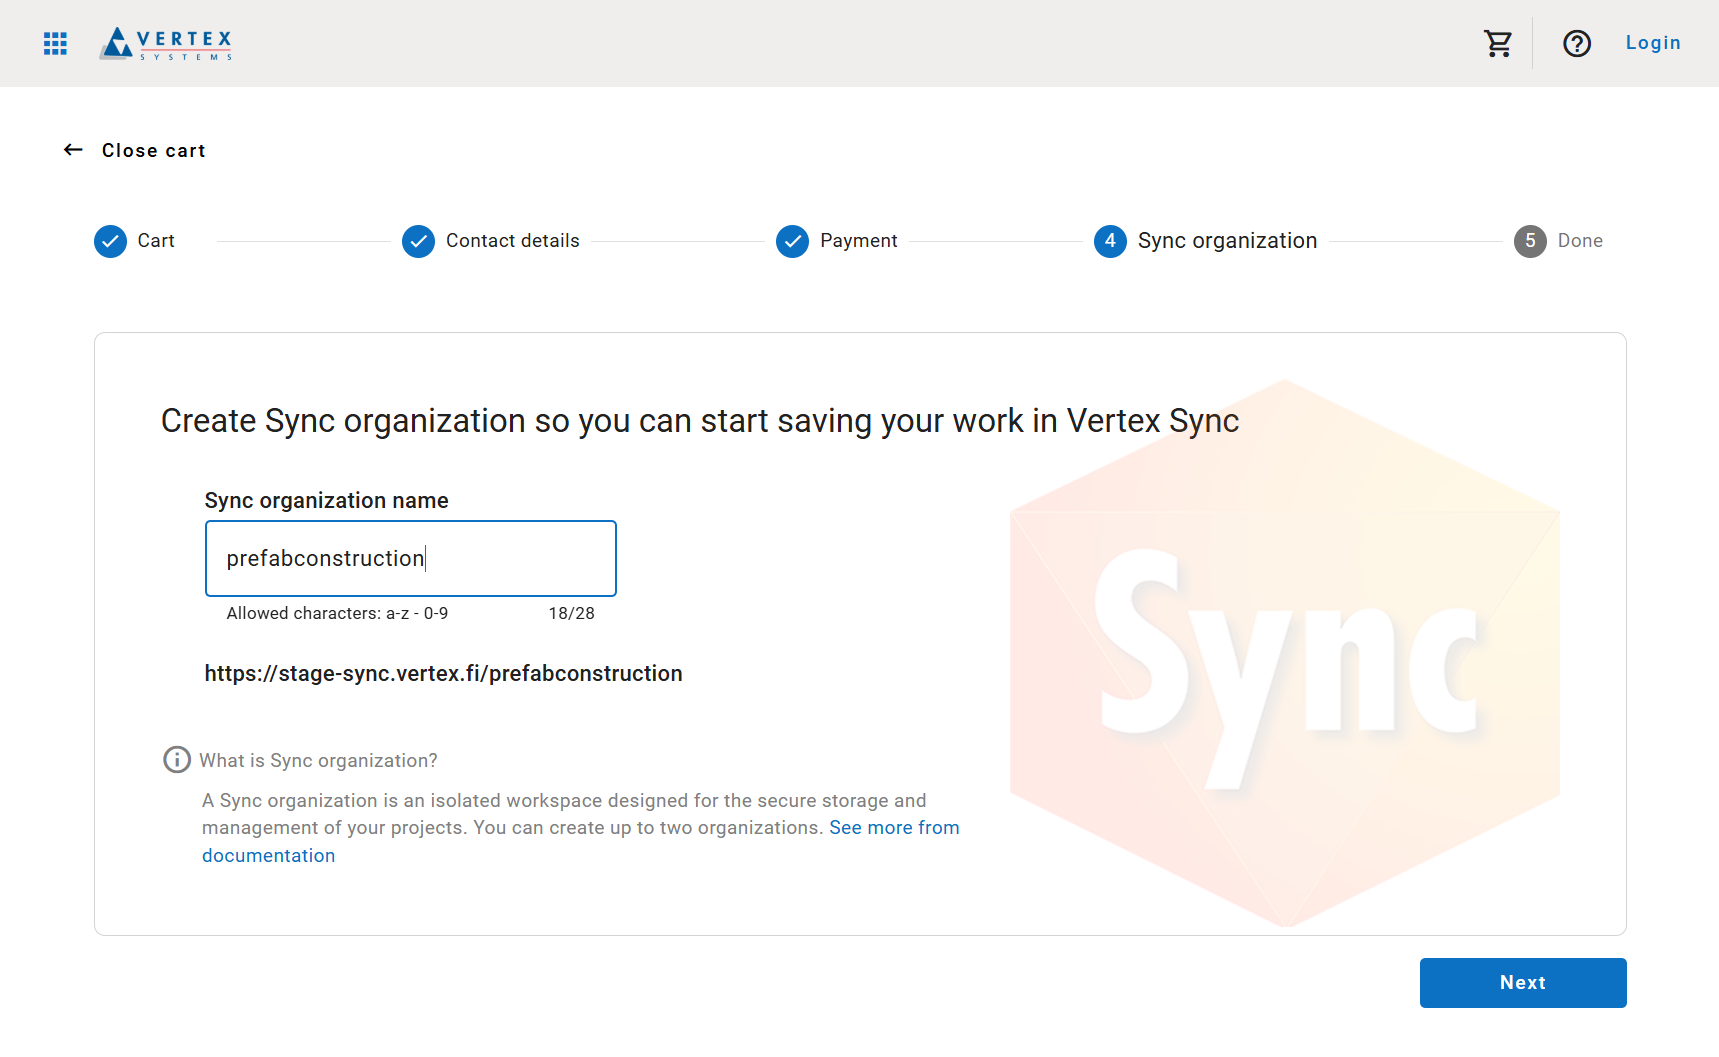
Create Sync organization
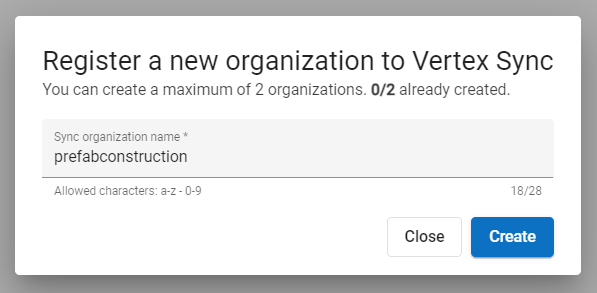
Using Sync requires naming your organization. Choose the organization’s name carefully, as it cannot be changed later. The name will appear in the Sync URL path. Since the organization name is part of the URL path, it must follow the same character restrictions as a web address: use only lowercase letters or numbers. Special characters and spaces are not allowed.
The simplest way to create a Sync organization is during the checkout process, after completing the Contact details and Payment steps. The organization can be created by entering a name into the form and clicking Next.
This step is available during checkout only if the company has no existing Sync organizations.
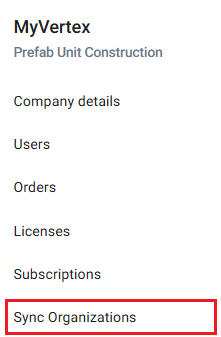
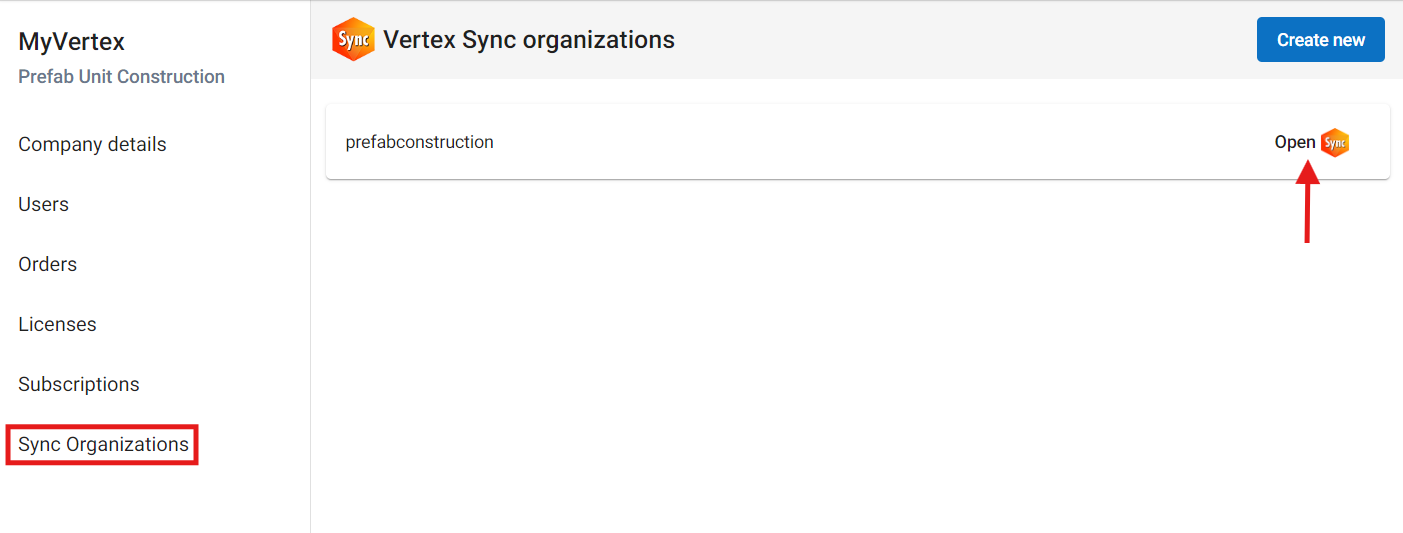
Another way to create a Sync organization is through the Sync Organizations view. This view can be accessed from the admin tools located on the left-hand side of MyVertex.
In the top right corner, you'll find the Create New button, which opens a dialog for configuring your Sync organization. If the button is disabled, it means you either don't have available Sync licenses or have reached the maximum limit of Sync organizations.
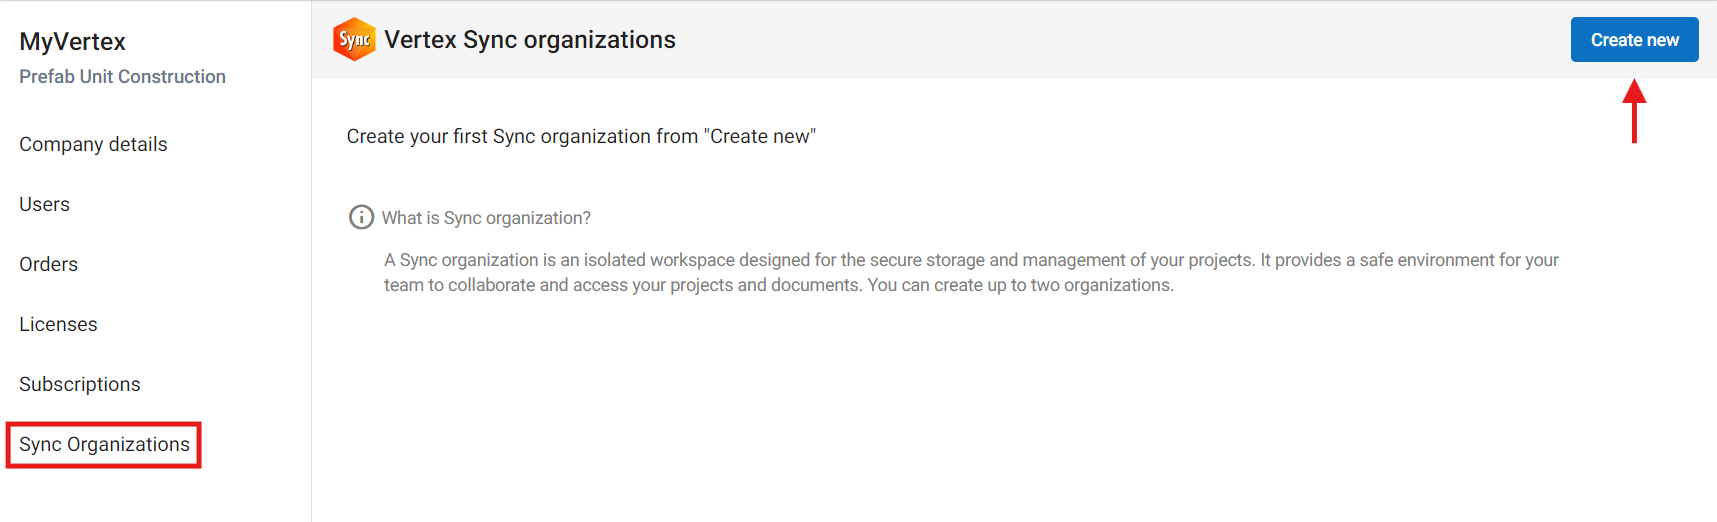
From the dialog, you can register your new Sync organization. Please remember the allowed characters!
A company can have a maximum of 2 Sync organizations.
Navigate to Sync
Existing Sync organizations are listed in the Sync Organizations view. You can navigate directly to Vertex Sync for that specific organization by clicking the Open button.
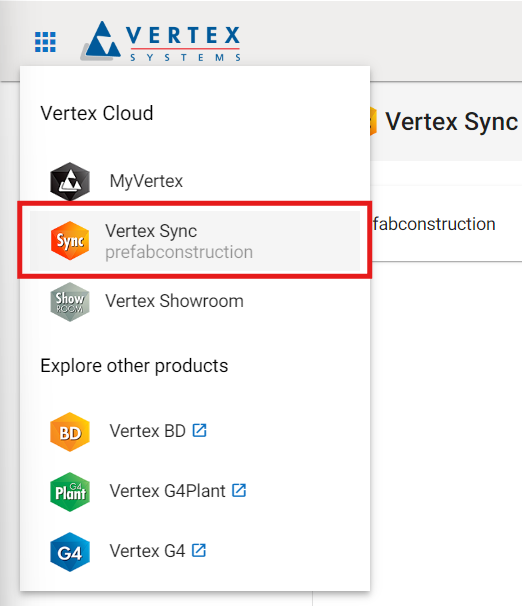
Another way to navigate to Vertex Sync is through the navigation menu. If you have only one Sync organization, it will be pre-selected, and you will be automatically directed to that organization. If you have more than one Sync organization, you can select your preferred organization from the drop-down menu.
Sync license management
Every Sync user must have a license assigned to their account to access Sync. For new users, a license is automatically assigned when they are invited to the Sync organization. For existing users, you can assign licenses from the Licenses view (see Manage licenses).