Manage subscriptions
In the Subscriptions view, you can review and modify your company’s subscriptions.
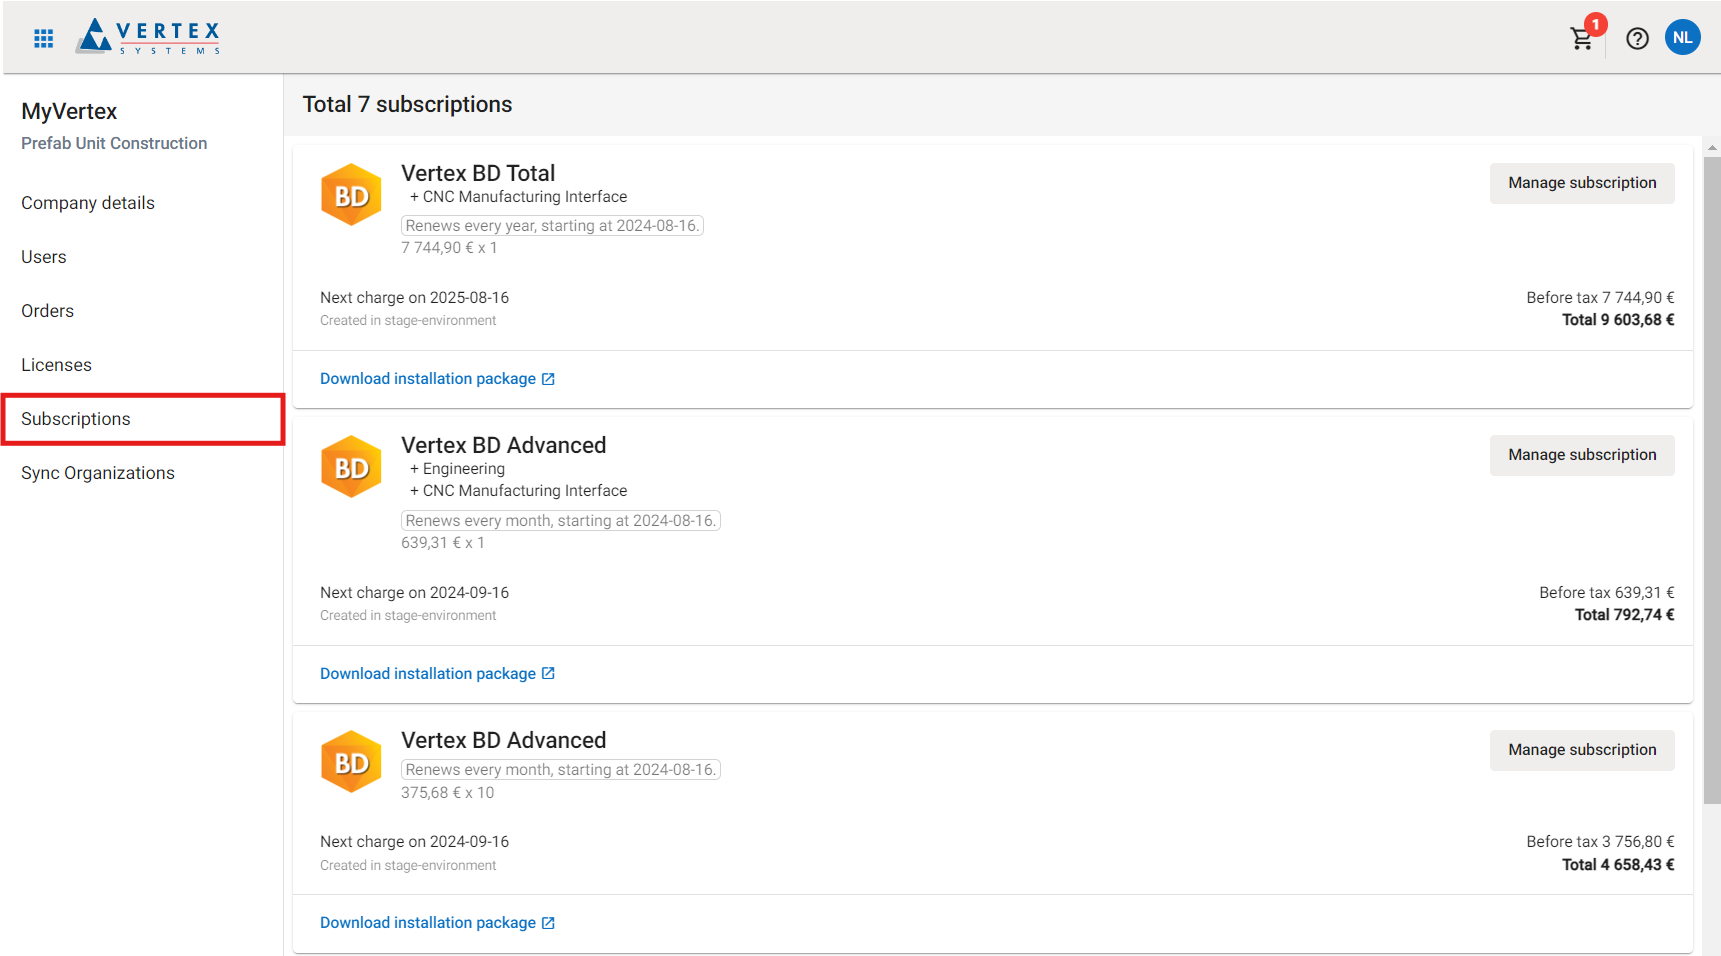
Each subscription is presented as a card, displaying details such as the product name, included add-ons, license quantity, next billing date, and the price of the upcoming bill. CAD subscriptions also include a button for downloading the CAD installation package.

Modifying the subscription
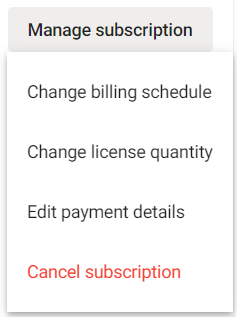
You can modify the subscription by clicking the Manage Subscription button located in the top right corner of the subscription card.

Clicking the button opens a dropdown menu where you can choose to change the billing schedule, adjust the license quantity, edit the saved payment details, or cancel the subscription.
Change billing schedule
You can change the billing interval of an active subscription from monthly to yearly, but not the other way around. To change the billing schedule from yearly to monthly, you must first cancel the existing subscription and then create a new one with the monthly billing schedule.
Clicking the Change Billing Schedule option in the dropdown menu opens a dialog where you can switch the plan from monthly to yearly.
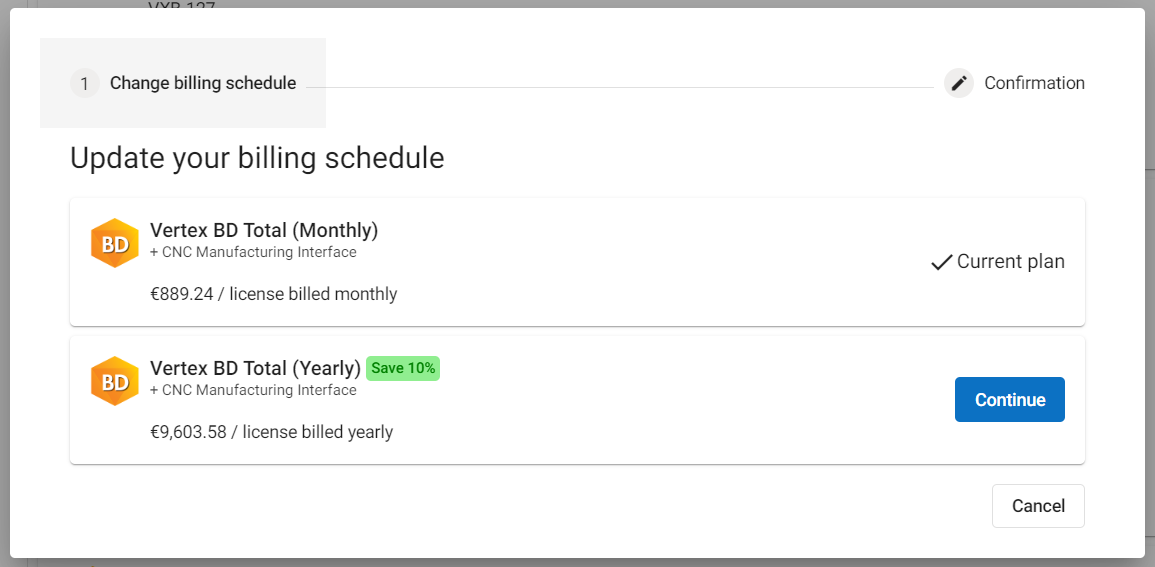
You can proceed to the confirmation by clicking Continue under the yearly option.
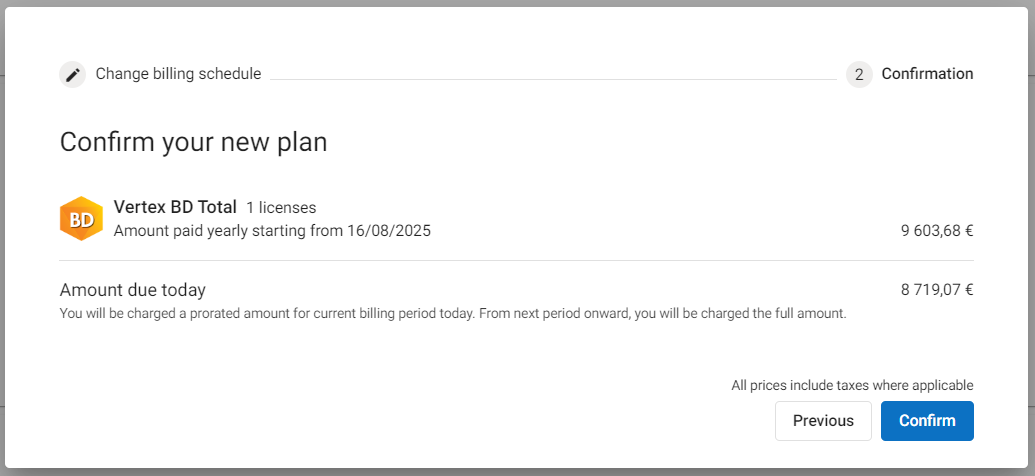
In the confirmation step, you'll see the new yearly price and the prorated amount that must be paid immediately.
Changing the billing schedule requires paying a prorated amount for the current billing period. For example, when switching from a monthly to a yearly subscription, the monthly payment is deducted from the yearly payment for the first billing period.
You can finalize the modification by clicking Confirm. The prorated amount will be immediately charged using your saved payment method. Afterward, you will receive a confirmation email detailing the change, along with a receipt for the payment. Please note that it may take a few minutes for the changes to appear in MyVertex.
Change license quantity
You can change the number of licenses in a subscription by selecting Change license quantity from the dropdown menu. License quantity can only be increased. If you want to decrease the number of licenses, you must first cancel the subscription and then create a new one with the desired license amount.
Clicking the Change license quantity opens the following dialog.
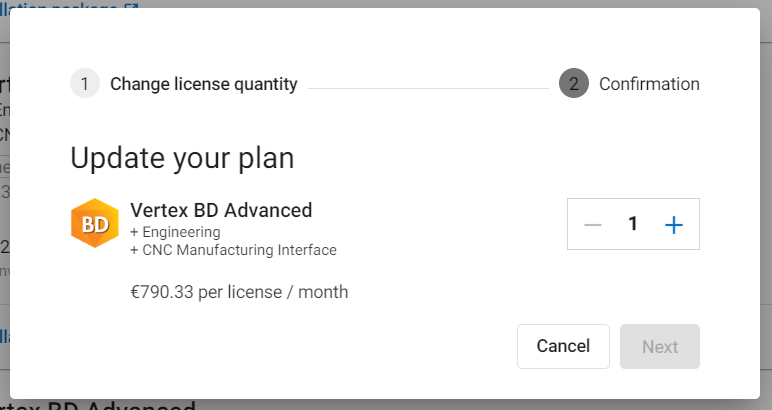
The number on the right represents the current number of licenses in your subscription. You can adjust this by using the + and - buttons. Once you've made your adjustments, proceed by clicking Next.
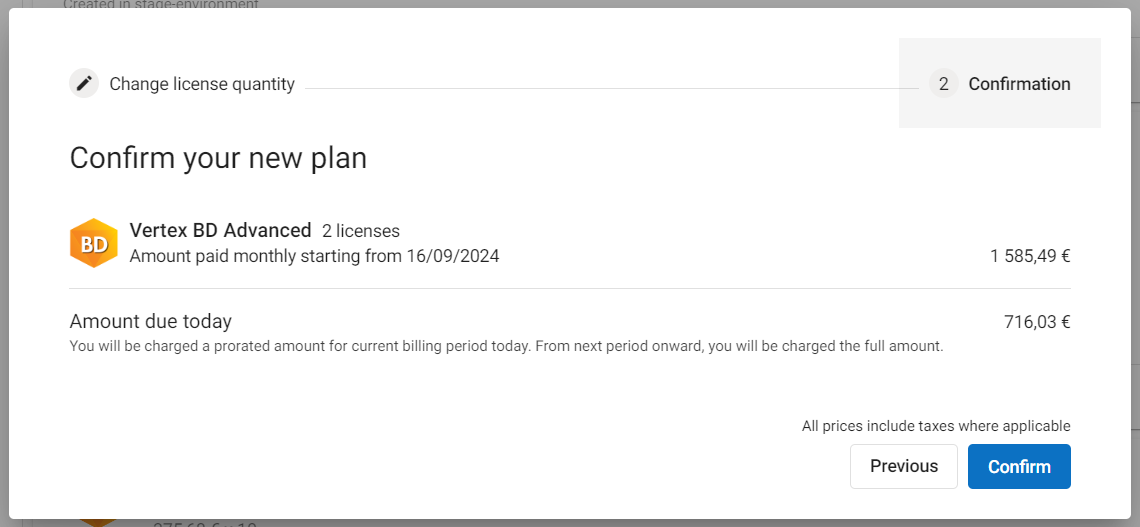
In the confirmation step, you'll see the new subscription price as well as the prorated amount for the current billing period, which needs to be paid immediately.
When you increase the number of licenses in your subscription, you'll be charged a prorated amount for the added licenses based on the remaining time in the current billing period. This means you only pay for the time left until the next billing cycle, rather than the full billing period upfront.
You can finalize the modification by clicking Confirm. The prorated amount will be immediately charged using your saved payment method. Afterward, you will receive a confirmation email detailing the change, along with a receipt for the payment. Please note that it may take a few minutes for the changes to appear in MyVertex.
Edit payment details
Your payment details are automatically saved to FastSpring after your purchase and will be used for future subscription billing. To add a new payment method or update the existing one, select Edit payment details from the dropdown menu.
This opens a dialog where you see all your saved payment methods.
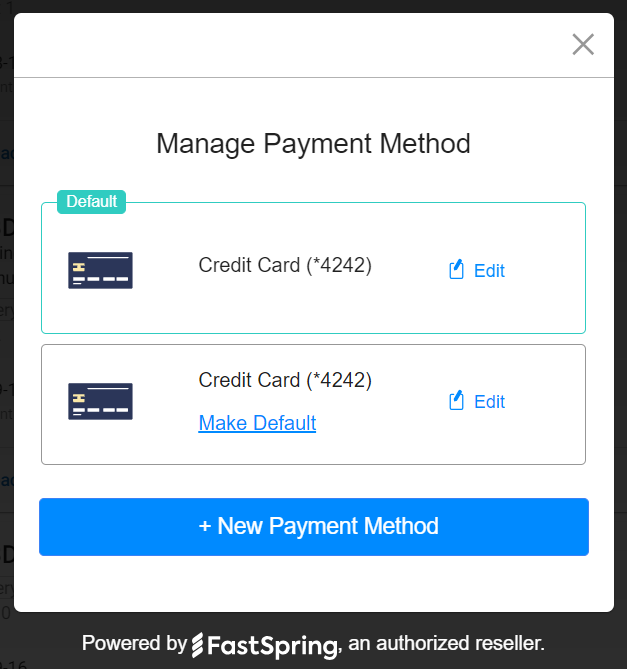
The green highlight and the Default label indicate the payment method currently used for the subscription. To choose a different payment method, click Make Default. You can also edit saved payment methods by clicking Edit.
To add a completely new payment method, click New Payment Method and follow the presented steps. Note that SEPA Direct Debit cannot be selected from this dialog. To use SEPA Direct Debit, you must first cancel your current subscription and then start a new one with SEPA Direct Debit as the selected payment method.
Cancel subscription
An active subscription can be canceled by selecting Cancel Subscription from the dropdown menu. This will open a confirmation dialog. Click Yes to proceed with the cancellation.
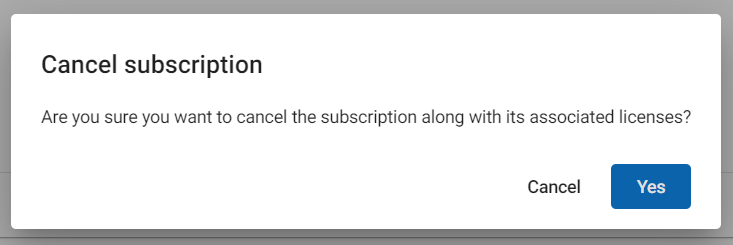
After the subscription is canceled, you will receive a confirmation email with the expiration date. You can continue to use the associated licenses until that date.
Converting a Vertex Sync trial into an active subscription
To upgrade from a trial to a full subscription, the recommended method is to convert the trial into an active subscription. This approach automatically replaces the assigned trial licenses with active ones, saving time and effort. Alternatively, you can purchase a new subscription from the store. However, this requires manually reassigning licenses to all previous trial users.
Trial conversion is available from the start of the trial and up to 30 days after it ends.
The conversion can be started by clicking the Subscribe button in the trial subscription.
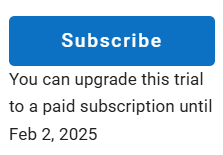
The button opens a dialog with three steps. The first step lets you determine how many licenses you want to purchase. The license amount doesn’t need to match the trial but keep in mind that if fewer licenses are purchased, some trial users may be left without a license.
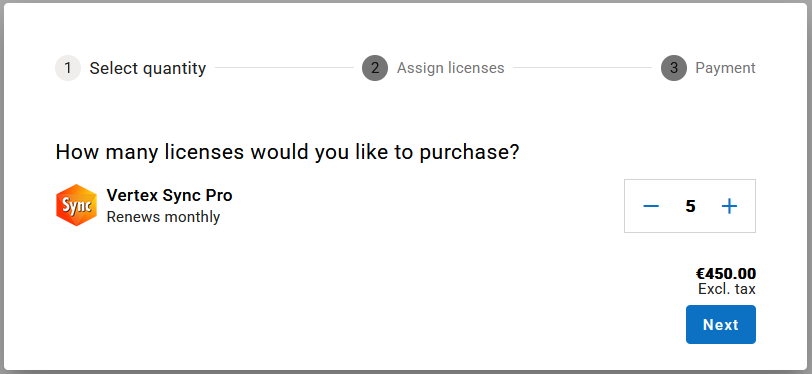
After selecting the desired number of licenses, click Next to proceed to the next step to assign the licenses.
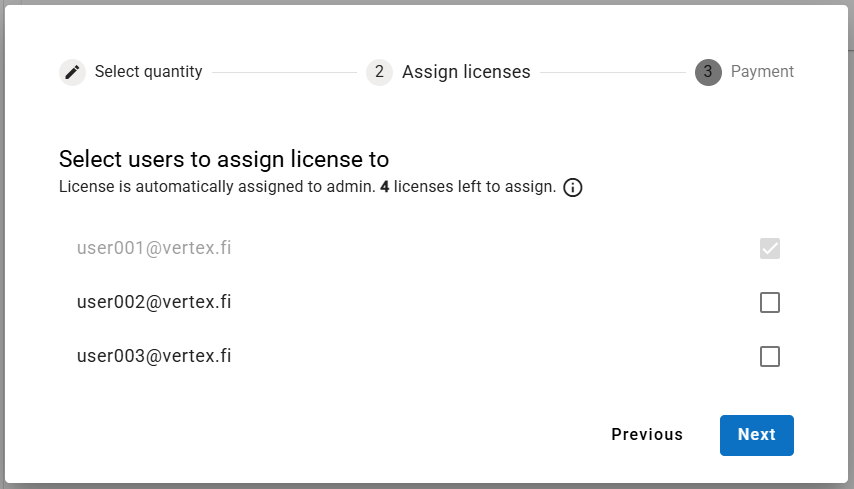
The license is automatically assigned to the admin user. If you’re purchasing more than one license, you can assign them to the users you want. Keep in mind that this view only shows users who were using Sync during the trial. If you want to assign licenses to users who haven’t previously used Sync, you can leave them unassigned here and assign them later from the Licenses view.
You can proceed to payment by clicking Next. The payment step uses FastSpring, similar to what is described here. After completing the purchase, the order receipt is displayed, and the details are sent to your email.
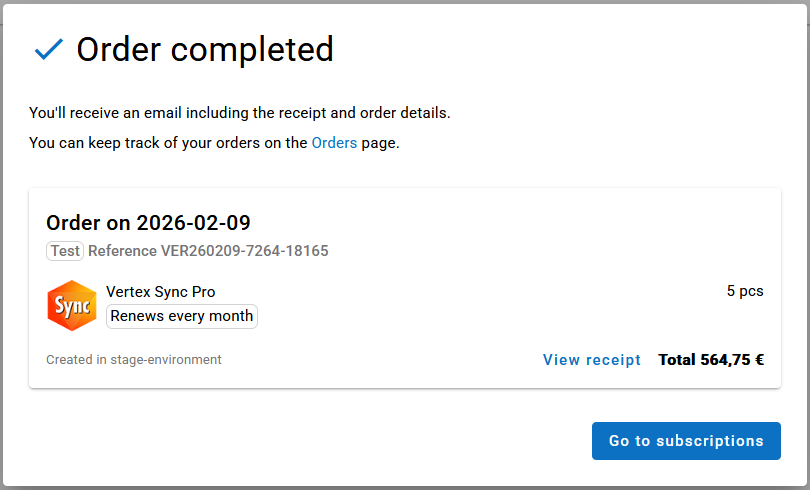
The trial has now been successfully converted into an active subscription, and the trial licenses have been replaced with real ones based on your selections.
