Create a new object
General
You can create a new object either from scratch or by copying an old object as a template. You can also create a new document using the so-called drag-and-drop technique.
A title object associated with a model and drawing can be copied in a way that the model and/or drawing remains linked to the new title, or the model and title are copied as new objects along with the title.
Create a new object
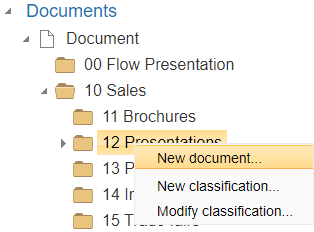
(1) Select Object Type.
(2) If necessary, select a classification under the object type.
If you don't select a classification, you can choose it when filling out the object's attribute information on the object card.
(3) Select the context-specific action New Object, where the word "Object" is replaced with the object type.
For example, New Project, New Title, or New Document.
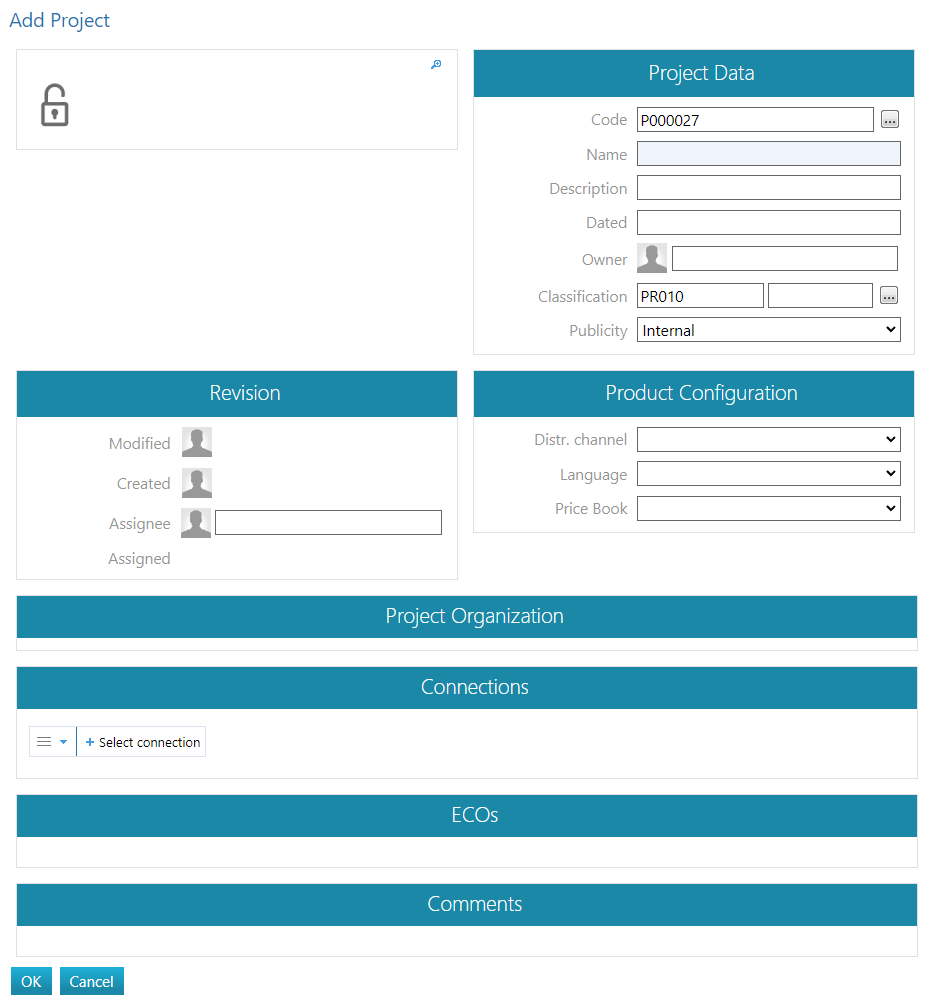
Flow opens the object properties (object card) with the suggested Identifier for the object and the filled-in Classification section if you follow step 2.

(4) Fill out the object card
Mandatory fields (A) are displayed in light blue, and the program does not allow the creation of a new object until all mandatory fields are filled out.
By clicking the button (B), you initiate a function to search for content for the field.
The preselection button (C) opens a list from which you can select content for the field.
A field may receive its content programmatically (D), in which case you cannot fill it out yourself.
You can add connections from the new object to existing objects.
See Object Connections.
(5) Select OK
The program checks that you have filled out all mandatory fields.
If any mandatory fields were left blank, the program displays them.

Create an object by copying
INFO: Creating objects by copying saves time if the property details of the objects are largely similar.
If an object is created by copying and the object is associated with an attachment (such as a model or drawing), careful attention must be paid to the copying options to achieve the desired result. |
(1) Find the object to be copied.
(2) Select the object to be copied.
For example, Item or Project.
(3) Choose the action Object > Copy (Where the word "Object" is replaced with the object type).
For example, Item > Copy or Project > Copy.
Flow copies the object's property details and opens the property card to be filled in.
If the object is associated with an attachment (such as a model linked to an image item), you must select the appropriate attachment.
INFO: It is advisable to link the item being copied, which is associated with a parametric model, to the model. |

Create a new object by dragging
You can also create new objects in the Documents group by dragging and dropping.
If needed, you can drag multiple files at once.
Drag-and-drop attachment is available for all file types, such as documents, photos, and videos.
A document object is created in Flow, with the dragged file as its attachment.
(1) Choose the document type from the Documents group.
(2) Select a Classification.
Flow opens the area "Create New by Dragging or Select..."
(3) Drag and drop files into the aforementioned area.
Alternatively, you can choose the option "Select," navigate to the correct folder, and select the files to attach while holding down the Ctrl key.

Example of object attribute information
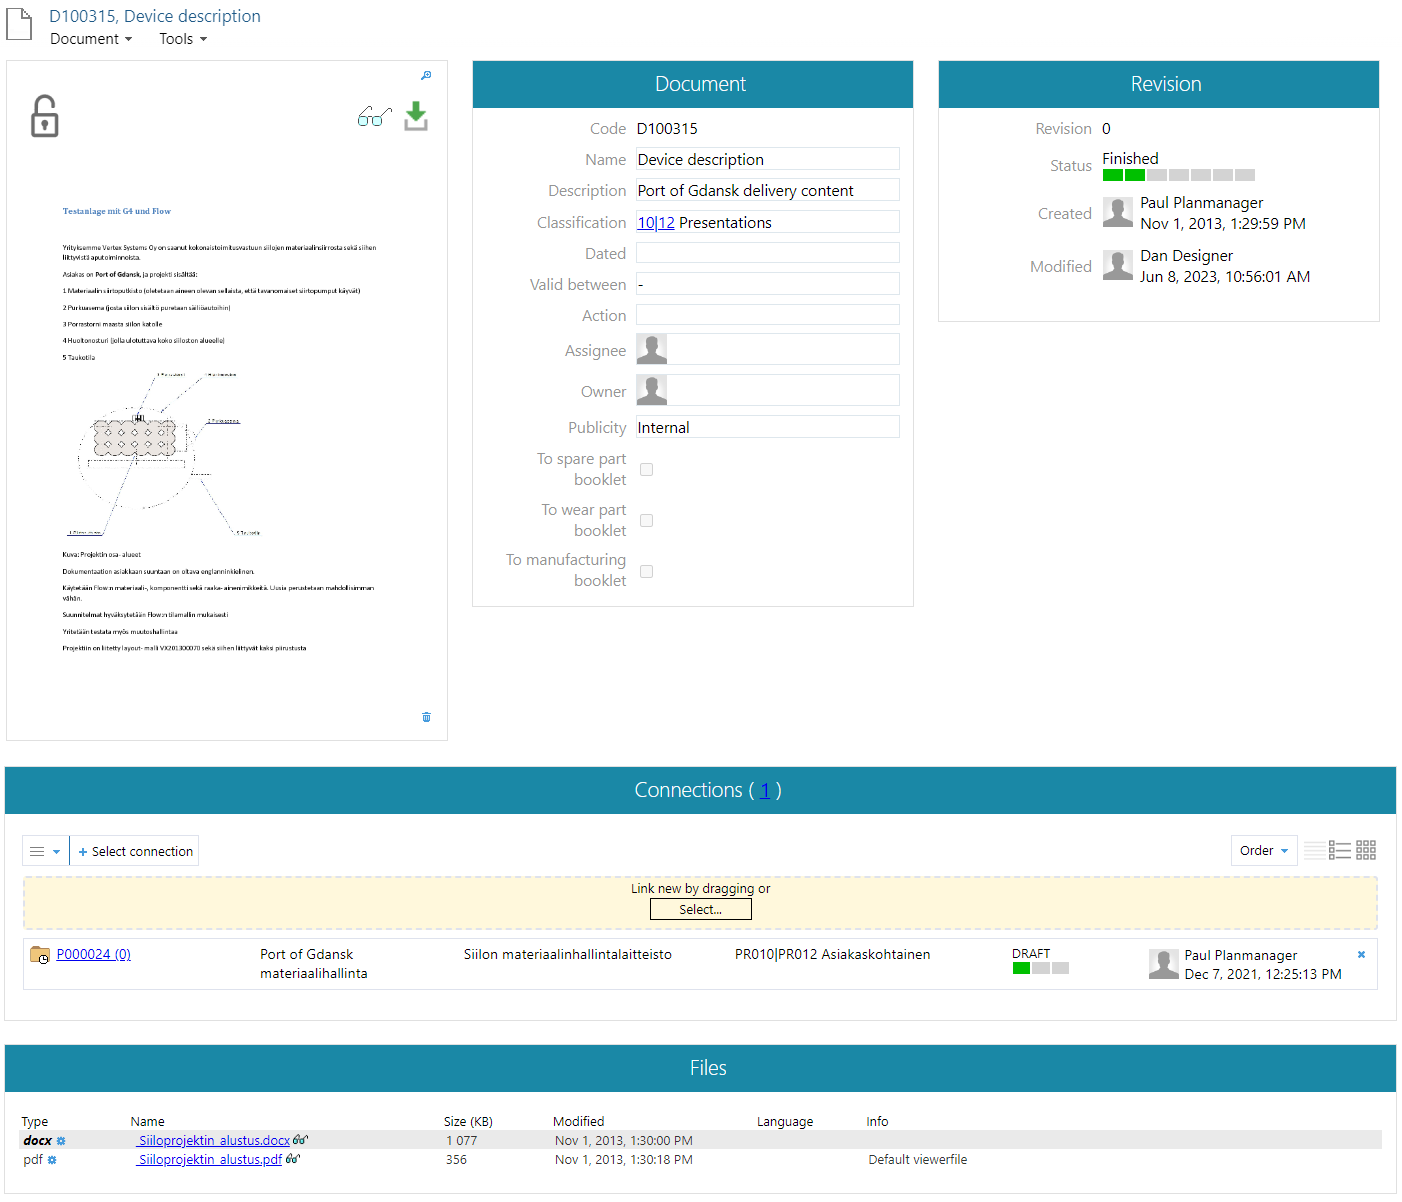
Metadata fields of an object:
Code: Code is a unique set of numbers and letters. You can generate codes automatically while creating a new object. In this case, the code will be created according to a code set, which is customer-specific. Although the code is unique, for example an item, a model and a drawing connected to the item can have the same code. Also, the different versions of the same object have the same code if users don't manually modify the code. You are not allowed to use special characters in a code. Allowed characters are letters a-z and A-Z, numbers 0-9 and an underscore (_).
Revision: Revisions are a way to manage a product's life cycle. If the object is in Approved-state and you check-out it, the modifications you have to the object will be saved in a new version of the object. In this case, the editor, date and a description of the changes will be saved once you check the object in.
Name: You can name the object in a way that fits you and your objectives. Allowed characters in names are letters a-z and A-Z, numbers 0-9, a dash (-), an underscore (_), a full point (.) or an empty character ( ).
Description: In the description field you can add a description of the object.
Classification: Classifications are used to classify the objects in a hierarchic way. You can use classifications as a search criteria.
Publicity: This guides the access rights in the system. All objects are public by default. You can have different states of publicity depending on who you want to allow to see the document. For example, internal objects may have multiple states of publicity if they are only for the management or for everyone.
Assignee: You can set an assignee for an object. You can also change the setting so that in some cases the assignee will get a notification of changes in the object.
Status: Status is used to control the object's visibility, available functions, reporting and searching objects. Also, you define object's life cycle using status. For example, a document must be verified before it is approved or you can't delete or modify an approved object version. You can define the allowed transitions between statuses in the state model. Different object types can have different state models, but one object type can have one state model at a time. If you change an object's state model, the new model is applied to new objects but it doesn't change the existing objects. Depending on customer-specific settings, you may have to set an assignee to an object when you change its status.
Connections: In Connections-section you see all objects that are connected to currently viewed object. In Flow you can connect all types of objects to each other.

Files: In Files-section you see all files that are attached to the object. Files can be for example Word- or Excel-documents, images or PDF-files. Many objects contain multiple files: the native file to which the changes are made, and viewing files that are automatically converted. Press to see information of the attached file.

