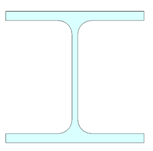
You can add a rectangular cross section directly to the profile library by simply entering the dimensions of the cross section, see Add a New Profile to a Cross Section Library. If the cross section is not a rectangle, first draw the shape of the cross section as presented below.
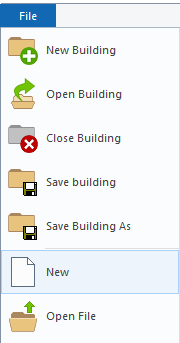
Select File > New.
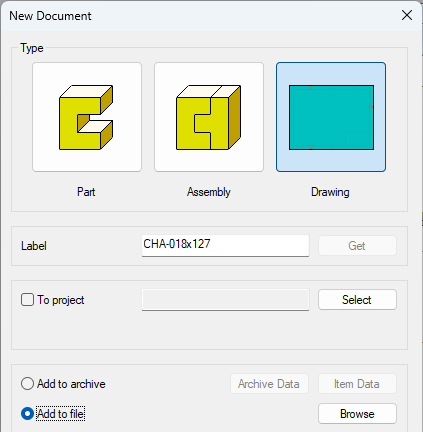
Enter the name of the 2D drawing. Max 16 characters, no spaces.
Draw a desired profile yourself. This must be drawn in actual size.
Make sure that all lines are connected to each other. Use the function Drafting | Line Tools | Explode Concatenated Lines > Concatenate Lines.

Add a hatch to the drawing.

The true center point is obtained by drawing auxiliary lines.

Place the true center of the figure in the origin point of the drawing sheet.

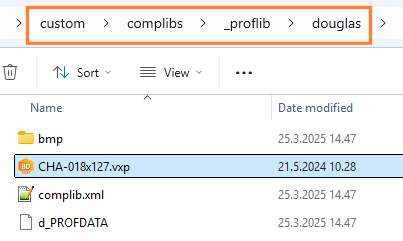
Save the drawing in the profile library that you have created for this type of profile. Learn how to create a profile library: Create a New Profile Library.
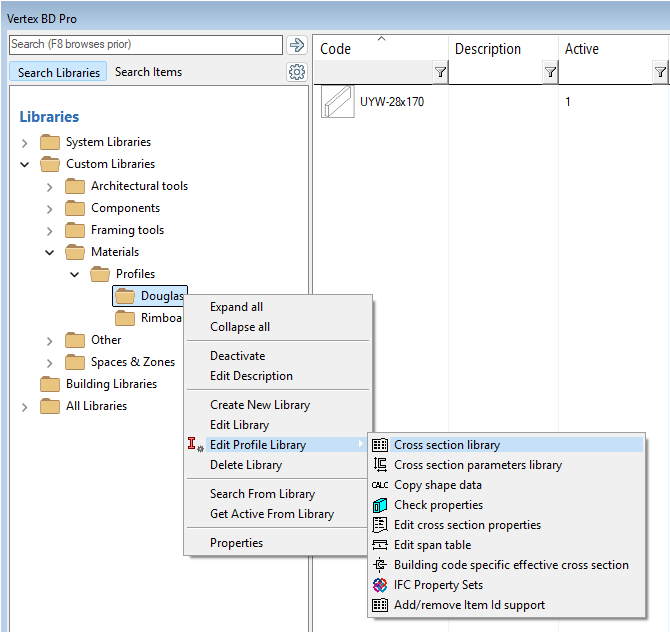
Open the library browser by selecting System | Libraries | Libraries.

Open the branch Custom Libraries / Materials / Profiles.
Select the library folder and then select Edit Library or Edit Profile Library > Cross section library from the right-click menu.
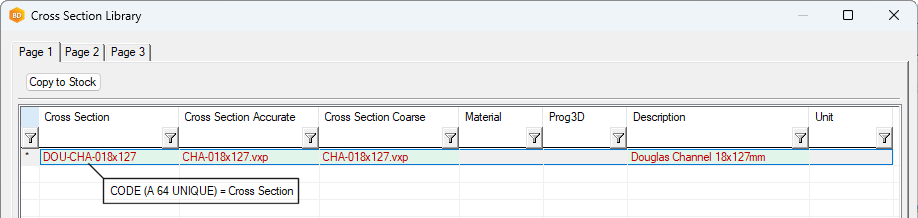
Edit the code and description of the cross section.
At Cross Section Accurate and Cross Section Coarse, enter the name + the .vxp extension of the 2D drawing. This creates a link to the 2D drawing.
Cross Section Coarse
Individual details of the model are not visible.
Cross Section Accurate
Individual details of the model, for example rounding off, are visible.