
When generating the truss part, the user can modify truss structure parameters according to the specific design requirements.
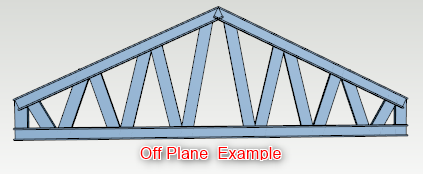
Generate truss frames easy and fast. Modify interactively if needed. You can generate In Plane and Off Plane truss frames easily.
1. Create truss envelopes
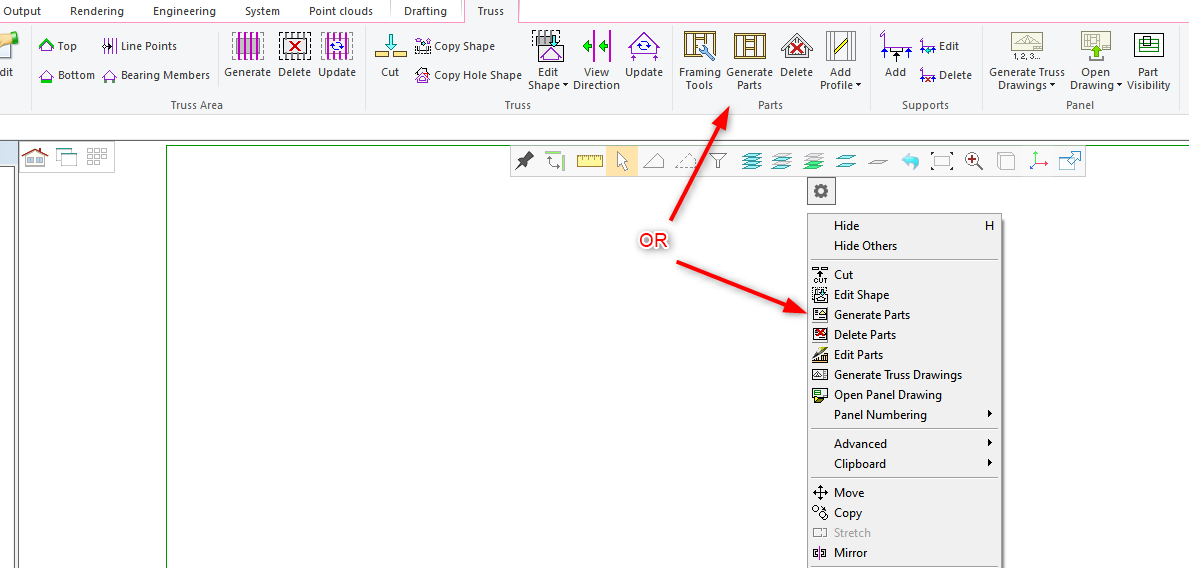
2. Select truss or trusses, 'Truss' tab get activated in the ribbon bar
3. Select ‘Generate Parts’ icon from Truss ribbon bar
4. The framing tools are set for each truss when the trusses are first drawn in, but you can edit them via the Framing Tools button on the ribbon bar.
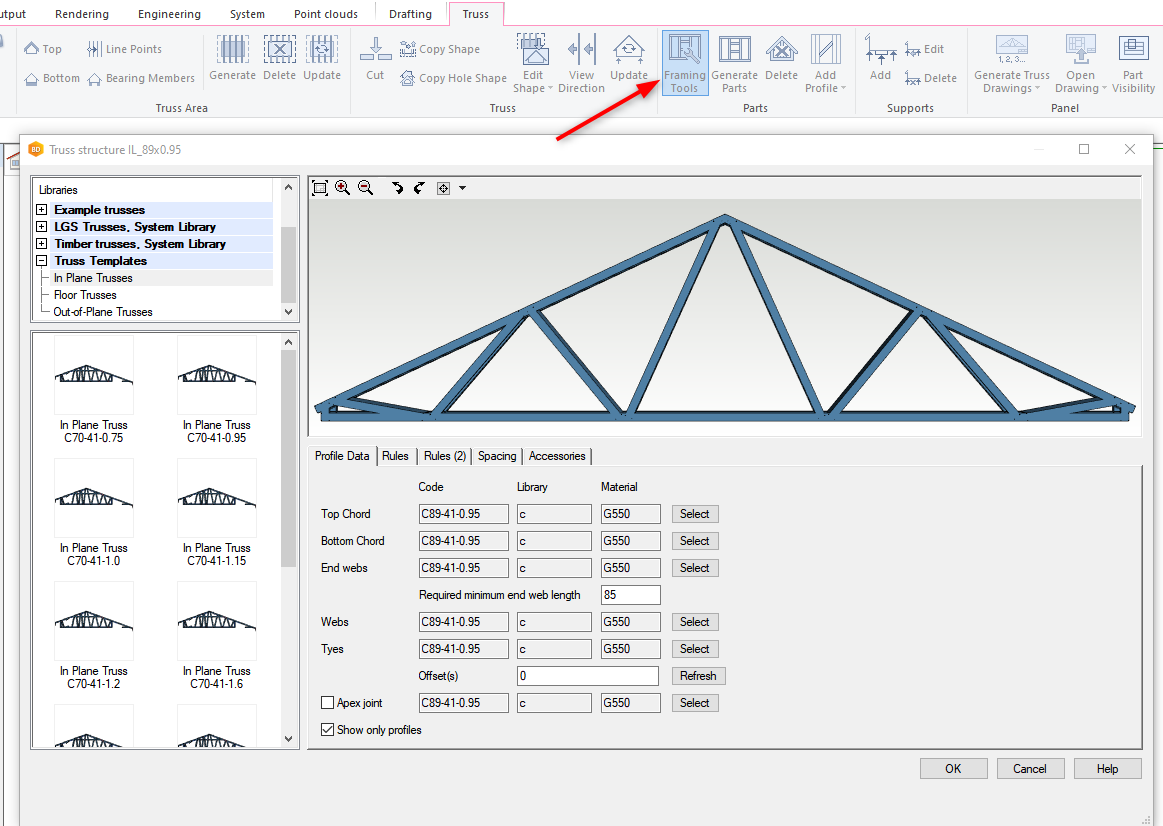
Truss structure parameters are defined in five tabs. The following sections give an explanation of these parameters.
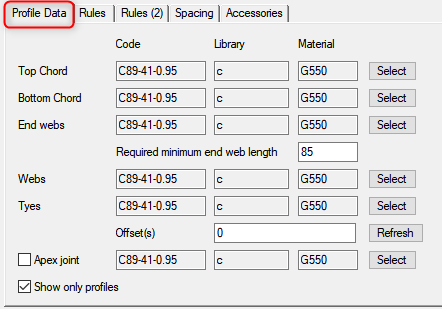
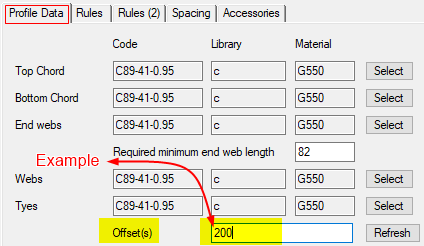
Edit Profile data
Explanations of parameters :
-
Top Chord, Bottom Chord, End webs, Webs and Ties are profiles : Select correct profile and material.
-
Required minimum end web length : If length is less than given value, end web is not added.
-
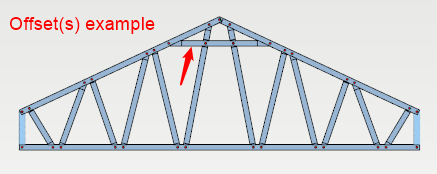
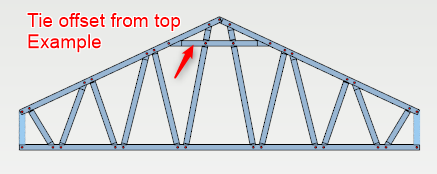
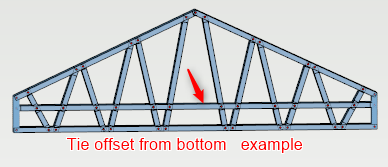
Offset(s) : Parameter is horizontal tie location measured from top or bottom (defined in sheet Rules). For example add 200 and click on Refresh.
-
Apex joint : Connecting profile between top chords at ridge
-
Show only profiles : Truss volume is not visible, if this is checked on
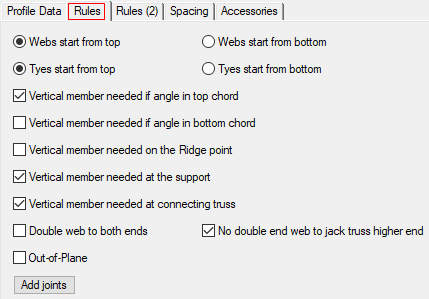
Rules
Explanations of parameters :
-
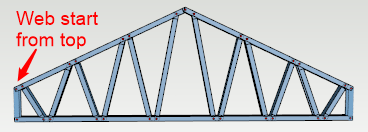
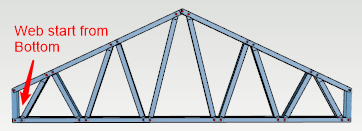
Webs start from top/bottom : First web direction where it starts top or bottom
-
Tie start from top/bottom : Defines from where offset is calculated. Offset is defined in Profile Data tab.
-
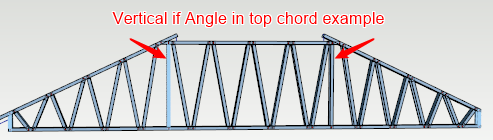
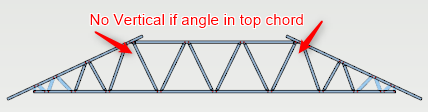
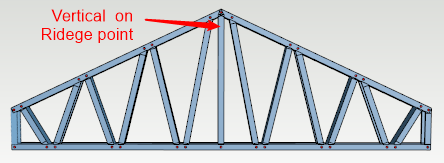
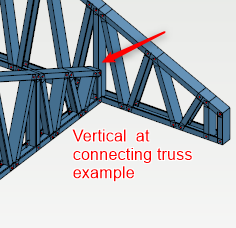
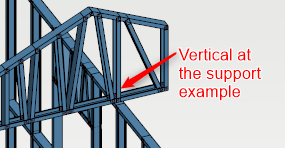
Vertical member needed... : Select when vertical web is added.
-
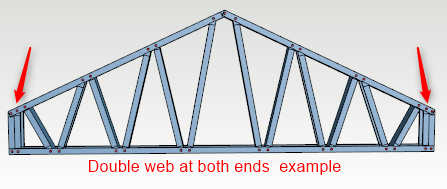
Double web to both ends : Add double web at the end both sides.
-
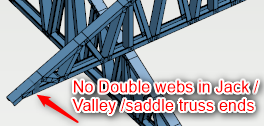
No double end web to jack truss higher end : Add double end only to the lower end of jack truss.
-
Off Plane : If this is checked on, truss frame type is Off Plane. Chords and webs are back to back.
-
Add joints : You can control which joints are used. 3D window appears on the screen where there is truss frame. Modify joints if needed.
-
There are different type of joints that you like for corner joints, side joints etc. Go through all different joints types that you like to change. It's not necessary to change every single joint.
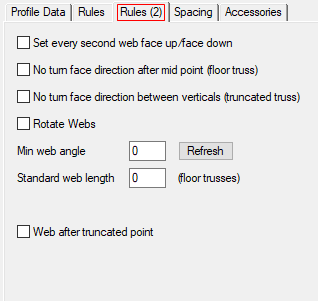
Rules (2)
Explanations of parameters:
-
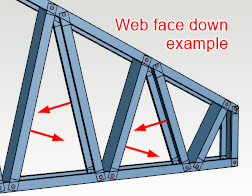
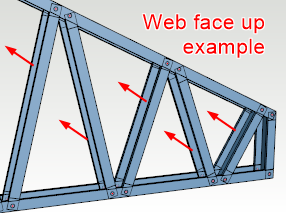
Set every second web face up/face down:


-
No turn face direction after mid-point (floor truss) : Floor trusses are typically flat. Direction rules are same for all webs.
-
No turn face direction between verticals (truncated truss) : Direction rules are same for all webs when chords are horizontal.
-
Min web angle : You can define minimum angle for webs
-
Standard web length (floor trusses): You can define fixed web length for floor trusses. Angle is set according the length of the web and height of the floor truss.
Spacing
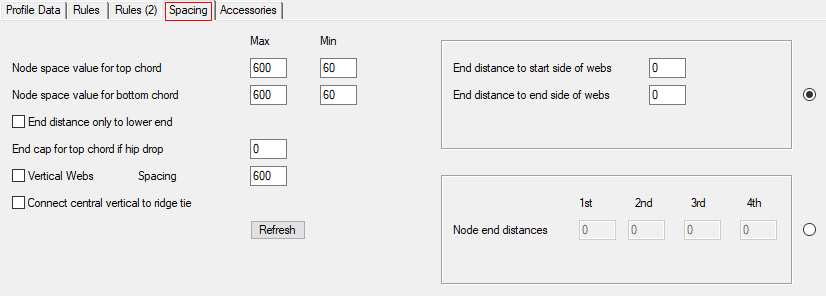
Explanations of parameters:
-
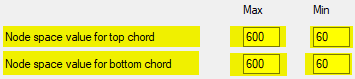
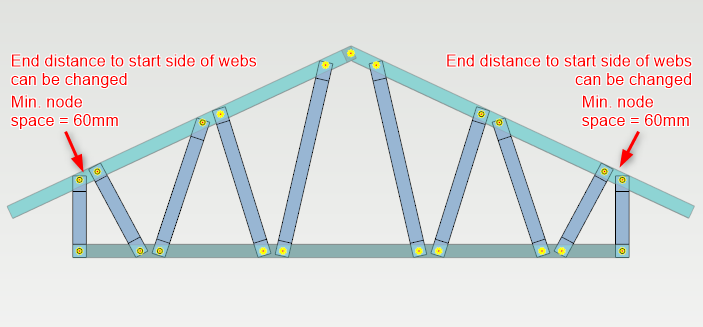
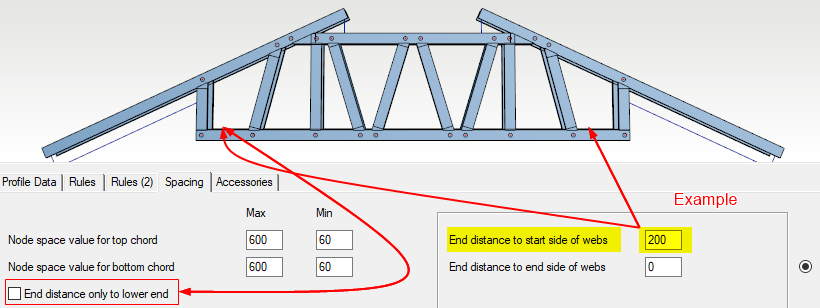
Node space value for top or bottom chord : Set maximum and minimum value for node spaces in top and bottom chord. You can define with minimum value how close webs can be and with maximum value you can control how many webs are added.

-
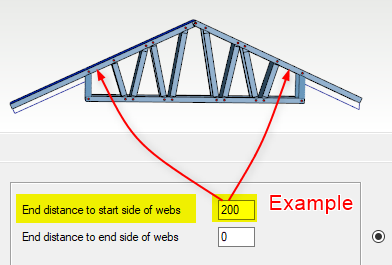
End distance to start side of webs : Distance from truss edge to start side of first web ( both ends if symmetric truss OR non-symmetric truss and End distance only lower end is not checked. )
-
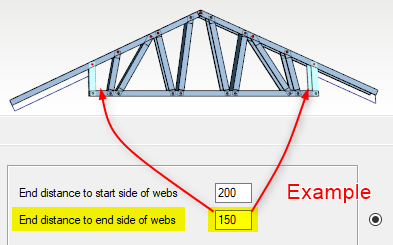
End distance of end side of webs : Distance from truss edge to end side of first web. ( Both ends if symmetric truss or non-symmetric truss and End distance only lower end is not checked.)
-
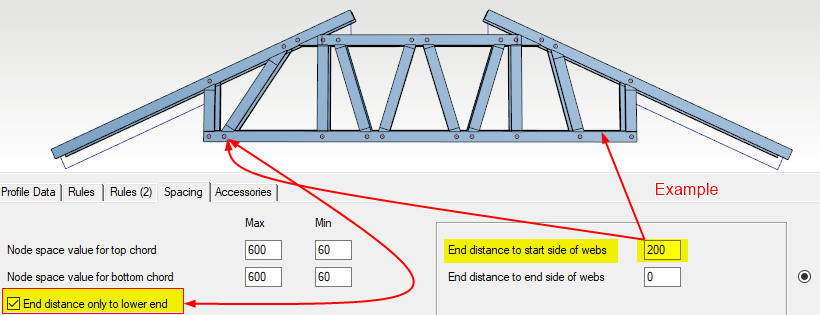
End distance only lower end : Check this if you like to set end distance only to lower end.
-
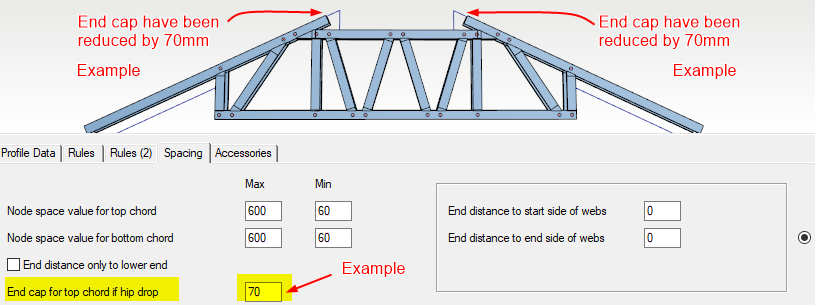
End cap for top chord if hip drop : End of the top chord can be reduced to avoid collision with hip roof panel

-
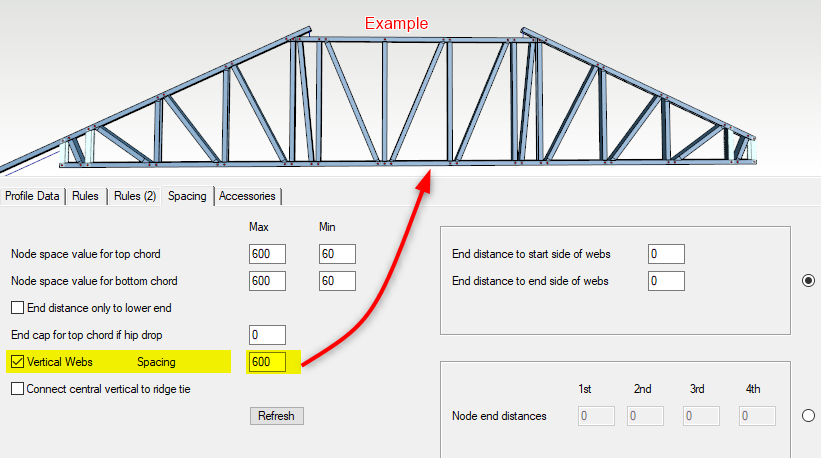
Vertical Webs spacing : Vertical webs spacing can be changed according to the specific design requirement.
-
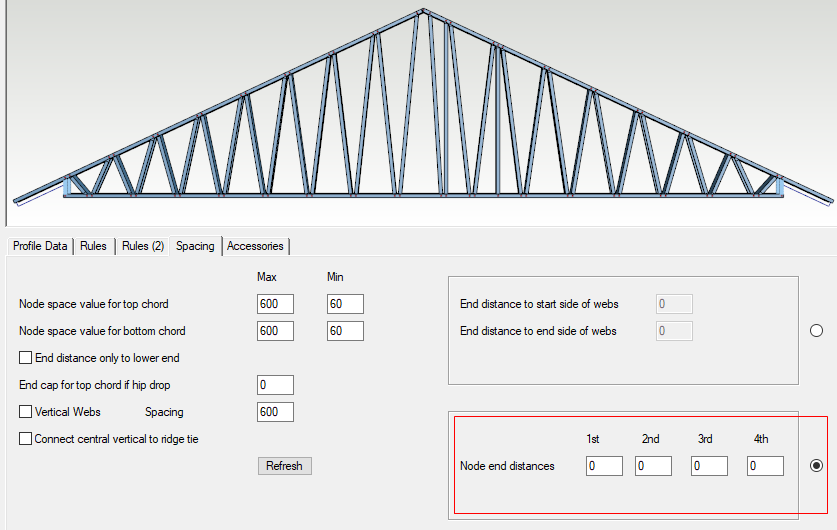
Set the location of the first diagonals accurately : For the first four member node points exact distances can be changed by entering 'Node end distances fields. You can set one or all four node distances to suit. Remember that it's possible to save different default settings in the truss library.
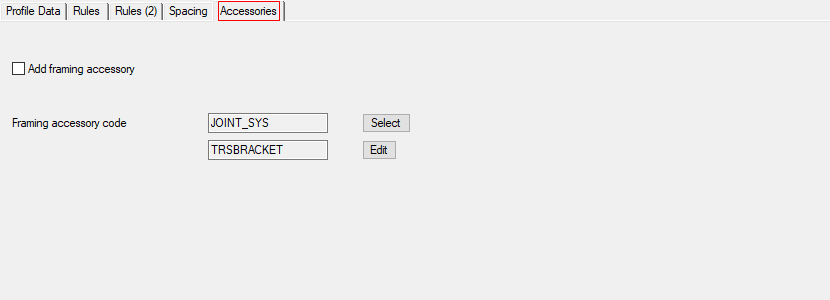
Accessories
-
Accessories ( such as bracket ) are table based and can affect uplift of the truss.
Apart from Truss Parameters. Truss webs can be manually moved, mirrored and copied as per the requirement. For more detail refer to Edit Truss Tips