-
Creating a panel drawing is similar for walls and ceiling panels. Panel drawings can be created many ways.
-
Select walls in 2D view.
-
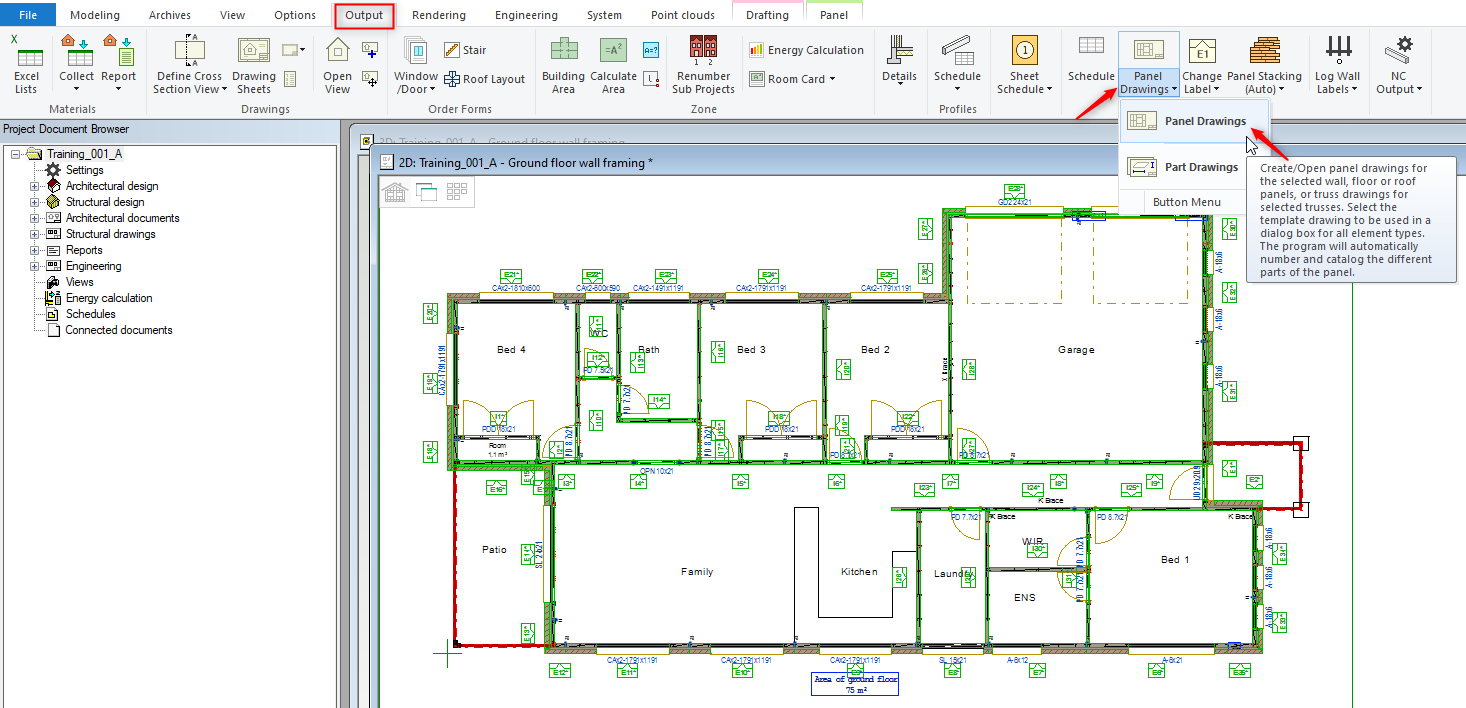
In 'Output' tab click on 'Panel Drawings' icon and from the menu click on 'Panel Drawings'
OR
-
Select walls in 2D view. R
-
Right click and from the contextual menu click on 'Create Panel Drawing'

OR
-
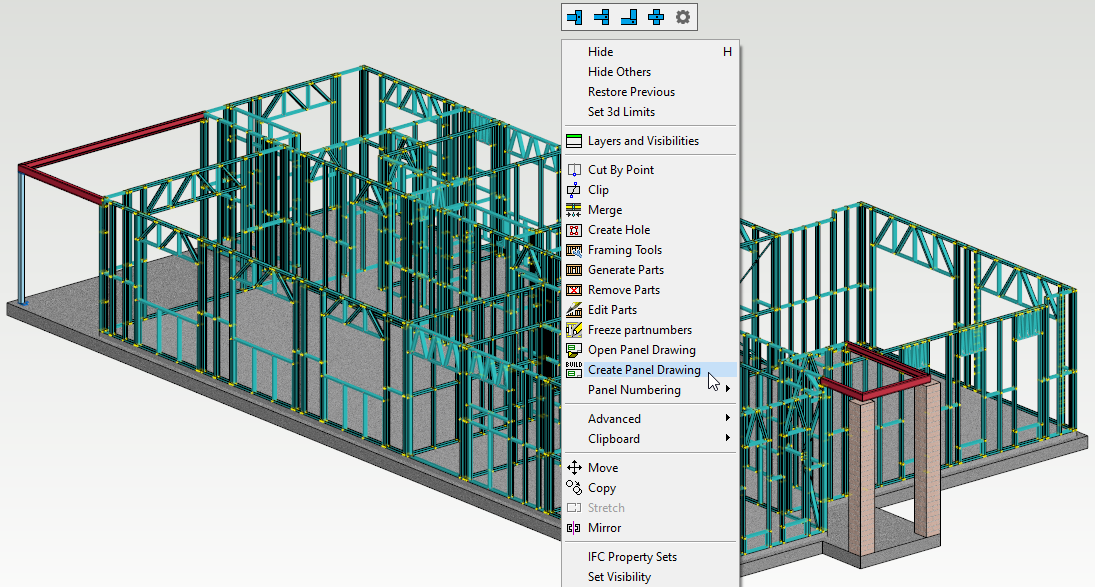
Highlight ( hold down the ALT key ) the wall panel in 3D view.
-
Pick multiple panels by holding down the CTRL along with ALT key.
-
Pick all panels by holding down the CTRL A key.
-
Right click and from the contextual menu click on 'Create Panel Drawings'
-
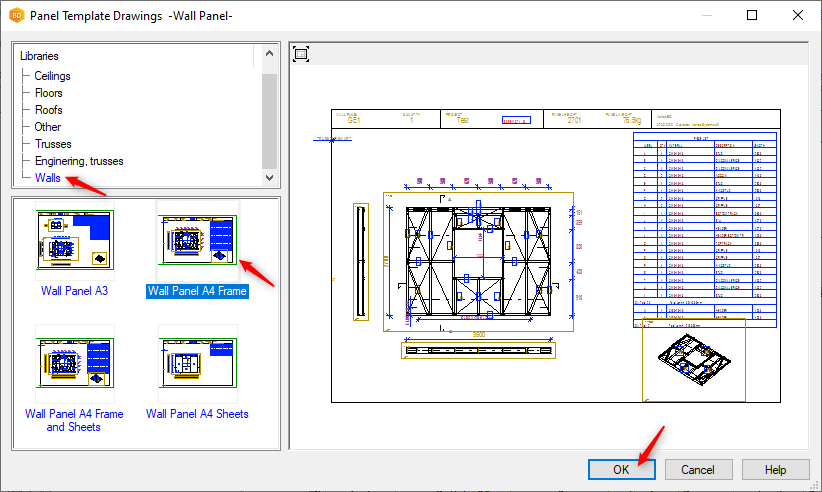
Select Panel Template drawings sheet ( as per the suitability or requirements ) and Click on OK.
-
Vertex will take time to crate panel drawings.
-
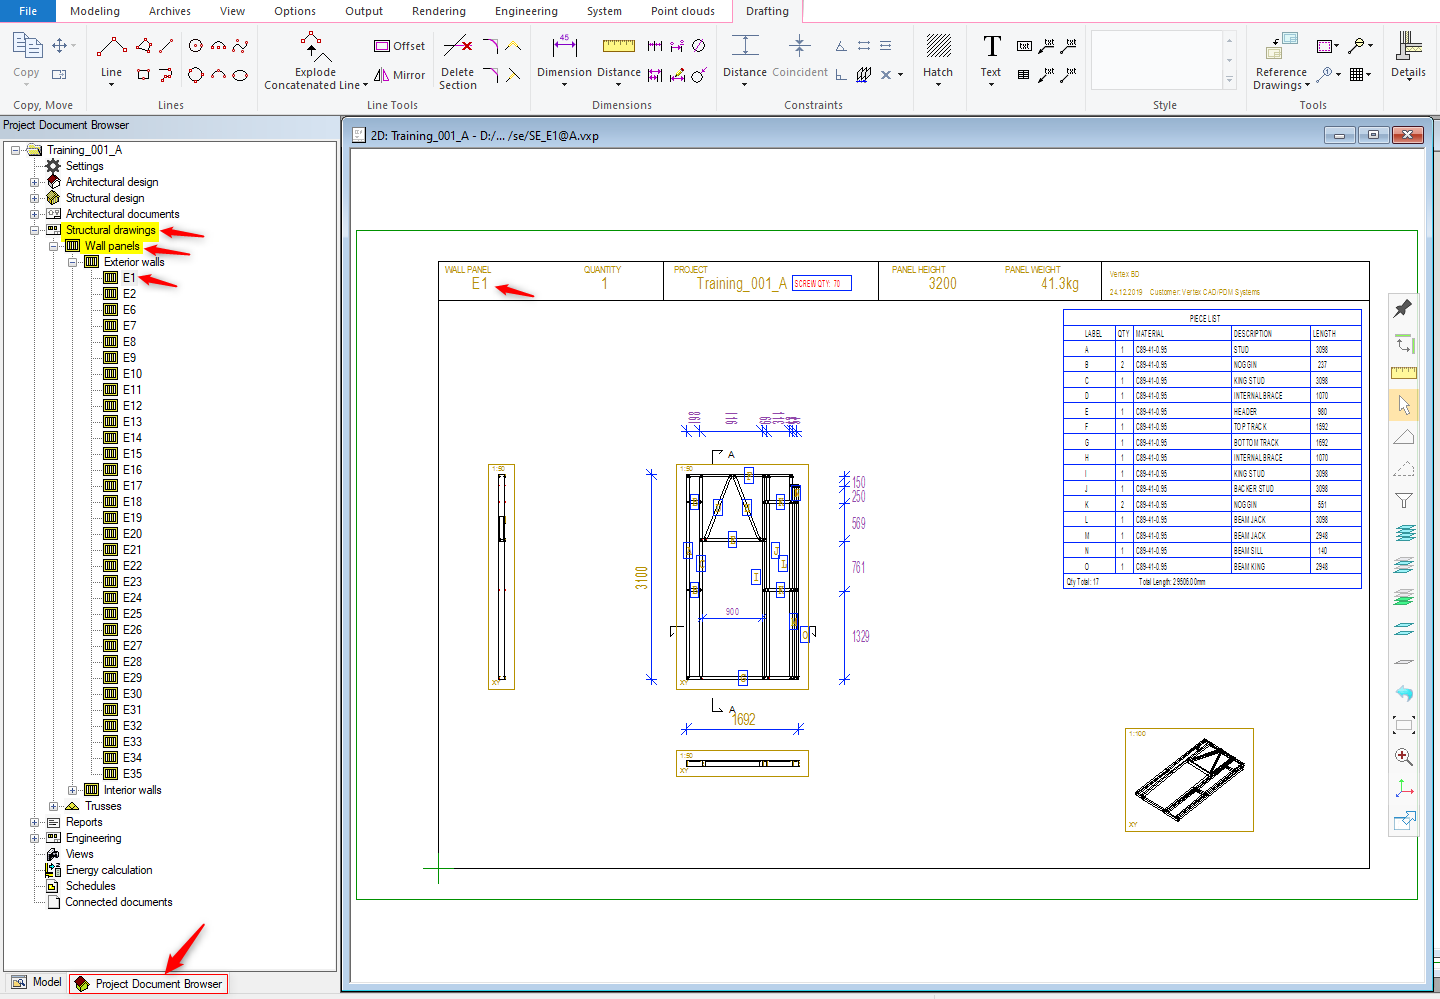
All the panel drawings are under 'Project documentation Browser tab \ Structural drawings \ wall panel, as shown below. The user can open the panel drawing by double-clicking the above path
-
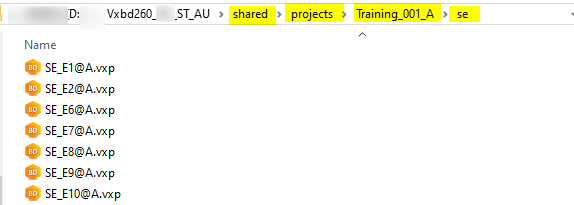
The generated wall panel drawings can be found in shared \ projects \ project name \ se folder.
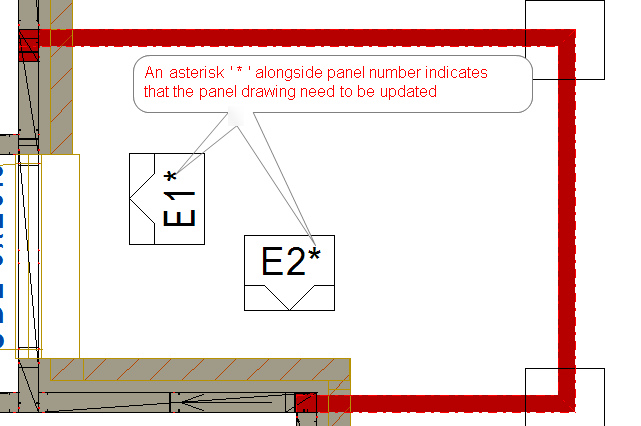
If you modify / make any changes to the panel. Panel drawings need to be updated.
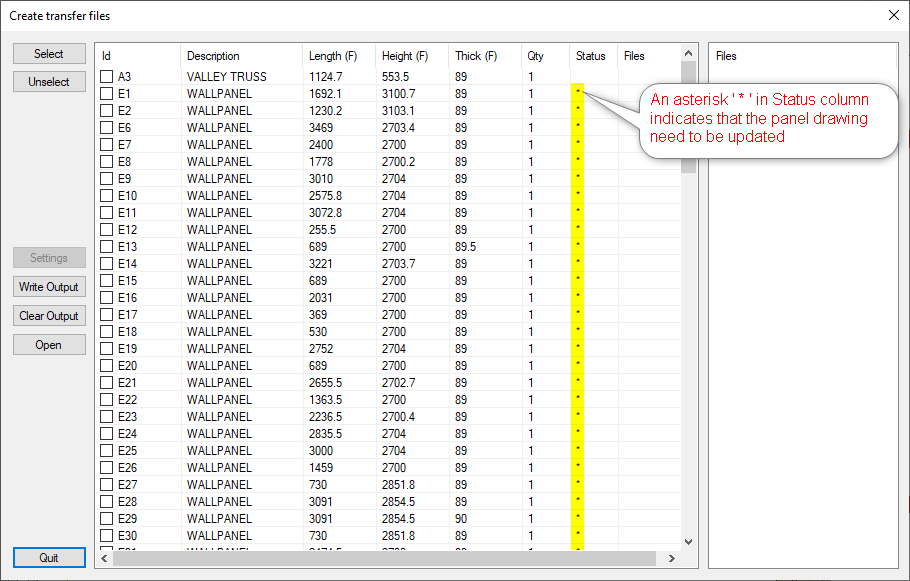
If for any reason you forgot to update the panel drawing, panel number will have an asterisk ' * ' alongside ( as shown in the image )
Also in NC output dialog box if you see an Asterisk ' * ' in Status column that means panel drawing need to be updated. ( as shown in the image )