-
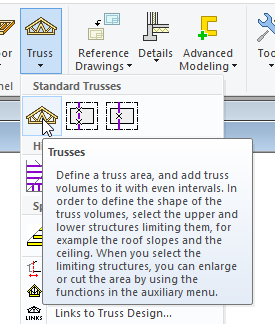
In Modeling tab click on the Truss icon and form the pull down menu click on the Standard Trusses option.
-
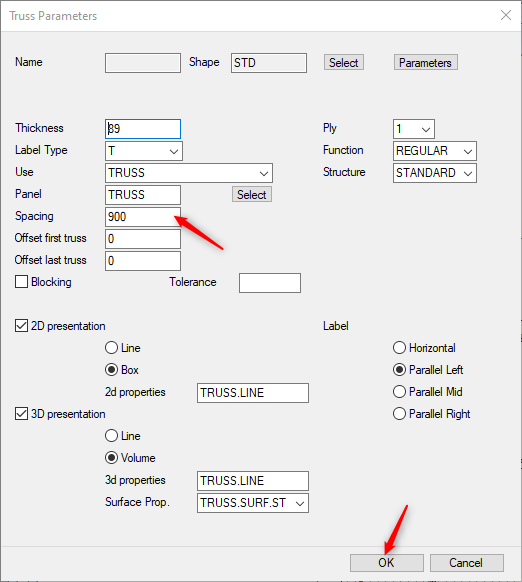
This will bring up the Truss Parameters dialog box
-
Check the truss spacing.
-
Accept the rest of the default settings and click on OK.
-
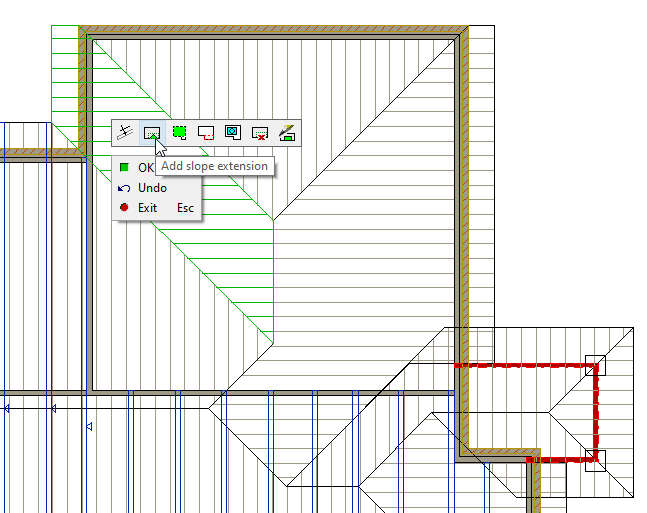
First select the roof slope that need to be extended.
-
Right click and from the contextual menu, select ‘Add Slope Extension’ button as shown
-
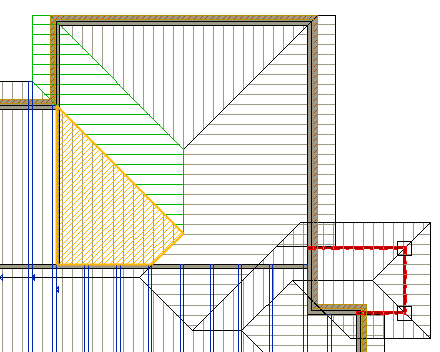
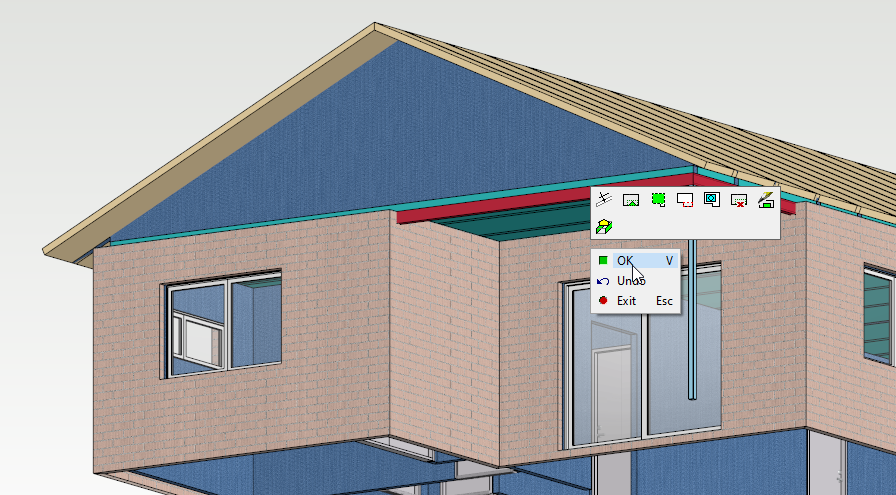
Pick the points to determine the extension of this roof, at the end Right click and click on OK to confirm or press ‘V’

-
The extension will now be created.
-
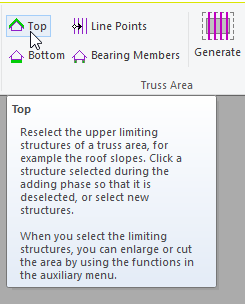
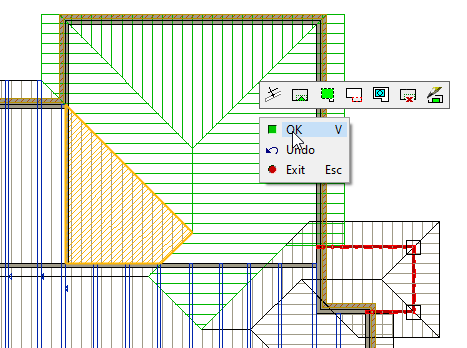
While you are still in create common truss command, the program will still ask for you to select ‘above slopes’. This means you need to define the upper extent of the roof envelope.
-
Continue selecting the above slopes (as shown) when finished right click and from the contextual menu click on OK to confirm OR press ‘V’ to Confirm.
-
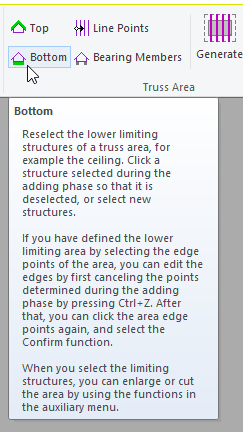
Now the Vertex prompts you to ‘Select below slopes’. This means you need to define the lower extent of the roof envelope.
-
Press F2 to switch to 3D view and rotate the model ( by holding down shift key ) so that you can select the ceiling as the lower extent for the truss envelope.
-
Right click and form the contextual menu click on OK OR press ‘V’ to Confirm.
-
Now Vertex prompts to define the ‘Truss line points’, this means the extent that the truss will be spaced out across the building.
-
Press F2 to switch back to 2D view.
-
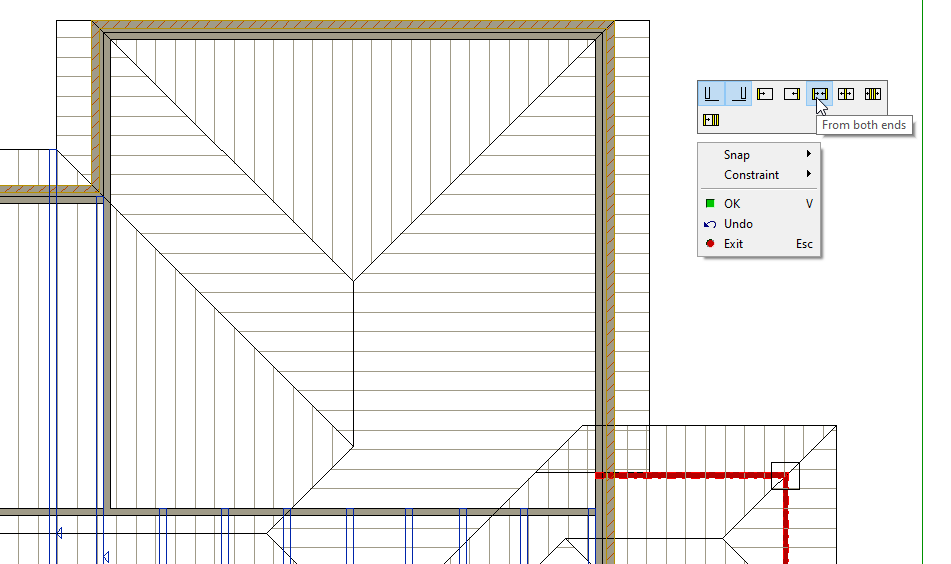
Right click and from the contextual menu select ‘From Both Ends’ ( This will space the trusses towards the centre, from each end of the selected points ).
-
Select the first point near the beam perimeter ( This will ensure that the starting point of the first truss to be aligned with back of the beam ),
-
As you move the cursor towards the garage door wall, with the appearance of this

-
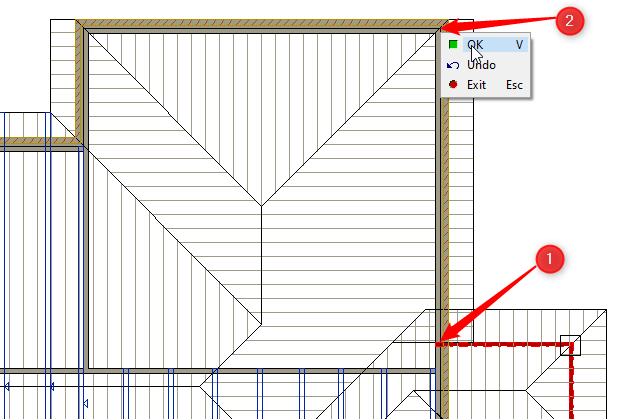
Select the last point as the outside face of garage door wall frame. ( This will ensure that the end truss to be aligned with outside face of the wall frame ).
-
Right click and form the contextual menu click on OK OR press ‘V’ to Confirm.
-
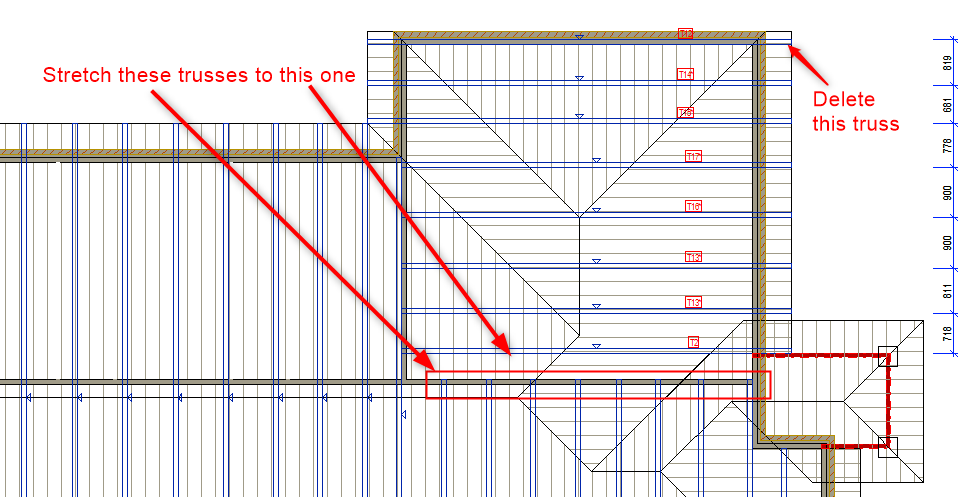
Trusses can be moved, stretched, copied and deleted as per the requirement. but must be updated afterwards.
-
The truss envelope that sit on garage door wall can be deleted, since it will be too Low in height, to be effective in practical.
-
Create common trusses over the entry roof similarly as explained previously
Trusses can be moved, stretched, copied and deleted as per the requirement, but must be be updated afterwards.
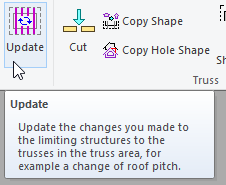
To update select the truss/s and the Truss tab gets activated in the ribbon bar. Click on Bottom and then press V to confirm. Click on Top and then press V to confirm. If you want to update all trusses, just select one truss and click on Update. All the trusses will get updated.