
Generate parts for Floor trusses
-
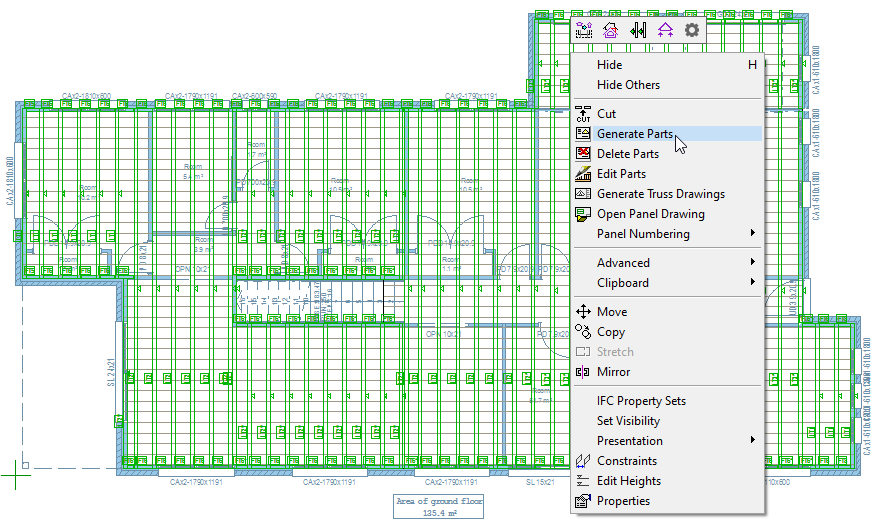
Select all the floor trusses ( in 1st floor deck layout ) right click and from the contextual menu click on ‘Generate Parts’
-
Select the library as shown
-
refer to Truss structure parameters description for more details.
-
Click OK
-
Vertex will now generate the truss frame members ( It will take little time so be patient ).

-
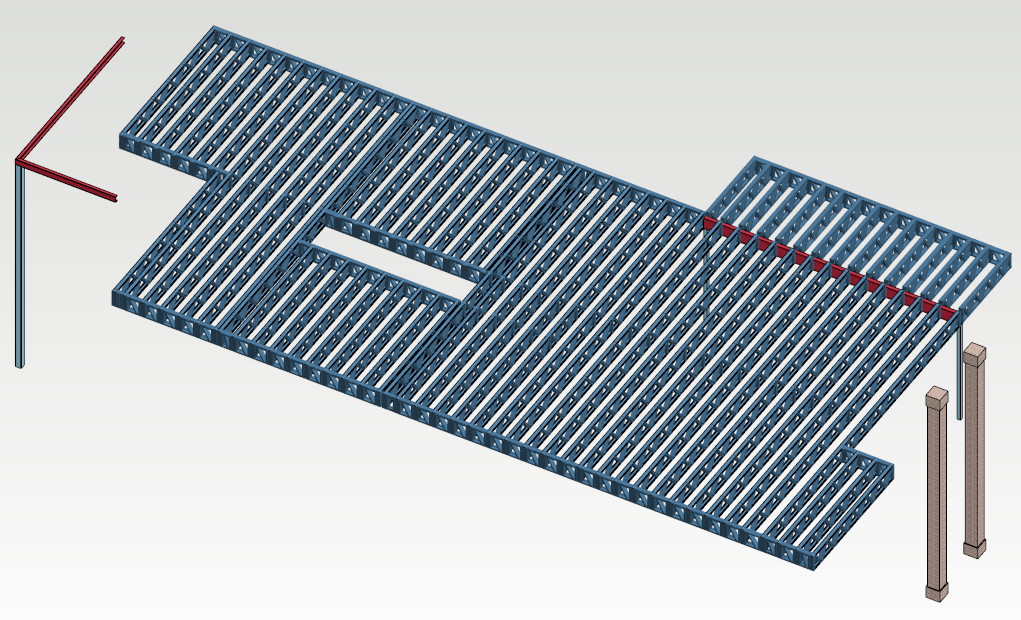
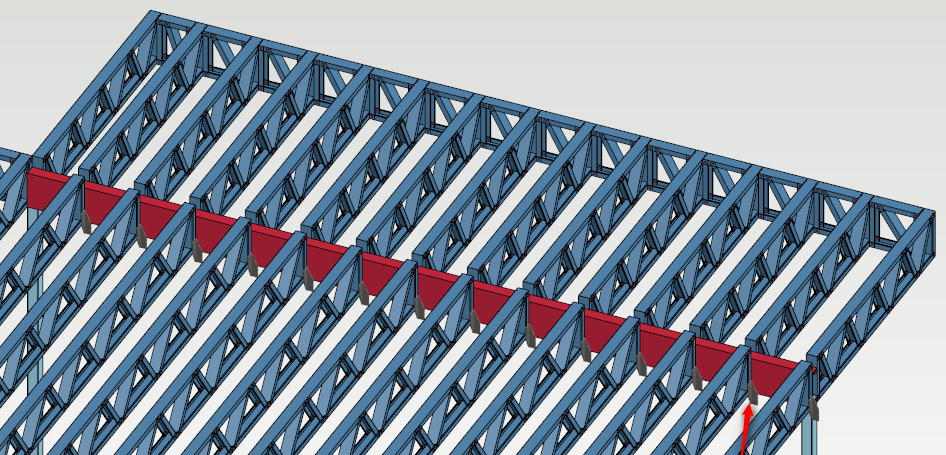
Once the Frame parts have been generated press F2 to switch to 3D view

Add Floor Truss Connections
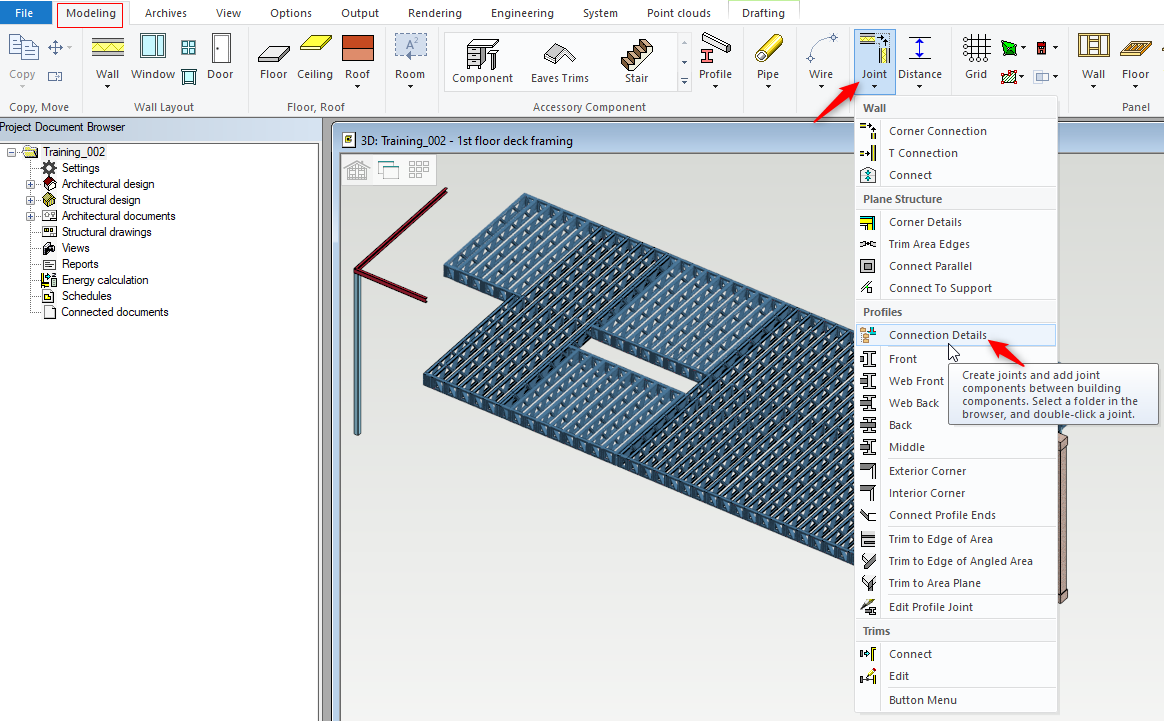
Before engineering the Floor Trusses, few connections need to be manually defined. In this scenario we have a PFC beam floor trusses abutting to beam need connections.
-
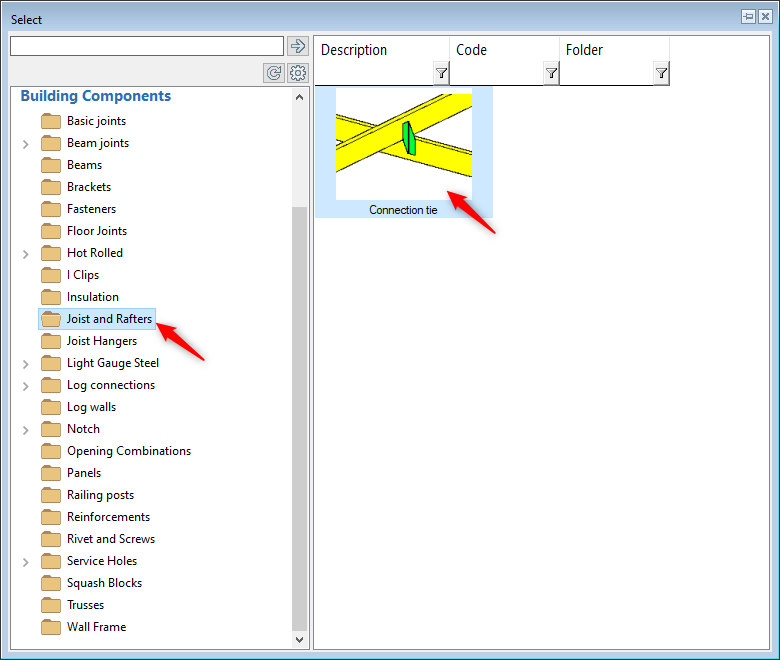
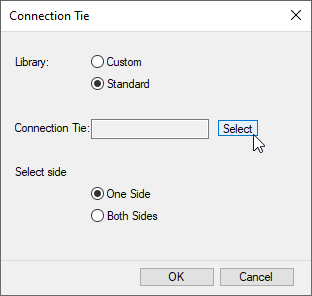
In ‘Modelling tab’ click on ‘Joint’ icon → ‘Connection Details’ → ‘Joists and Rafters’ folder
-
Double click on ‘Connection tie’,
-
Connection tie menu pops up.
-
Click on Select button.
-
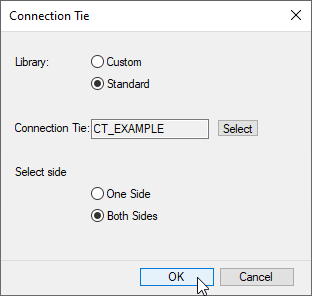
From Select Component menu, Connection tie example and click OK

-
Select side: tick on ‘Both sides’ Again click OK
-
Pay attention to the instructions at the bottom left corner of the vertex window

-
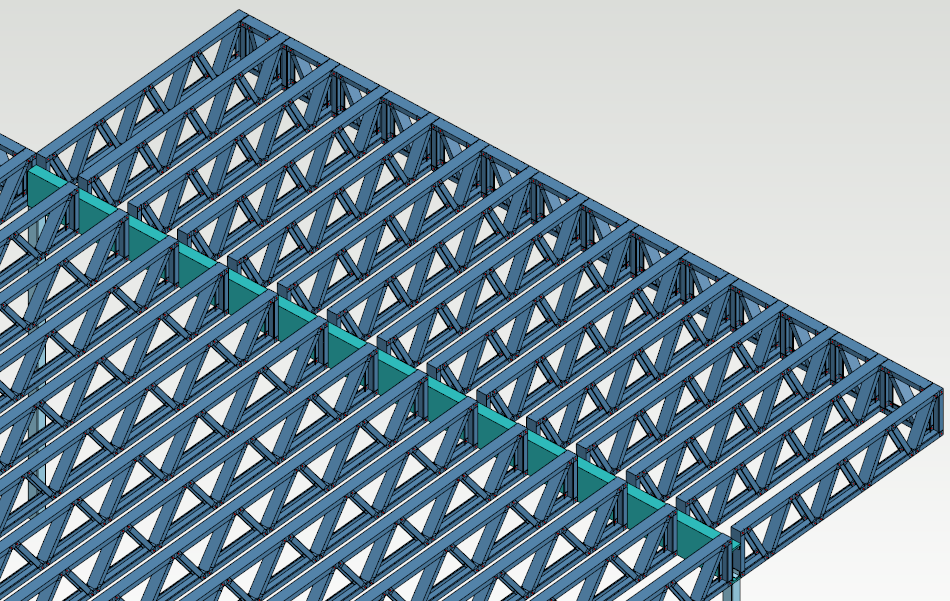
Vertex prompts to ‘Select Primary Beam’ ( select PFC beam in 1st floor deck framing 3D view )
-
Then Vertex prompts to ‘Select Secondary Beam’ ( select floor truss/s ( hold CTRL key to select more than one ).
-
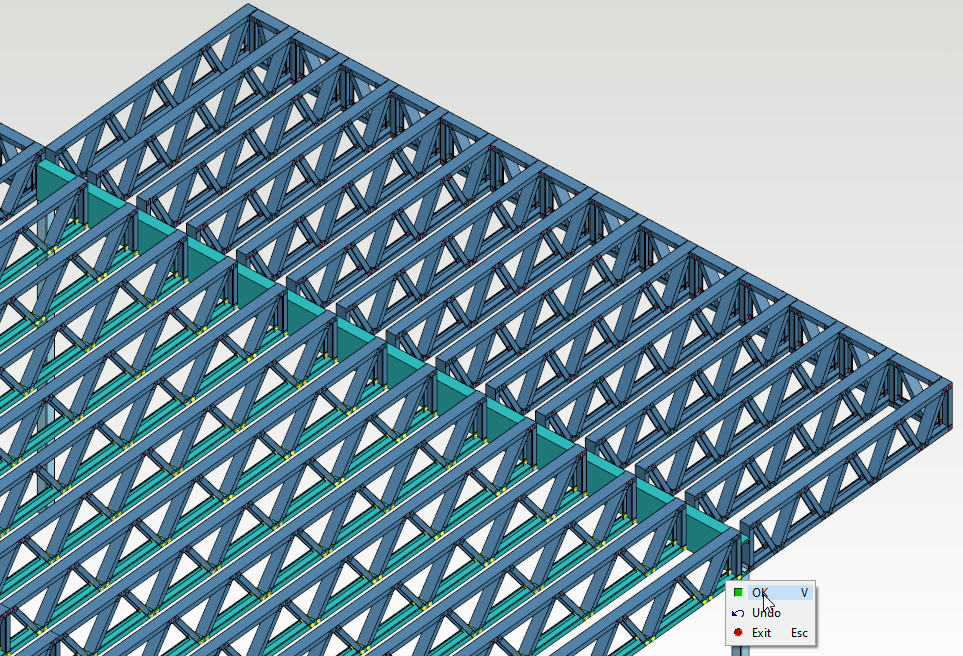
Right click and click OK to confirm
-
Connection sides can be changed by clicking on the green arrow.
-
Again right click and click OK to confirm or press ‘V’.

-
Floor Trusses now have connection to the floor beam.
-
Now add the connections for the other side of floor trusses to beam in similar process