
-
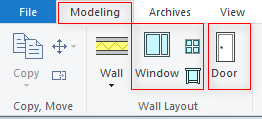
Windows and doors are located under ‘Modeling tab’ → Window and Door icon
-
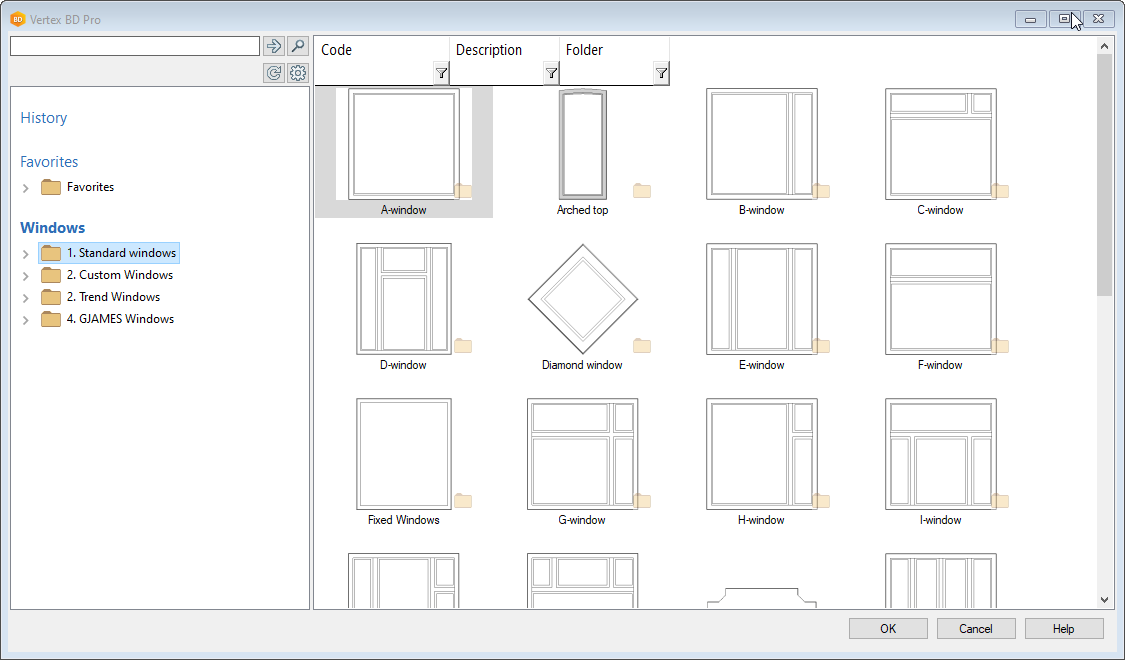
After selecting the Add Window command, select a window type from the different options.
-
These windows are pre-set but can be adjusted to whatever height and width, you require.
-
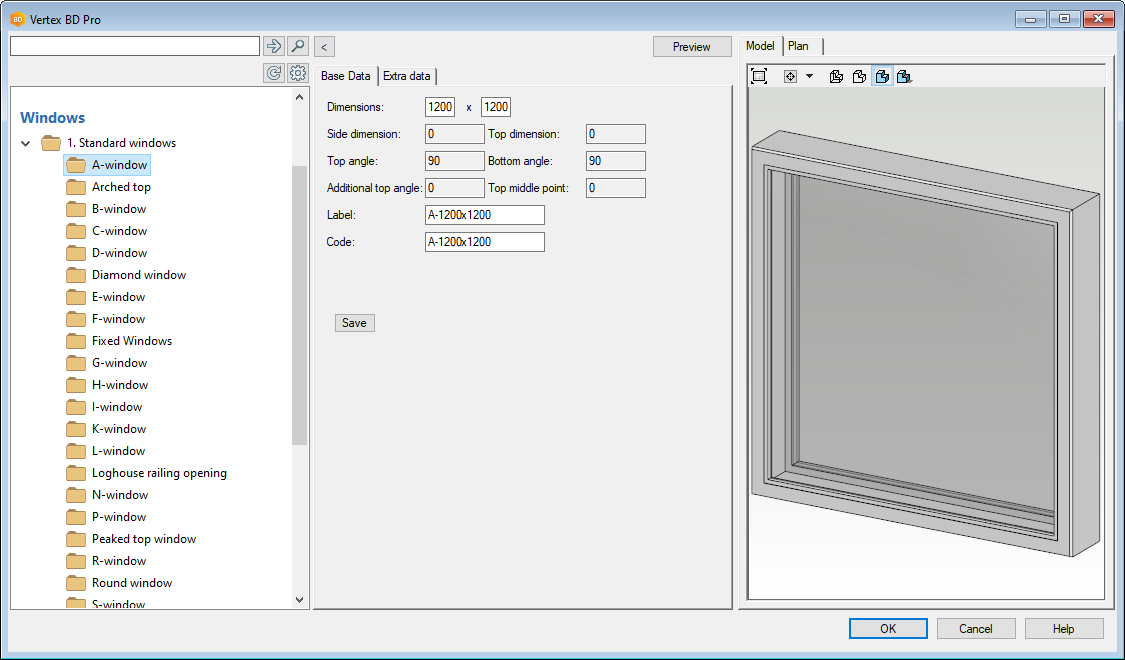
Make sure that the head height is correct. (In this instance the height height is under the "Extra data" tab)
-
Accept your alterations / selection and you are ready to place your opening.
-
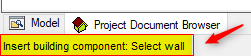
Pay attention to the instructions at the bottom left corner of the vertex window.
-
Select the wall. After selection a cursor changes to represent the window opening and locks into the selected wall.
-
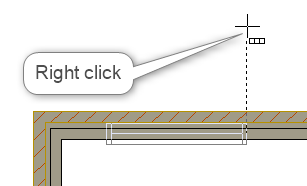
Right click a new set of contextual menu appear.
-
These buttons in the contextual menu give you different options such as Mirror the door swing and Flip the orientation of the door as per the requirement etc. to position the opening accurately.
-
Change the holding position to the right and select the arrow button.
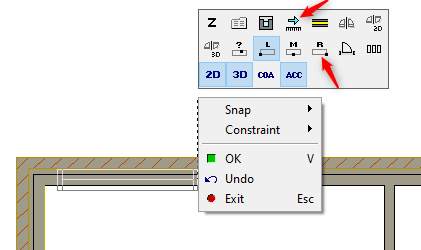
Z height of the openings can be adjusted, in case of variable step-ups in floor by right clicking and from the contextual menu click on 'Z'
-
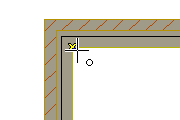
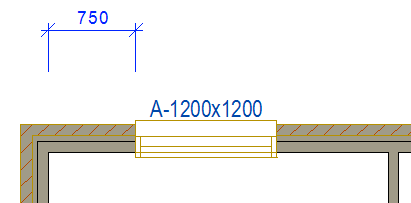
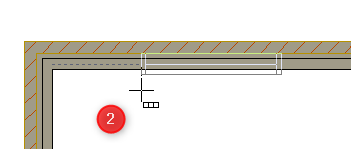
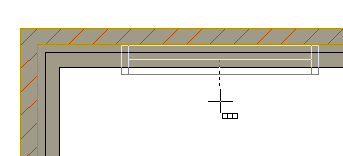
You can move the cursor to an intended reference point. But in this scenario hover the cursor to the inside face/corner of the top left external wall
-
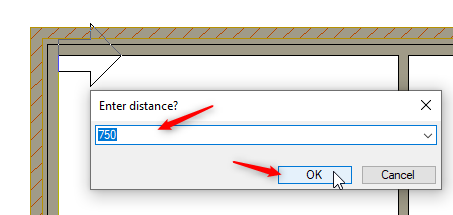
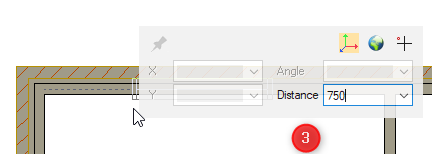
Click and 'Enter distance' menu pops up.
-
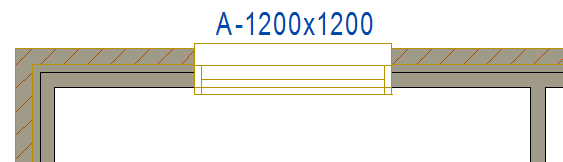
Enter the distance 750mm and hit OK
-
Right click and click OK or press ‘V’ to confirm
-
The command still continues until you press ESC key
-
You can also use ‘Q’ command to set a reference point and ‘D’ command to set middle point between two given point.
'Q' command example:
-
Select the wall.
-
adjust the holding position of window ( from right click contextual menu ).

-
Move your cursor to an intended reference point or hover over the inside corner of the wall. The cursor will change to this

-
Drag your cursor in intended direction, as you type any number, a coordinate input menu appears on the screen, type the distance and hit enter.
-
Right click and form menu click on OK or press V to confirm ( Remember that the command still continues )
-
Press ESC key to quit the command.
'D' command example:
-
Select the wall.
-
Pick the holding position of window ( from right click contextual menu ). to the midpoint.
-
Press D key to activate the command.
-
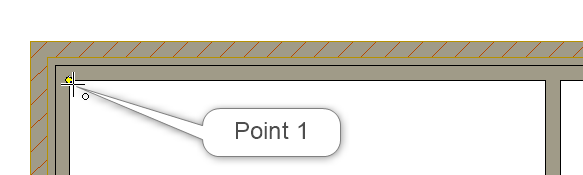
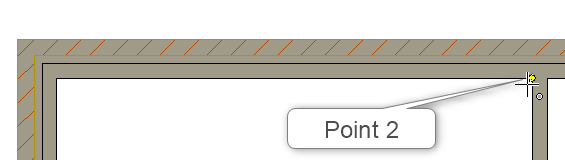
Pick the point 1 and point 2.
-
Now the opening will be inserted in the middle between the two points.
-
Right click and from menu click on OK or press V to confirm ( Remember that the command still continues )
-
Press ESC key to quit the command.
-
Place other windows and doors in a similar manner.
-
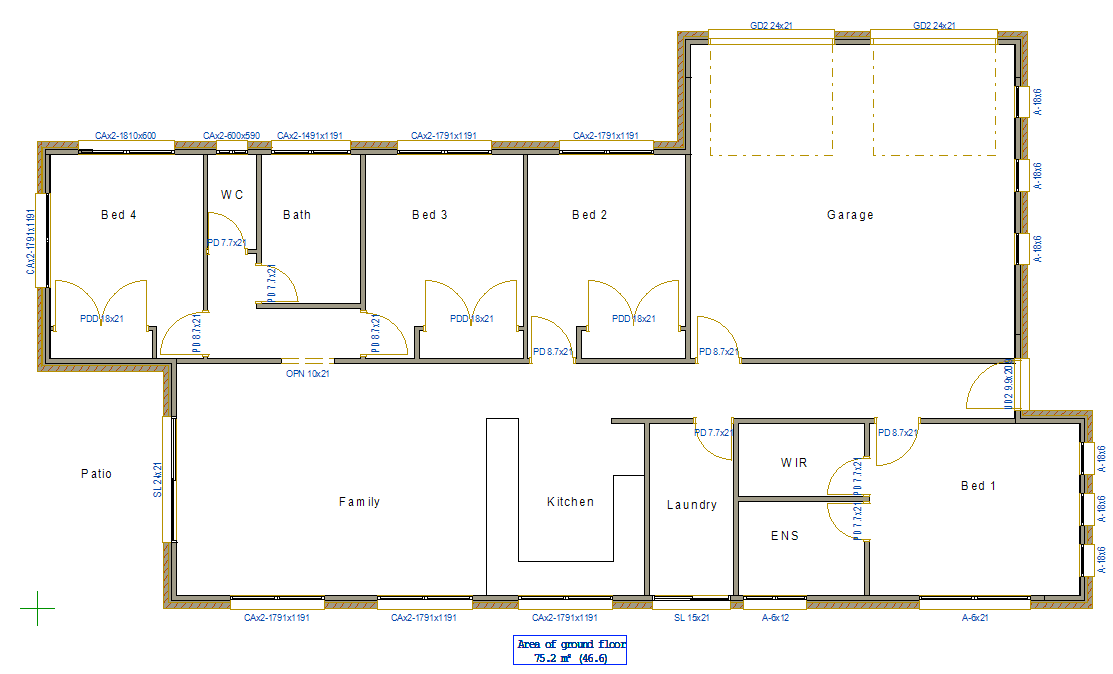
Now you should have a model that looks something like this
-
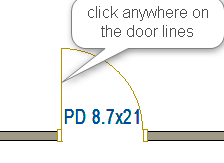
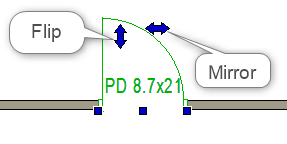
Door swing can be Mirrored and the door orientation can be flipped, even after the door has been added to the wall.
-
Click anywhere on the door swing line OR on the door dimension text, and the blue arrow appears
-
Click on these arrows to Mirror the door swing and Flip the door direction / orientation.
-
Openings can also be modified, copied, moved and deleted as per the requirement