Exercise 4. Use archiving
Archiving means that a model or drawing file or project folder is associated with a so-called metadata, i.e. header information, stored in a separate database.
This exercise was carried out with version 28.0 (Vertex 2028).
In this exercise you will learn to
-
Filling in the model archive card when creating a new model.
-
Editing the contents of a archive card of model.
-
Creating a new a project and filling in a project archive card.
-
Listing models and drawings of project and editing archive information.
-
Editing and supplementing the contents of a drawing archive card.
-
Using the revision database of drawings.
Functions to be used:
-
New > Part / Assembly.
-
New > Project.
-
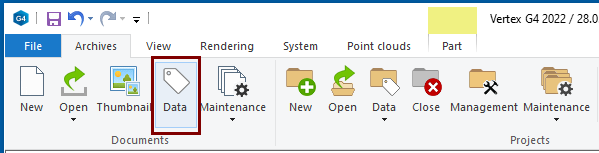
Archives > Documents > Data.
-
Archives > Projects > Data.
Model archive (Database d_MODREG) contains information for each model.
-
Model file: XXX.vxm (where XXX is the name of the model in to archive)
Drawing archive (Database d_PICREG) contains information for each drawing.
-
Drawing file: XXX.vxm (where XXX is the name of the drawing in to archive)
Project archive (Database d_PROREG) contains information for each project.
-
The project is a Windows folder in the directory vxg4/shared/projects or vxg4_srv/shared/projects.
-
The project name (ID) in the project archive is the same as the folder name in the Windows file system.
In Vertex G4, models and drawings can be found in Windows as files and projects can be found in Windows as folders, but these objects are always associated with information in databases.
-
Do not use Windows Explorer to delete models, drawings, or projects, or the archive will still recognize those models, drawings, or projects, but because the file (or folder) no longer exists, they cannot be opened or, for example, upgraded.
-
Do not change the name of the drawing, models, and project using Windows Explorer, because models, drawings, and projects are processed using the Vertex archive, which can retrieve the correct file based on the name in the archive.
Create a new document (part model)
-
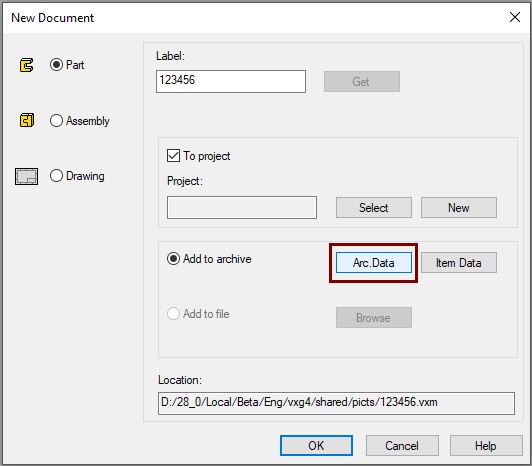
Select the document type: Part, Assembly, or Drawing.
-
Enter the Label.
-
Special characters (such as * / \?,% & #, Etc.) are not allowed in the ID that makes up the model file name.
-
We recommend that you use the letters A ... Z (and you do not use Scands, even if they are accepted by the system) and the numbers 0 ... 9 and - (dash) and _ (underscore), as these characters are commonly found on all Western computers.
-
-
It is also possible to get an ID for the model from the series, but from that later in this exercise.
-
Click Arc.Data button.
-
The model archive card opens.
-
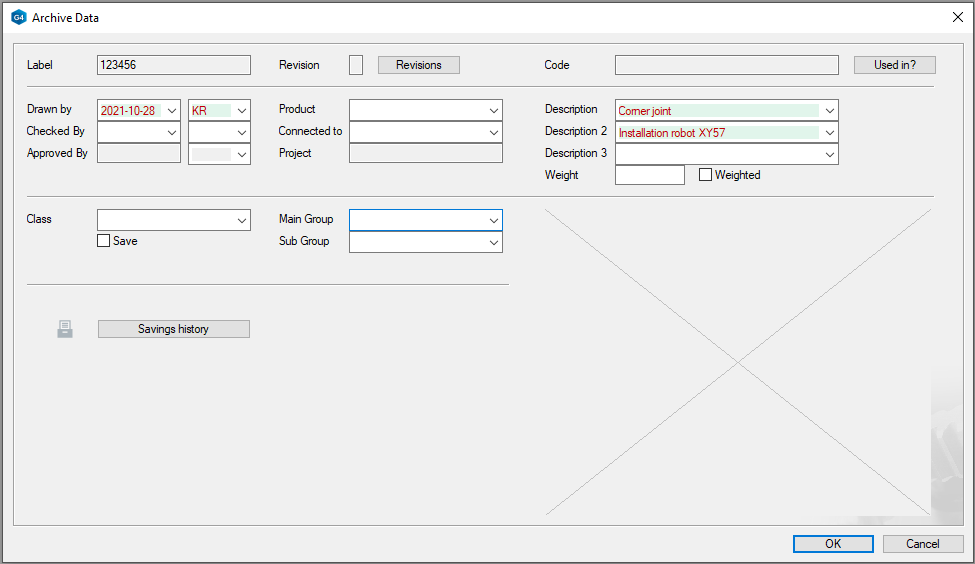
Fill in the model's archive card
Fill in the archive card of model as well as possible, because they are inherited for the drawing (the information of which you can of course edit individually) and from where they are automatically transferred to the title table of the drawing sheet.
Based on the information in the archive, you can also search for models in the model archive.
-
In the Drawn by and Checed By fields, you can use the preselection button to retrieve the date and designer ID.
-
Adding the names and IDs of the designers to the database in question is presented in Exercise 2. Add users.
-
-
In the Product field, you can search for words that have been added to the Description database d_DICTIONARY, if necessary, but you can also enter the desired string in the field.
-
In the Connected to field, you can retrieve the model ID to which this model is associated from the model archive.
-
First, you get a search card for which you can enter search criteria.
-
You will then get a list of models that meet the search criteria.
-
Select an associated model.
-
-
In the Description field, you can search for words that have been added to the Description database d_DICTIONARY, if necessary, but you can also enter the desired string in the field.
-
The Class, Main Group, and Sub Group fields work together so that you can use the preselection button to select the main group, then the sub group, and finally the class. All the above fields are filled in with the card when you have selected the class.
-
You can set the weight in the Weight field, in which case the Weighed check box must also be selected so that the weight calculated based on the volume and density of the model does not override the set weight.
-
You should set the weight in cases where you have to create a rough space charge model (e.g. from an electric motor) whose weight you know, but based on the volume and default density of the model, the weight would be the wrong weight.
-
Otherwise, the program calculates the weight of the model based on its volume and the density of the raw material.
-
-
You can view your model Saving history later, if your recording history is enabled.
OK saves the data to the model's archive card.
-
If you want to change or add information to the model, you can do so with the Data function in the Documents group on the Archive tab when the model is active.
If necessary, create a new project or select an existing project
A project is a way of grouping together models and a drawing related to the same design entity (under the same Windows folder). Such a project can also be packaged by Vertex, so that all the models and drawings contained in the project and the related archive data can be copied between two different Vertex systems, e.g. from subcontracting planning to the principal.
Creating a new project
-
Click the New button.
-
Creating a new project and filling in the archive card is described in Create a new project.

Selecting an existing project
If you know a project already exists and you want to link a new model to this project, follow these steps:
-
Click the Select button.
-
This opens a search screen where you can enter or select search criteria.
-
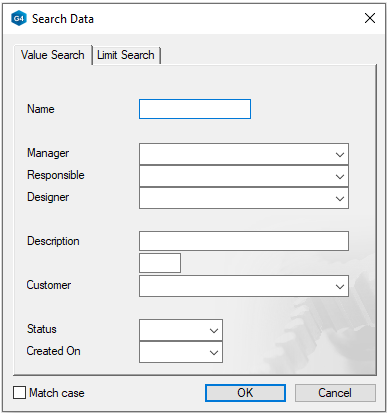
-
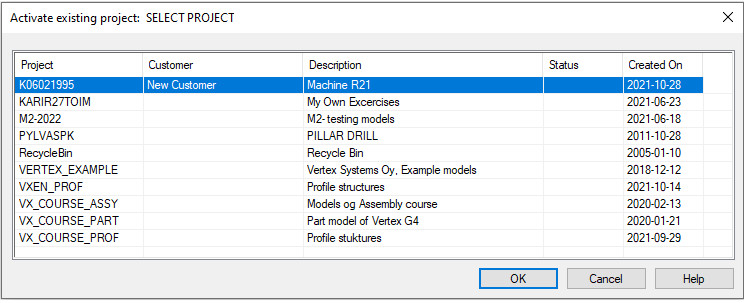
OK searches for projects and lists projects
-
Double-click the project to select it from the list.
Create a new project
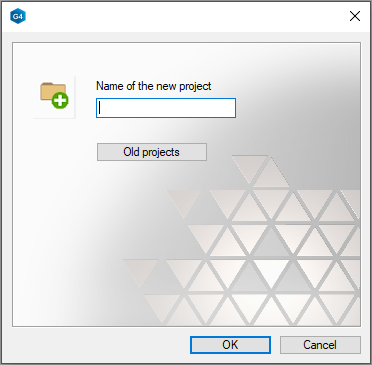
You can create a project when creating a new document, or with the function New in the Projects group on the Archive tab.
-
Enter an ID for the project.
-
The same character restrictions that applied to model IDs also apply to project IDs.
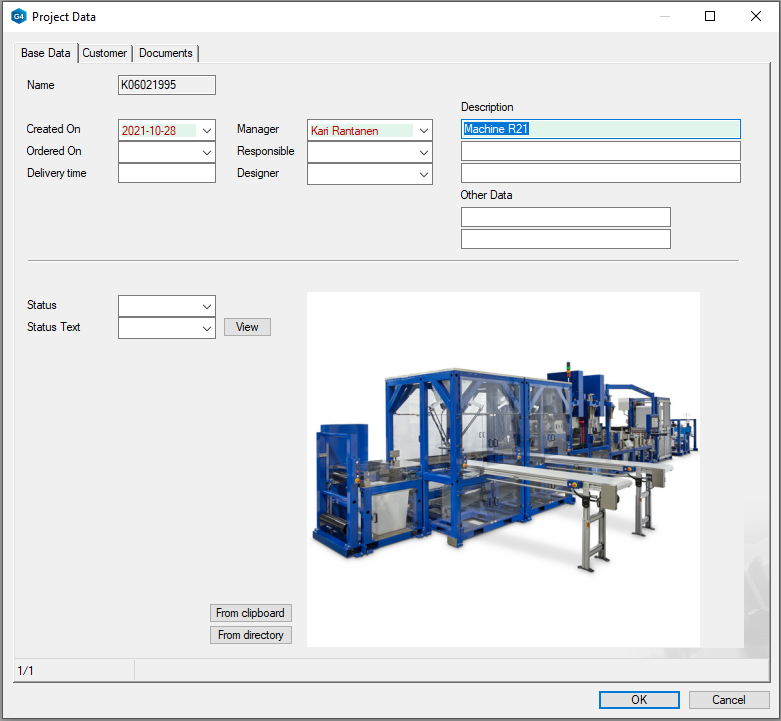
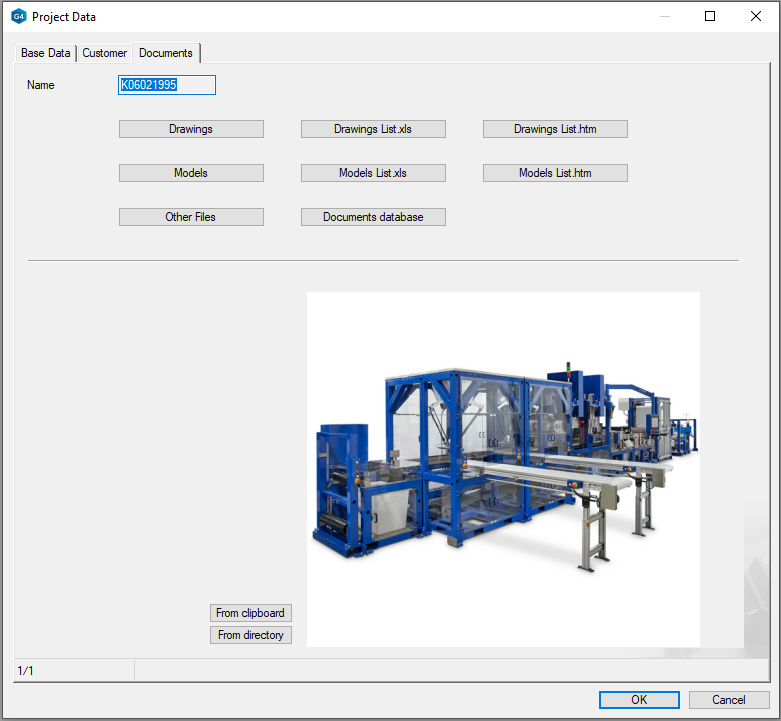
Fill in the project's archive card
Base data tab:
-
The Created On field gets the date automatically, but you can change it manually.
-
In the Manager, Responsible and Designer fields, you can use the preselection button to search for the person's name.
-
Adding the names of the designers to the database in question is presented in Exercise 2. Add users.
-
-
In the Ordered On field, you can enter the order date of the project or retrieve it from the calendar.
-
In the Delivery time field, you can enter the agreed delivery time.
-
In the Description and Other data fields, you can enter texts describing the project.
-
The Status field allows you to maintain the status of the project, eg NEW, PENDING, READY, etc.
-
The preselection of the Status Text field gives the content of the field the name situation and the adjacent View button allows you to work on a file where you can write comments related to the project.
-
If necessary, the View button creates a file named situation if there is no text in the field.
-
You can also enter someone else's name in the field, and the View button will create and open that file.
-
The program opens a list of programs from which you can select the program with which you are editing the file.
-
-
Below are two buttons on the From Clipboard and From Directory, that let you set an image for a box in next to.
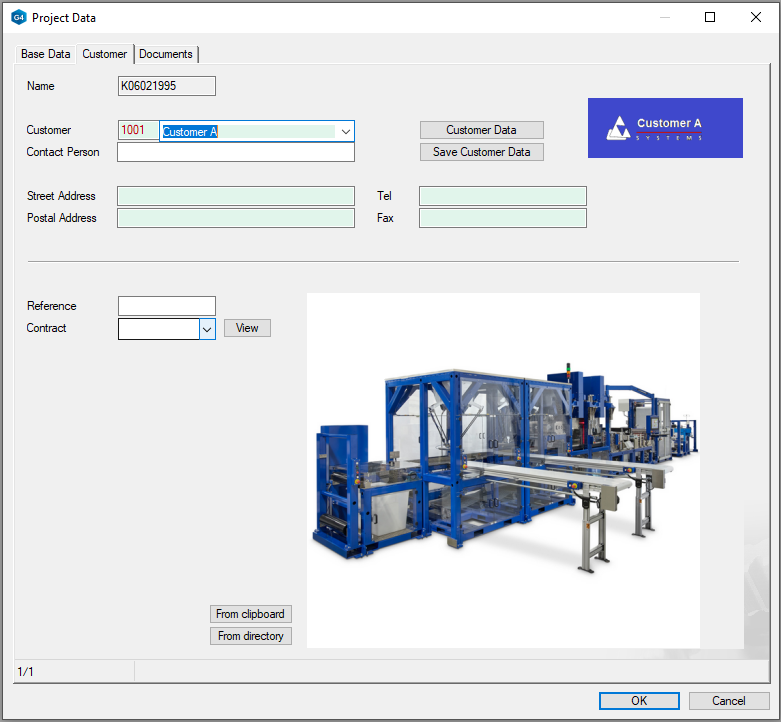
Customer tab:
-
If you have a customer database transferred to Vertex, you can use the preselection button in the Customer field to retrieve the customer information on the card.
-
Fill other contact information if necessary.
-
The preselection of the Contract field gives the content of the field the name Contract and the adjacent Viewbutton allows you to work on a file Contract, if one is named Contract saved under the project in question.
-
If necessary, the View button creates a file named Contract if there is no text in the field.
-
You can also enter someone else's name in the field, and the View button will create and open that file.
-
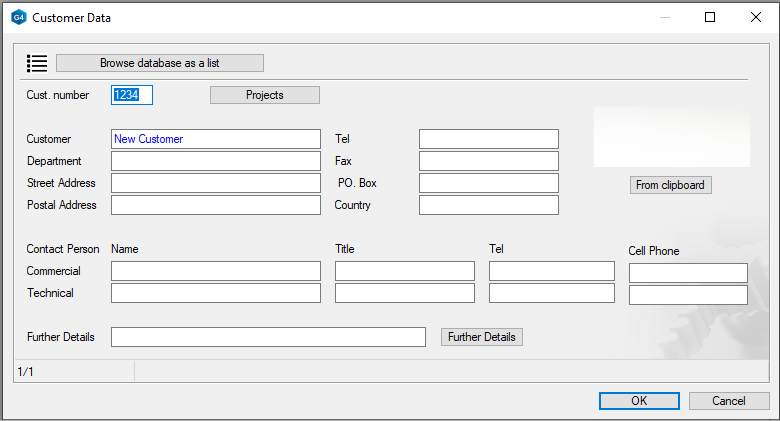
Save the new customer in the customer database
-
Enter customer's information.
-
Click Save Customer Data button.
-
This transfers the data to the customer database and opens the customer card for editing.
-
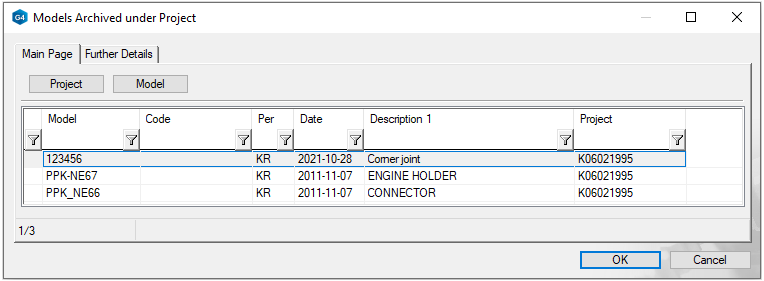
Document tab:
-
The functions on this tab allow you to view or generate listings from the archive data of drawings, models, or other files attached to the project.
-
The Drawings and Models button allows you to view the models or drawings in the project in a list.
-
This is also a great way to view and SUPPLEMENT archive information.
-
Also note the More Information tab, which contains some of the information on the archive card.
-
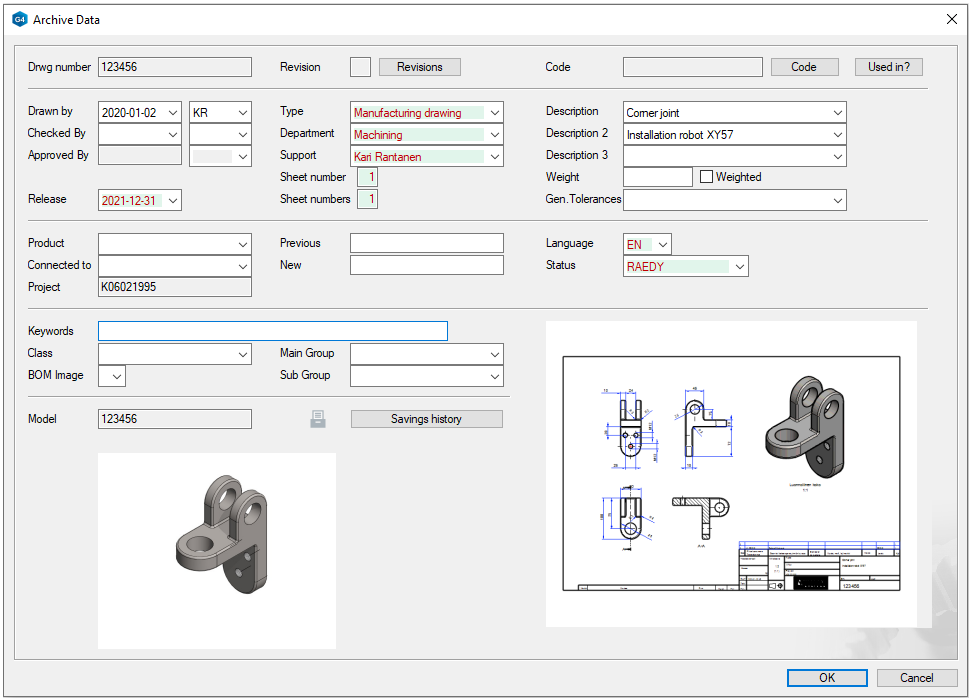
Edit the model drawing archive information
-
When you create a drawing of a model (with the right-click function: New Drawing in the Drawings of the Model Feature Tree), the program copies the current archive data for the model to the drawing and opens the drawing card for editing.
You can change and supplement the drawing archive information.
-
After this, the archive data for the model and drawing “live their own lives,” and the change made to one is in no way reflected in the other.
Fields on the card that differ from the model archive
-
In the Type field, enter or retrieve a document type (defined in ISO 7200 standard).
-
In the Department field, enter or retrieve the responsible department (ISO 7200).
-
In the Support field, enter or retrieve the name of a person from whom you can obtain additional information about the document (ISO 7200).
-
In the Release field, enter or retrieve from calendar from the date on which the drawing will be published (ISO 7200).
-
In the Sheet Number and Sheet Numbers fields, enter the number of sheet and number of sheets associated with the drawing (ISO 7200).
-
However, the Vertex G4 does not yet offer the ability to list multiple sheets in a single drawing.
-
-
In the Language field, enter or retrieve the language ID that describes the content of the drawing (ISO 7200).
-
In the Status field, enter or retrieve information that describes the readiness of the drawing (ISO 7200).
-
In the Gen.tolerances field, enter or retrieve a general tolerance.
-
In many companies, general tolerances are described using tables and annotations added near the title table, so the title table, which has been updated to version 28.0.00, no longer has a box for general tolerances.
-
-
In the BOM image field: You can select 1 instead of the default (0) to include this drawing in the "Part List with Images".
-
A drawing made for this purpose should not contain a sheets or multiple projections, nor dimensions or text, as the image in the "Part List with Images" is so small that no details are visible.
-
A drawing made for this purpose could have only one (perhaps isometric) color-rendered projection.
-
OK saves the data to the drawing's archive card.
-
If you want to change or add information to the model, you can do so with the Data function in the Documents group on the Archive tab when the model is active.
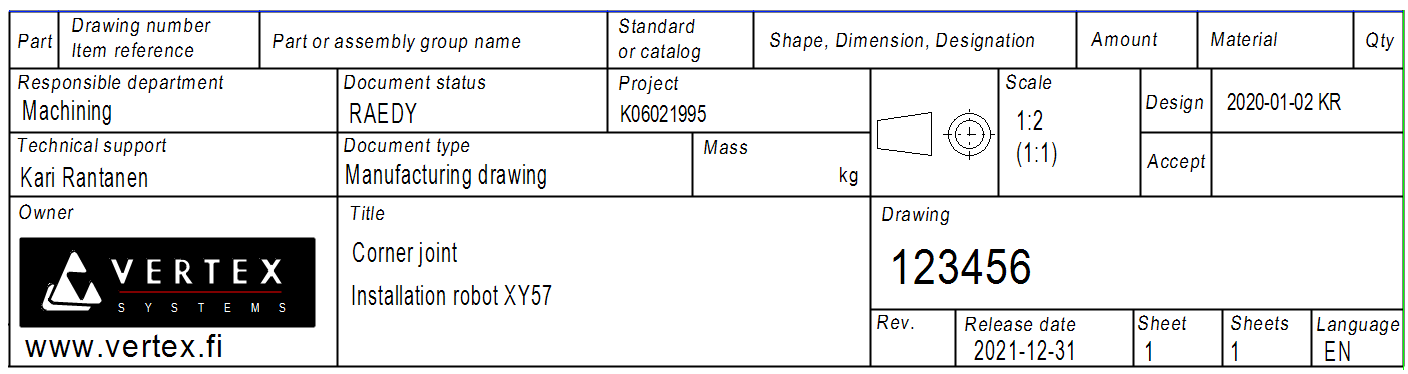
Update the drawing title bar if necessary
-
If you have edited the archivedata for a drawing, the data is automatically updated when the drawing is opened (if updating the drawings is not blocked when you open it).
-
You can update the archive information for the drawing with the F5 key or with the right-click function Update.
Create a new revision of the drawing
This functionality is mainly intended to provide a row to in the Revision header table. This functionality also allows you to save revisions to a drawing. (But it is awkward compared to G4-Flow using).
-
Open the drawing. Archive tab > Documents group > Data.
-
Click the Revisions button.
-
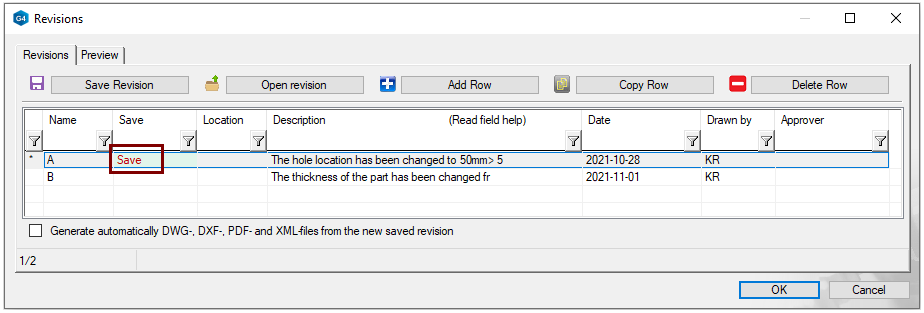
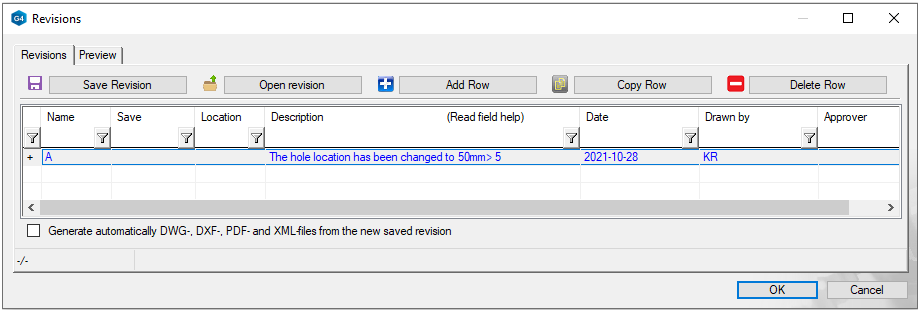
This opens the Revisions dialog.
-
A complete revision is successful if you have both a Vertex G4 and a Vertex Flow (Product data management system).
-
In this case, the old revisions are automatically saved and can be viewed later.
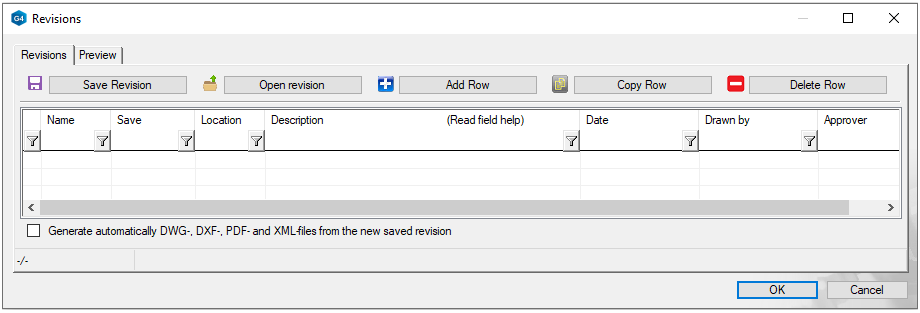
Add a line to the revision database and complete the description of the change
The row added here will appear in the drawing Revision header table.
-
The Add Row button adds a new blank row.
-
The Copy Row button copies an existing row, but omits the Name column (that is, the change ID) from the copy.
Complete the information
-
The Location field should only be completed if the drawing form has the old coordinates, such as horizontal letters and vertical numbers.
-
Today, this field has become so rare that there are no such ones in Vertex Systems Oy's example sheets, and thus that column is not in the Revision header table either.
-
-
Update the drawing to complete the Revision title table. For example, with the F5 key.

Save and open the revision
-
Once you have filled in the revision information and you want the current situation of the drawing to be saved, then click the Save Revision button.
-
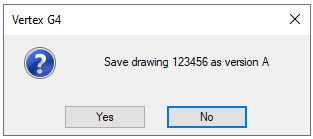
This functionality asks the verification question: Save drawing XYZ as version X.
-
The Yes answer saves the drawing in the REV_X (REV_A in this example) directory created under the project directory.
-
-
The Open revision button allows you to open the relevant drawing file (Note that you can only open a line with the entry Save in the Save column)