Truss Framing Tool Sets
In the past, if you wanted different framing tool settings for different trusses, truss spans or truss loadings, you had to create separate truss templates with the required settings.
With framing tool sets, you have one base template and all the variations in settings for the different trusses are contained within a database. When the trusses are generated, those settings are filtered out and applied to each individual truss.
Using framing tool sets means that the trusses generated are much closer to the required design, therefore saving hours of detailing.
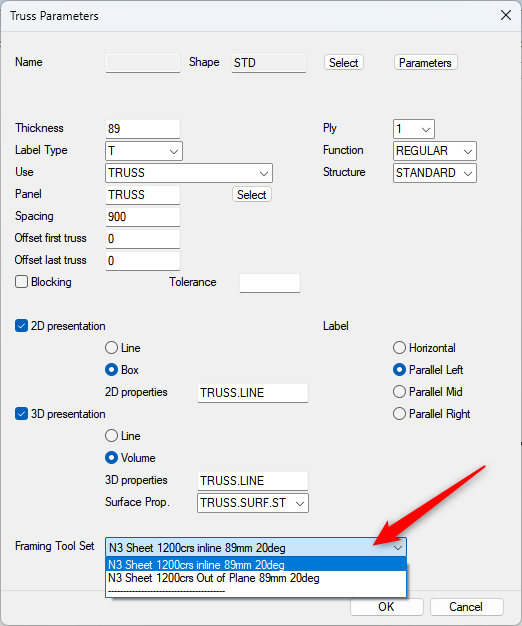
Select the Framing Tool Set in the Truss Parameters
When adding trusses, the truss framing tool sets are set in the truss parameters.
Just select the required framing tool set to be used.
The framing tool sets are defined in a database located in the Truss Framing Tool Sets library. You can view the database in the System Libraries / Other / Truss Tool Sets / Truss Framing Tool Sets library.
How it Works
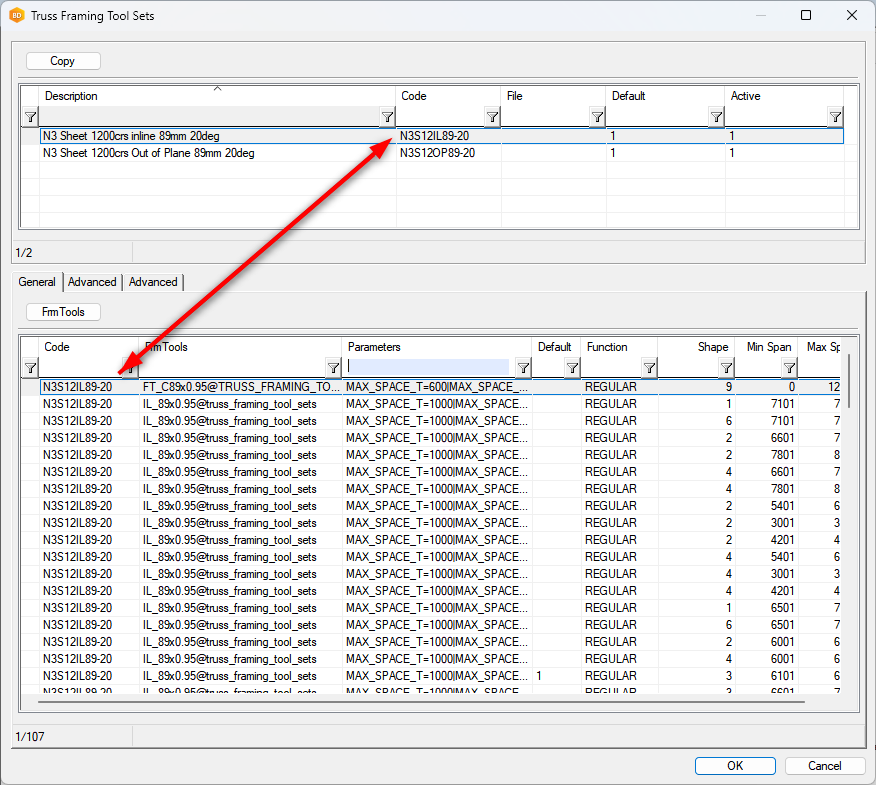
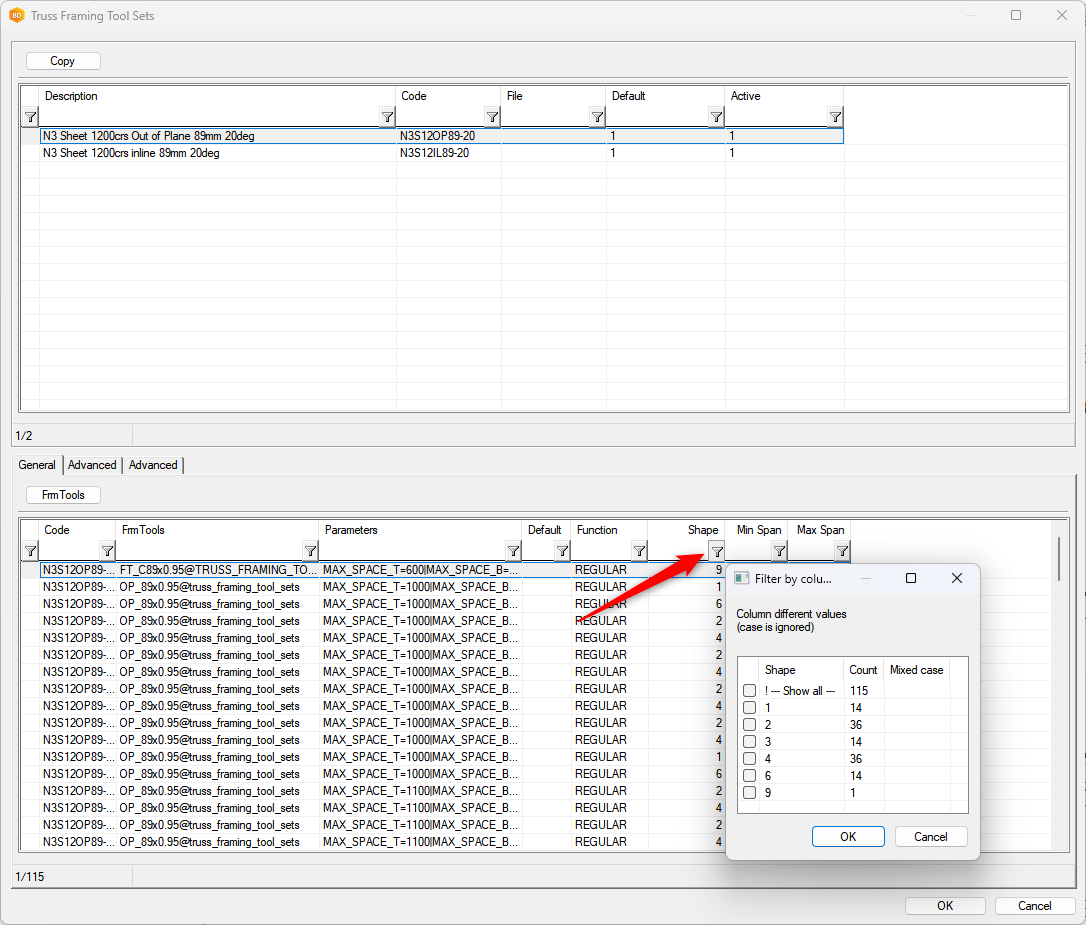
If you open the database, you will see that it is divided into 2 parts. The top part is the truss framing tool description and its associated code. You can copy this row and create a new framing tool set.
The information in the bottom part is the framing tool data and is directly linked to the framing tool in the top part via the code.
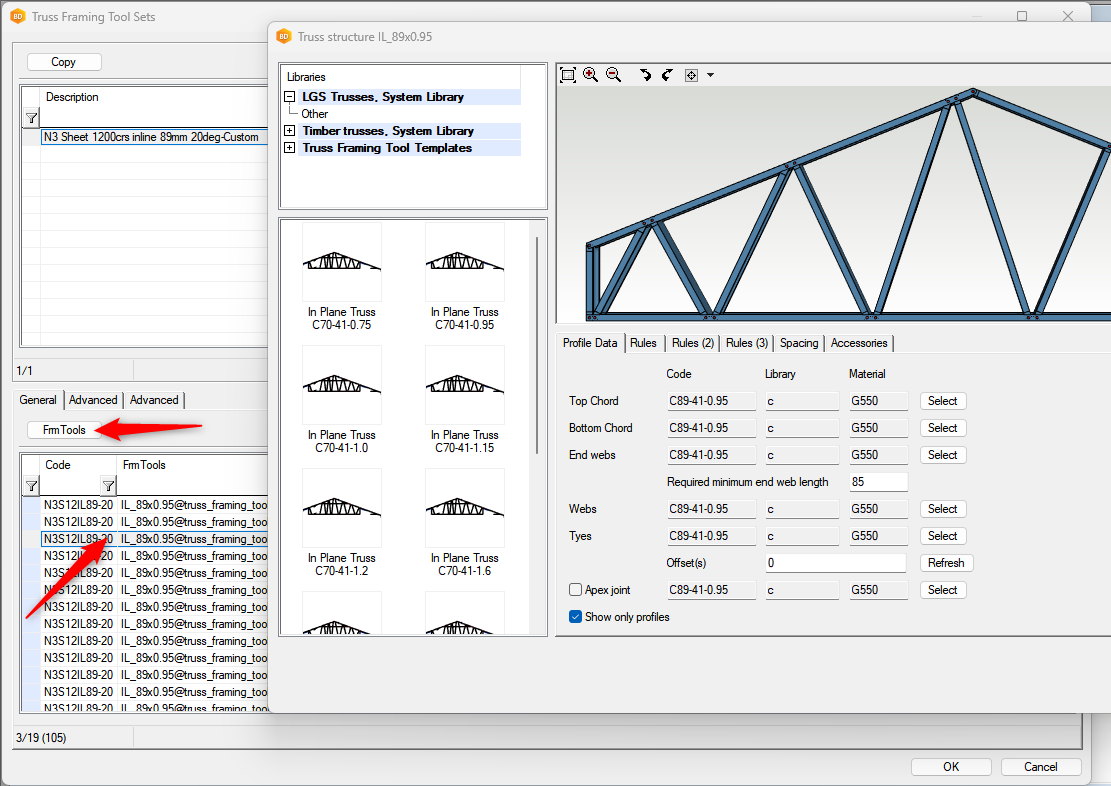
The FrmTools column contains the truss template used. The Parameters column contains the changes from the standard framing tools linked to the truss template. Pressing the FrmTools button will open the framing tool form where changes can be made.
All columns from Function on, including all those in the 2 Advanced tabs, contain specific filter information. When parts are generated for a truss, the truss parameters, such as shape, span, pitch and thickness, etc., are used to determine which truss template and framing tools (Parameters column) are used to generate the truss. The first row found to comply with the truss will be used. If none is found, the default row is used.
Filtering Fields Available
- Function – The truss type as contained in the truss parameters.
- Shape – The truss shape listed as an integer. Press the dropdown to see the description. Note that you can only do this if looking at the database in the custom, not the system.
- Min and Max span – The span of the truss from support to support. This not the length of the truss.
- Min and Max thickness – The truss thickness.
- Min and Max Heel Height - This is the over the wall height. The distance from the bottom of the bottom chord to the top of the top chord measured at the hell of the truss.
- Min and Max Crit. Height – This is mainly used with truncated trusses to define the height of the truss.
- Min and Max Pitch – The truss roof pitch
- Ply – the number of truss plies.
- Use – From truss parameters. Usually empty or set to “TRUSS”
- Min and Max length – The length of the truss.
Copy Framing Tool Sets from System to Custom
Firstly, to edit any data, it must be done in the custom library. If the Truss Framing Tool Sets is not in the custom library already, follow these steps.
- Go to the System Libraries / Other / Truss Tool Sets / Truss Framing Tool Sets, right-click and create a new custom library.
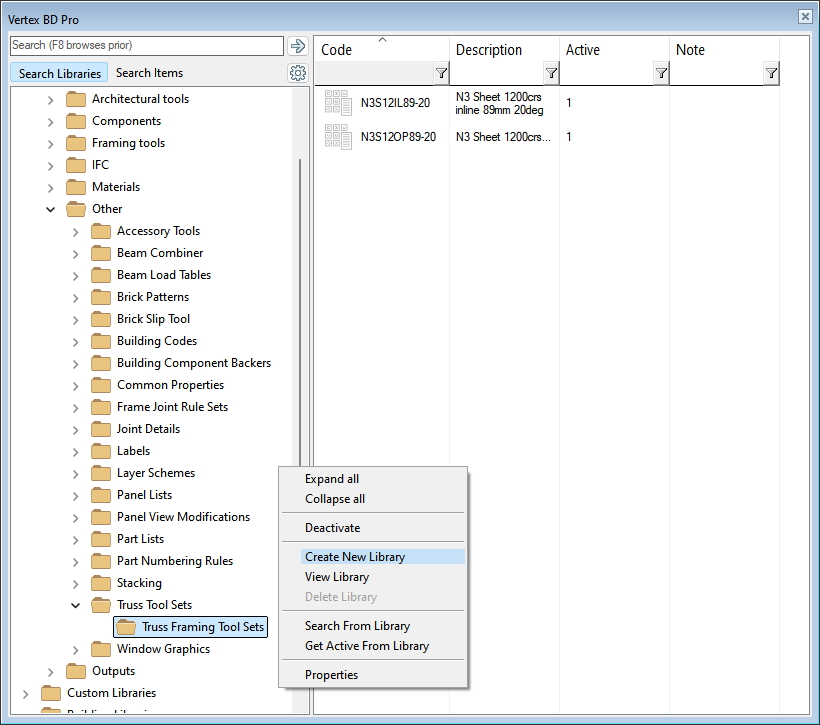
2. You will not be able to call it “Truss Framing Tool Sets”. Just call it “Truss Framing Tool Sets-Cus” or something similar. You can change the name once created if you want.

3. From the system library, select the framing tool set, right-click and copy it to the custom library you have just created.
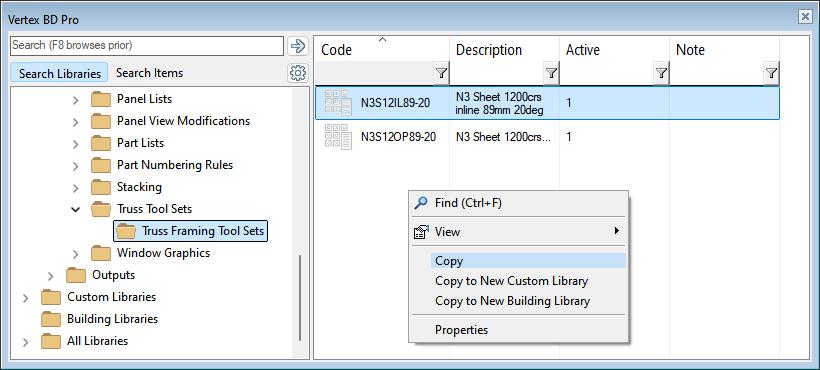
4. At this point you will see the framing tool sets available from the custom library and the system library. They may look like duplicates. To turn off framing tool sets in the system library so they do not show, right-click the Truss Framing Tool Sets system library, go to properties and untick Active.
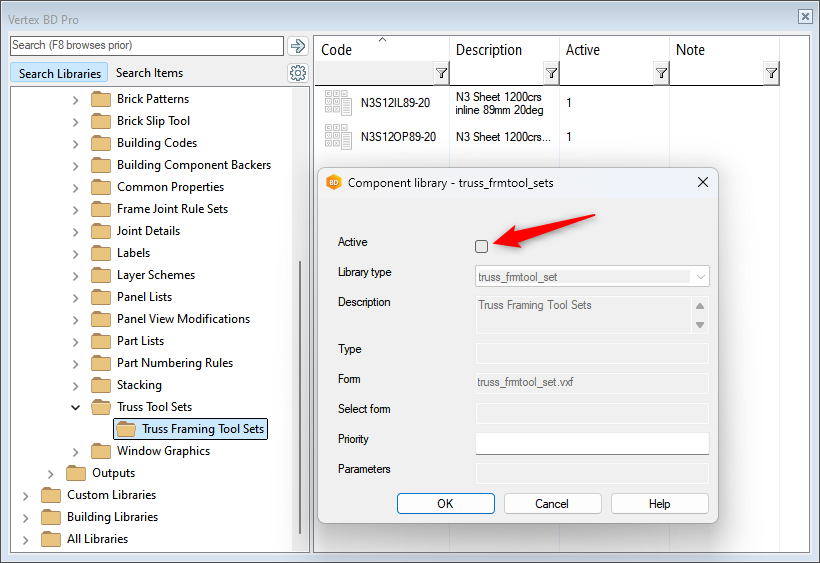
Editing Framing Tool Sets
To help manage the data, use the filters and sort functions. To sort alphabetically from biggest to smallest or smallest to biggest, just left-click on the column name. To filter out the required data, left-click on the filter symbol.
In this example, truncated trusses have been filtered out (Shape 2) and the Min Span has been sorted from smallest to biggest.
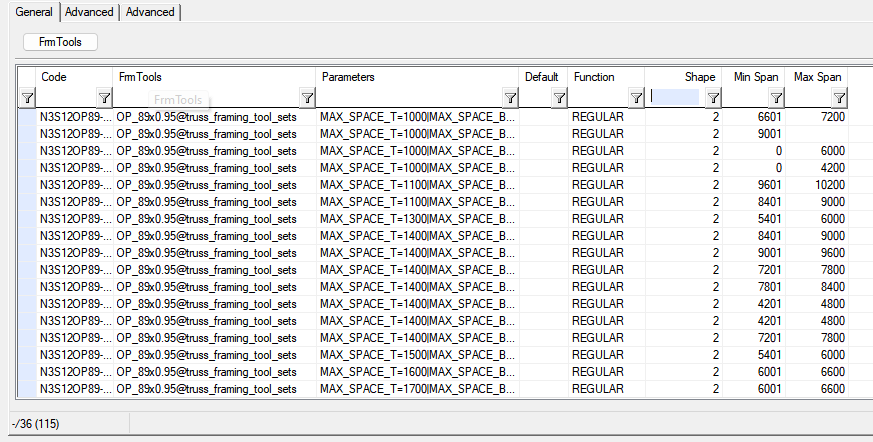
To edit the parameters of a particular row, select the row and press the FrmTools button.
You can then edit any of the truss settings within the framing tools and the changes will be saved to the Parameters field.
