You can also add components with only 2D presentation and without 3D geometry to the component library. First, draw the component's drawing. Consider the following when designing the drawing:
-
The drawing origin will be the component's locating point.
-
Select a layer for the geometry according to the component type.
-
If you want the 2D presentation to have a color fill, add two hatches: a color fill on the layer 59 and a covering hatch on the layer 101.
Save the file (.vxp) on your disc.
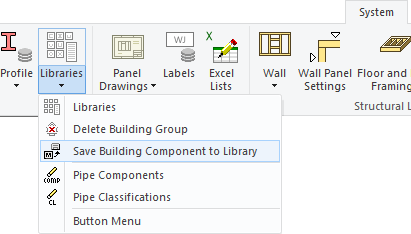
Select System | Libraries | Libraries > Save Building Component to Library.
Enter the following data:
2D - Select the 2D tab below the preview image. Click the Browse button above the preview image, and select the drawing file you saved.
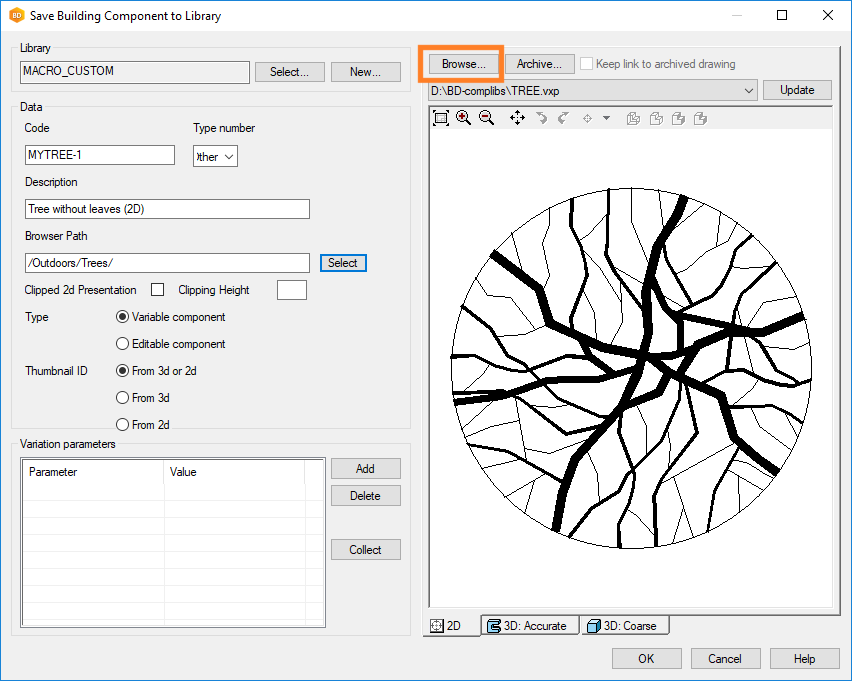
Library - The default library is MACRO_CUSTOM. If necessary, select another library by clicking Select.
Code - The code is used in material collection.
Type number - Select 2 Other as the component type, for example.
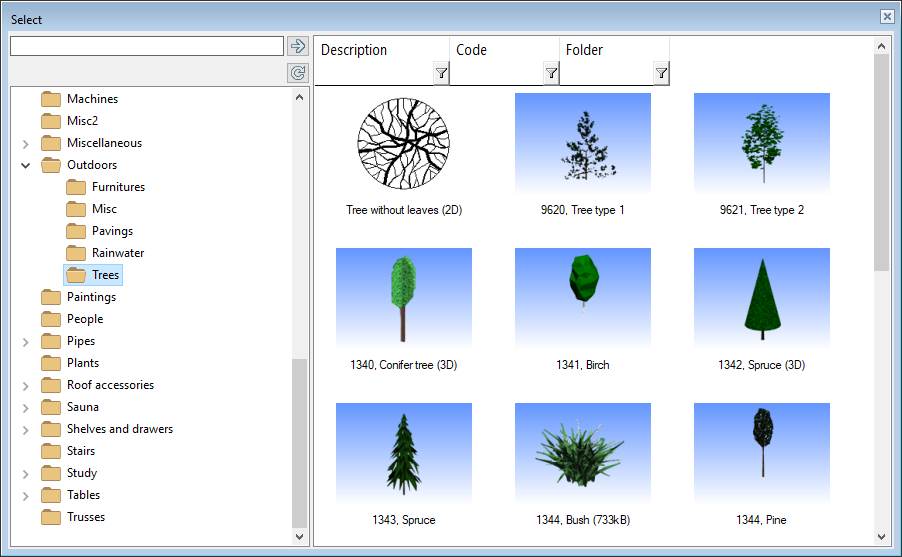
Description - Enter a description for the component. The description will be displayed in the browser when you select the component to be added.
Browser path - Define the browser folder for the component. Do either of the following:
-
Select an existing browser folder by clicking Select. The browser opens. Select a folder, right-click and select Select Folder.
-
Create a new folder in the browser. Enter the name of the folder in the text field in the format /folder/ or /folder/subfolder/.
You can use the default values for the other properties.
Accept by clicking OK.
The drawing is saved in the ../custom/complibs/macro_custom folder.
The program will update the component library browser.