Skip table of contents

3.1 Importing DWG or DXF as reference drawing


  • Reference drawings can be added to vertex and the layout can be traced over that. The reference drawing can be a Vertex 2D Drawing, a DWG or a DXF file.


TIP

It is imperative that you convert the DWG / DXF drawing to Vertex format ( VXP for 2D and VXM for 3D reference ) file first, before inserting as reference into a Vertex project. If you directly insert the DWG / DXF drawing into Vertex project as reference, program will bug you, every time you open the project. 


Convert DWG / DXF drawing to Vertex format 


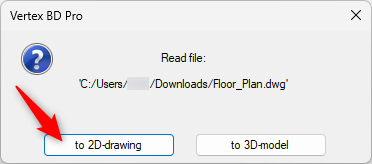
  • Drag the DWG / DXF file into Vertex window.


  • Click on'to 2D-drawing'


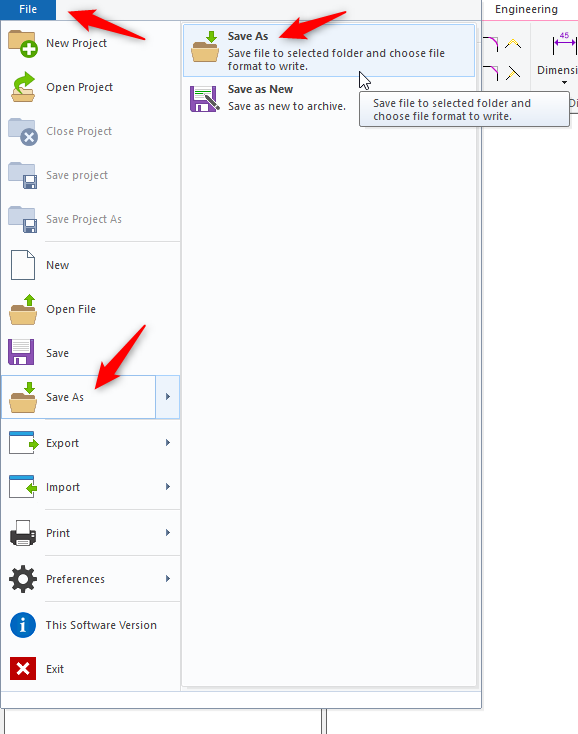
  • DWG/ DXF file opens in Vertex window. Now save it as vertex format  ( VXP for 2D reference )


  • In the Save As dialog box , enter a new file name
  • Choose the location, Save as type  and  click on Save.


TIP

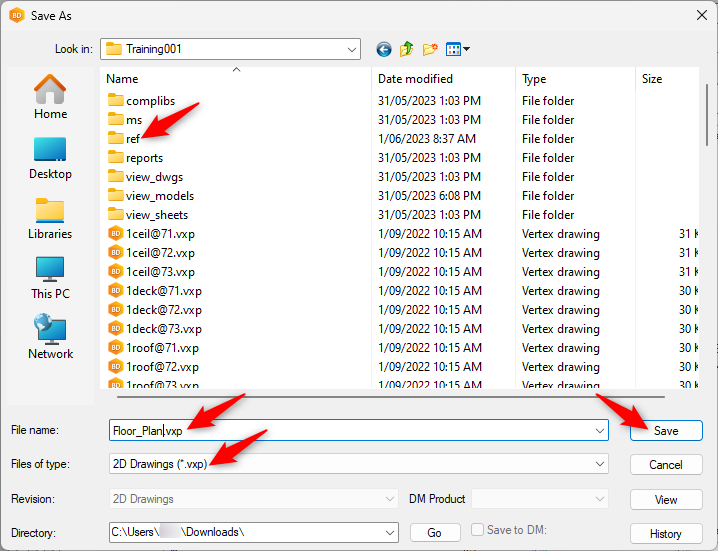
Generally it is a good practice to save the reference files in  'ref' ( reference ) folder under shared \ project \ project name \  'ref'  ( if reference folder doesn’t exist, just create a new folder with the name ref )


Import reference file to vertex


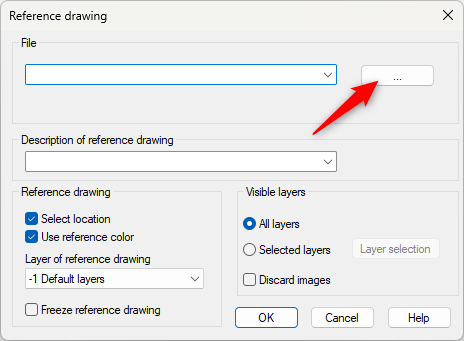
  • Click on ... to select the reference drawing file you want to import to vertex

Reference drawing Field Description :
  • File - You can open the reference drawing from a folder by file name. When you click the button, the Windows Open File dialog box will be displayed.
  • Reference drawing description - You can enter the name of a reference drawing. Name makes it's easier to recognize the reference drawing, when you view the properties of a reference drawing added to, by the Reference Drawings> Properties function.
  • Select location - You can point the position of the Reference drawing in the drawing window, if you select 
    Click position of the drawing. Before selecting the drawings location, you can, for example, mirror or rotate the reference drawing, or change the scale of the reference drawing using auxiliary functions. Auxiliary Functions for Selecting an Element's Location If you select , the reference drawing is positioned so that the drawings absolute zero points meet.
  • Use reference color - You can add the reference drawing to the drawing window either with reference colors or actual colors. The reference drawing is added by the reference color, if you select
     Use reference color.
  • Visible layers - You can select the layer, in which the elements of the reference drawing will be drafted. The Default layers or another layer will be selected by default in the field. If you select the Default layer option, the elements of the reference drawing will remain on the original layers in the drawing.
  • The default option selected in the field is defined in the setup file user \ 'SETUP' with the keyword  
  • set.refpicleveldefault.on. 
  • Freeze reference drawing - You can freeze the reference drawing by selecting Freeze reference drawing.
    • When you open the drawing, in which is Freeze reference drawing, the reference drawing is not updated, even if the original drawing had changed.
    • If you move the frozen reference drawing, it is not updated. Moving a Reference Drawing
  • Visible layers - You can select all layers of the reference drawing visible
     All Layers.
    • If you want to certain layers to be visible, first select the
       Selected layers.
    • Select visible layers by clicking Layer selection button. Select the visible layers in the dialog box.
  • Discard images - Vertex ED/HD: You can dismiss raster from the drawing when adding the reference drawing Discard images.


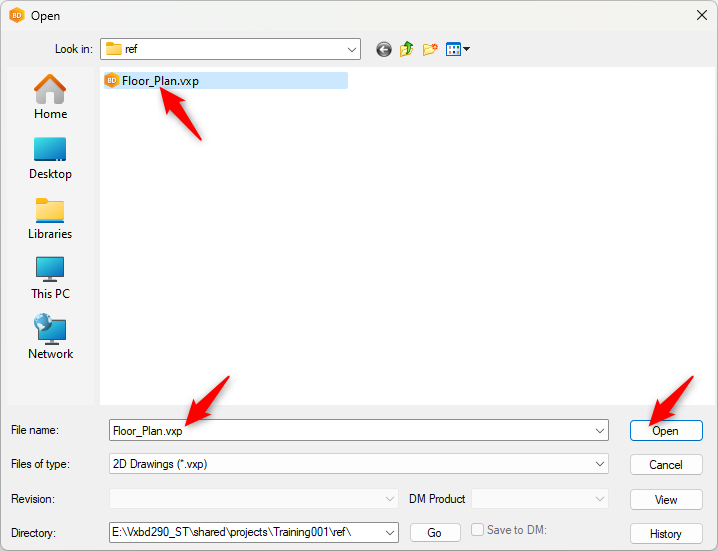
  • To find the reference file go to shared \ project \ project name \ ref
  • Click on Open


  • The XYZ.vxp reference drawing is successfully loaded in the layout. 


ADDITIONAL TOPICS


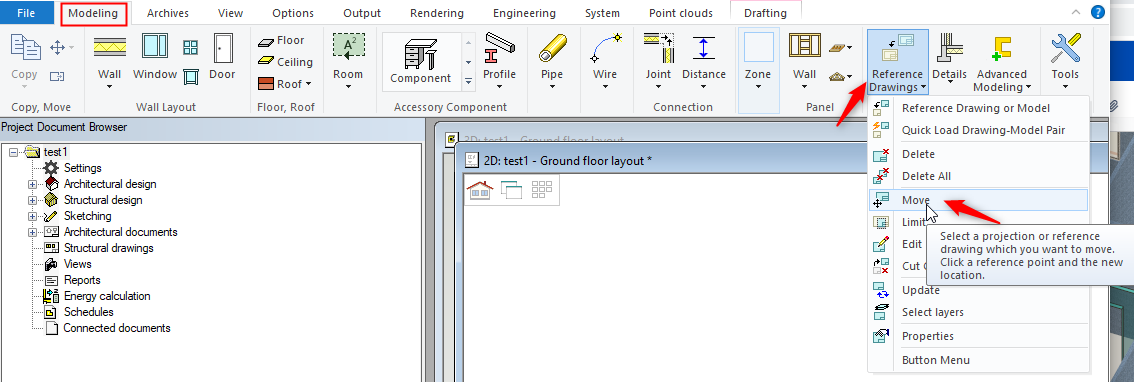
How to move reference drawings in a model 

If the reference drawing in the model is too far away, you can move the reference drawing to the origin point (Green cross 

 ). Just follow the steps shown below

1.  Switch to ground floor wall layout  ( or the layout where the reference drawing is added )

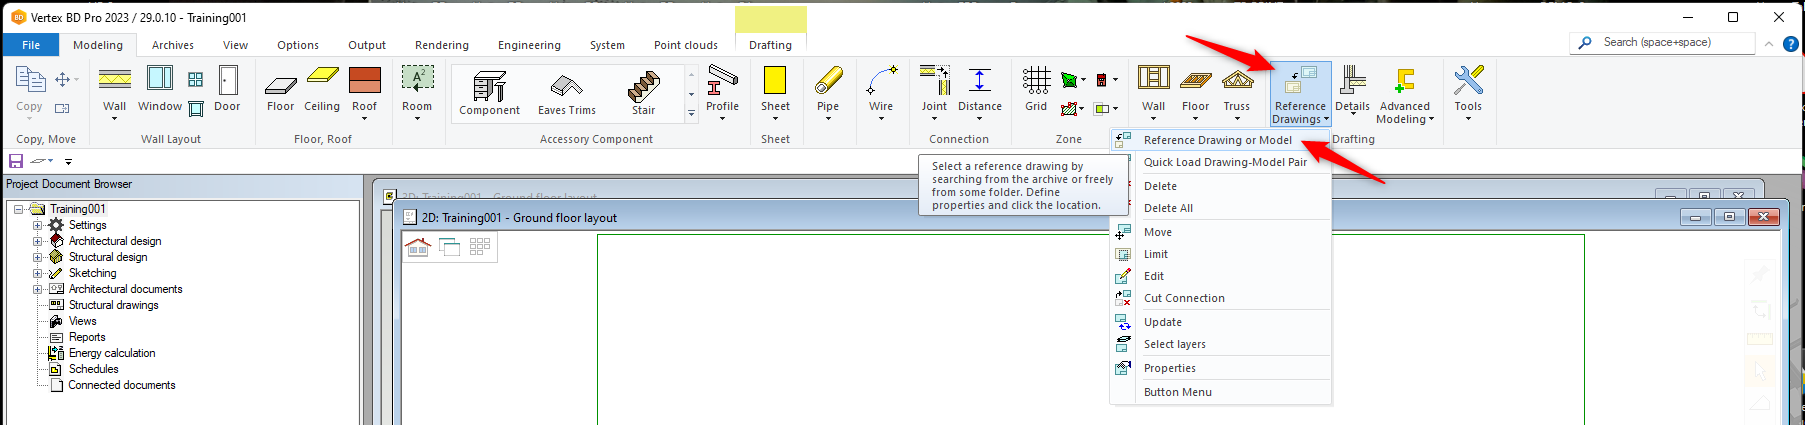
2.  In 'Modelling' tab click on 'Reference Drawings' icon and form the drop-down menu click 'Move'

3.  Select the reference drawing

4.  Pick the point ( in reference drawing ) and move the reference drawing to the Green cross

( Origin Point )


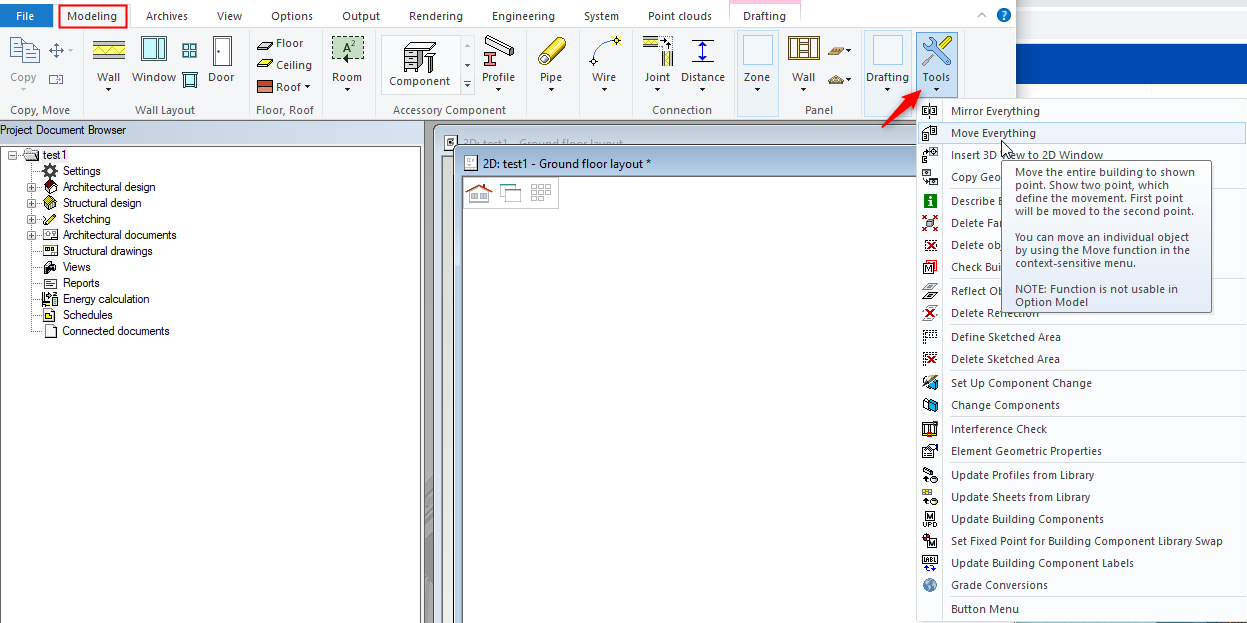
How to move whole model to Origin Point

To move the whole model to origin point follow the steps shown below

1.  Switch to ground floor wall layout

2.  In 'Modelling' tab click on 'Tools' icon and form the drop-down menu click 'Move Everything'

3.  Select the reference point ( pick the point in the model ) and follow the prompt.

4.  Select the location origin Point ( Green cross 

  ).


JavaScript errors detected

Please note, these errors can depend on your browser setup.

If this problem persists, please contact our support.