

Exercise 8: Mirroring of parts and subassemblies in an assembly
This exercise was carried out with version 27.0 (Vertex 2021).
In this exercise you will learn to
-
To interpret whether a part or assembly is symmetrical or not. This becomes clear when looking at the geometry to be mirrored.
-
If the original part can be used as is, as long as it is turned to the correct position, the part is symmetrical.
-
If the part cannot be mirrored by turning it to a new position, the part is not symmetrical, so a mirrored part must be manufacture.
-
-
To determine for a part whether it is symmetric or not (Needed only when it is assumed that the part will be mirrored in the assembly).
-
To mirror parts and subassemblies.
-
Save mirrored (non-symmetrical) parts and assemblies as new models.
Functions to be used:
-
File > Save as New.
-
Properties
-
Symmetrical / Not symmetrical
-
-
Other functions > Mirror
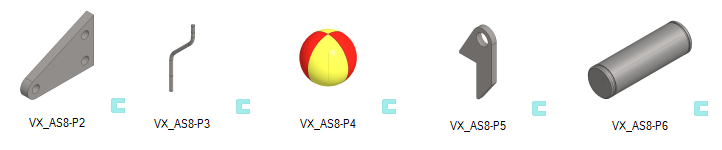
Get a project that includes the necessary parts
-
Download the zipped Vertex project (VX_AS8_PARTS.vxz) here.
-
Drag the file from the downloads section of your Internet browser onto Vertex G4.
-
When the program asks for an opening, answer yes.
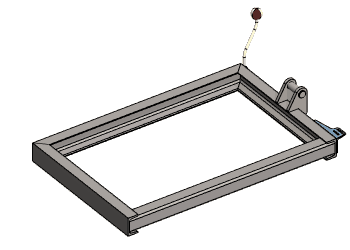
Model VX_AS8-A3 and its subassemblies and parts:
Save the assembly as a new one
-
File > Save as New (> Save as New).
-
Enter the ID and Archive data and create a new project or select the old one.
Open part VX_AS8-P1 and edit the properties
-
Open the part VX_AS8-P1
-
Either by selecting it from the assembly and the right-click function: Open Model.
-
Or by selecting it from the assembly and the right-click function: Edit.
-
Or File > Open (or press

-
-
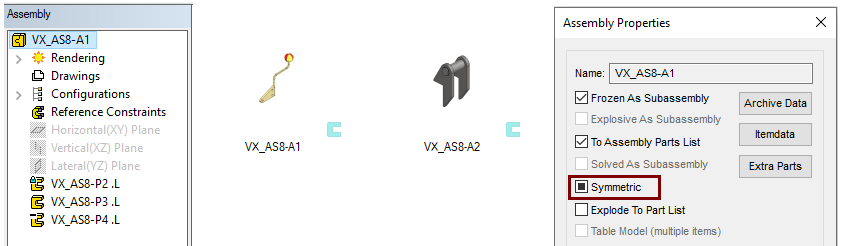
Right-click function: Properties.
-
Change Symmetry to non-symmetric:

-
Click the Symmetric box once or until it is empty.
-

-
This is the default settings for all parts and assemblies.

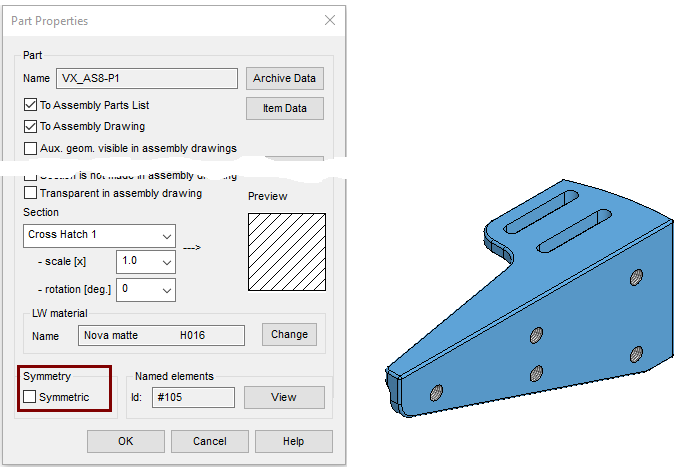
If a part or assembly has a single plane penetrating space with respect to which the part or assembly is symmetrical, then the model is symmetrical, ie it can then be rotated to obtain its mirror image position.
Define the symmetry of the other parts
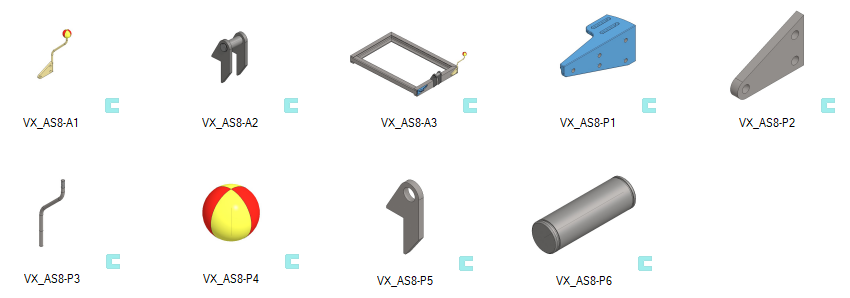
Open parts VX_AS8-P2, VX_AS8-P3, VX_AS8-P4, VX_AS8-P5 and VX_AS8-P6 and determine whether they are symmetrical or not.
-
Right-click function: Properties.
-
Select either symmetry
-
Save the models: File > Save or Ctrl S.
-
Remove the part from Vertex desktop.
Edit the subassemblies and define their symmetry
Open assemblies VX_AS8-A1 and VX_AS8-A2 and determine whether they are symmetrical or not.
-
Because the parts in them have changed, update the parts with the right-click function: Update All.
-
Select the main symbol from the feature tree of assembly.
-
Right-click function: Properties.
-
Select either symmetry
-
Save the models: File > Save or Ctrl S.
-
Remove the assembly from Vertex desktop.
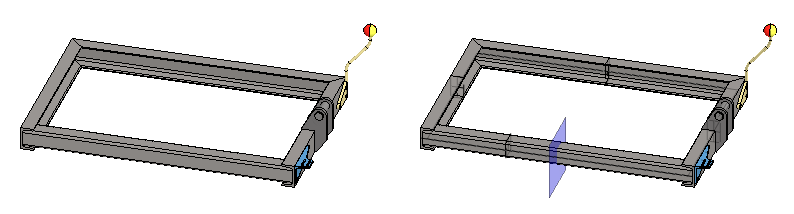
Open the main assembly (which you saved) and display the mirror plane.
The frame structure consisting of profiles is modeled symmetrically, so the Lateral(YZ) Plane of the assembly can be used as a mirror plane.
-
Because the parts have changed, update the models with the right-click function: Update All.
-
In the feature tree, click the Lateral(YZ) Plane.
-
Right-click function: Restore.
The auxiliary plane, like any other auxiliary geometry, can be shown and hidden with the 
function on Tool Strip: Show reference Geometry 
Mirror part and subassemblies
Part:
-
Click the part VX_AS8-P1.
-
Right-click function: Other function > Mirror.
-
Click the Plane (which was restored a moment ago).
-
When asked "Maintain original?", Click: Yes.
Assemblies:
-
Click a subassembly (VX_AS8-A1 and separately VX_AS8-A2) either from the feature tree or in the desktop the sub-assembly's part and Mini Toolbar function

-
Right-click function: Other function > Mirror.
-
Click the Plane (which was restored a moment ago).
-
When asked "Maintain original?", Click: Yes.
Expand the selection from part to assembly
After clicking a part, a Mini Toolbar appears above the cursor, with the button of which you can select the subassembly where the part is located.
-
If the part were in a deeper structure, then the next
-

-


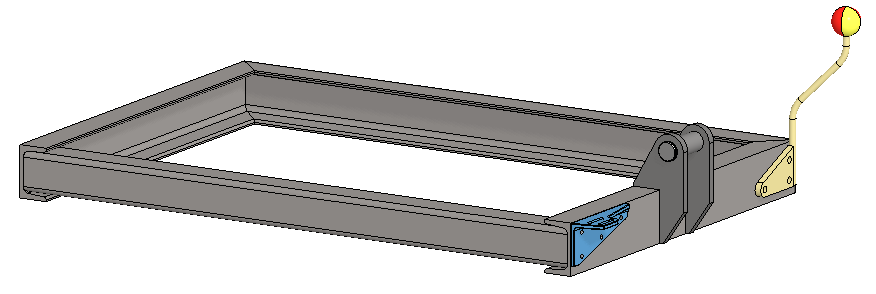
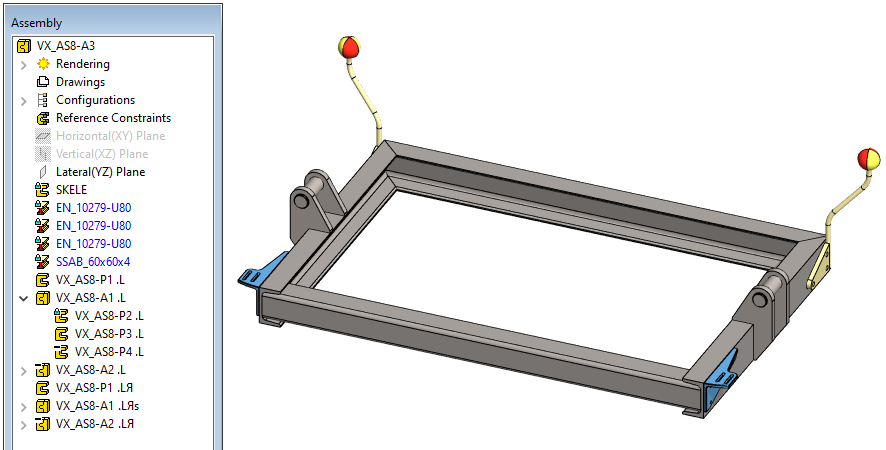
After mirroring, check that the features of the feature tree match those of the feature tree shown below.


The following parts and subassemblies are symmetrical:
-
VX_AS8-P2, VX_AS8-P3, VX_AS8-P4, VX_AS8-P5, VX_AS8-P6 ja VX_AS8-A2.
The following part and subassembly are not symmetrical:
-
VX_AS8-P1 ja VX_AS8-A1.
Save the non-symmetric part as a new
-
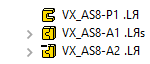
Click the mirrored part VX_AS8-P1
-
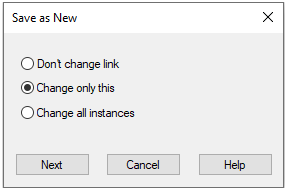
Right-click function: Save as New.
-
In the Save As dialog, select the option: Change only this. (also Change all instances is valid because the non-mirrored part has a different suffix and is not interpreted as the same part as the mirrored part).
-
Enter the ID and Archive data.
Save the non-symmetric assembly as a new
-
Click the mirrored part VX_AS8-A2
-
Right-click function: Save as New.
-
In the Save As dialog, select the option: Change only this.
-
Enter the ID and Archive data.
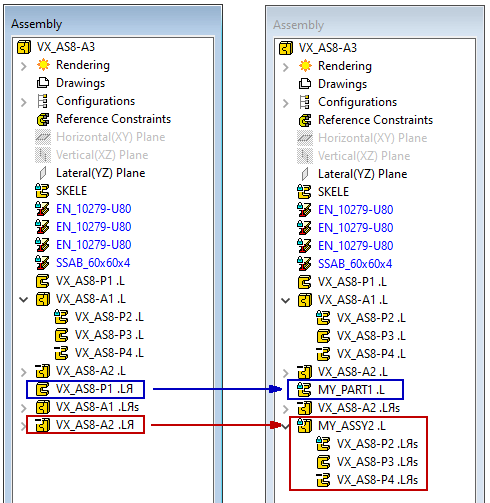
Open the feature tree of the newly saved subassembly.
-
You will see that the mirrored parts are symmetrical (
-
If any of those parts were mirrored as non-symmetric (
-
In general, non-symmetrical parts found under the mirrored assembly must be saved as new parts.
Create a drawing for the model
For more detailed instructions, see the Modeling parts course exercise 5 Drawing of Model.
The old way of marking "Another part is made as a mirror part" in the drawing is no longer an acceptable way today.
-
Once the right- and left-handed models and their drawings are made, this reduces production errors.
-
Mirroring geometry with CAD programs is so easy that why take a shortcut.
After the asymmetrical part is mirrored, the mirrored part no longer goes to the non-mirrored place, so each of these needs its own stock identifiers (spare part number), i.e. a unique item.
You can also add a new configuration for the model and mirror the model in a new configuration. When you add that part to assembly, you can add a right- and left-hand part to the assembly separately.
-
In this case, the model does not need to be mirrored in the assembly.
Save the model
-
File > Save or click


Download the pre-mirrored model here (VX_AS8.vxz)