
The idea to pass engineering of trusses with roof panels above is to define panel members and connections so that each member has at least two bearings or member function property is set so that member is ignored in engineering. Bearing span direction of panel is selected based on surrounding trusses and other bearing objects. Member function property can be used to define load path, support relations and to ignore some panel members in engineering.
Case 1
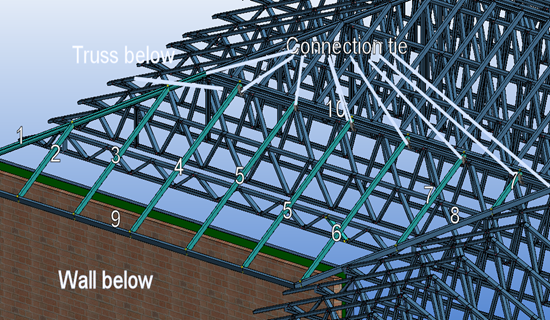
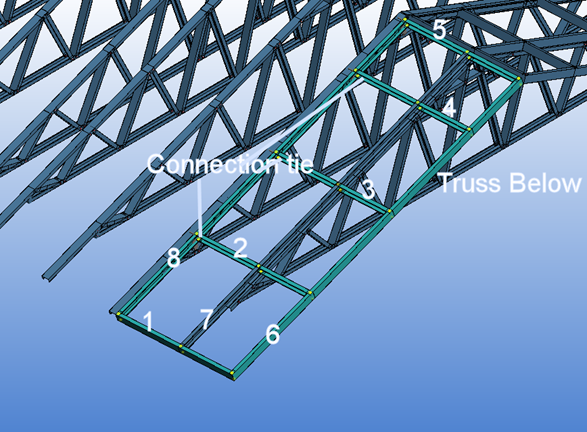
Make sure that members 1-6 and valley rafter 8 touch exterior wall bearing frame below. Set function property of members like in table below. Rake members 9-10 are ignored in engineering. Connect upper end of rafters 4-7, hip rafter 1 and valley rafter 8 to truss top cord below with connection tie.
|
Member |
Function |
|
1 |
Hip Rafter |
|
2 |
Rafter |
|
3 |
Rafter |
|
4 |
Rafter |
|
5 |
Rafter |
|
6 |
Rafter |
|
7 |
Rafter |
|
8 |
Valley Rafter |
|
9 |
Rake |
|
10 |
Rake |
Case 2
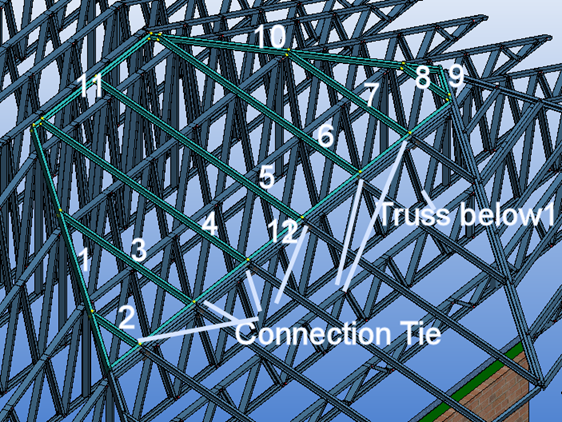
Make sure that members 1, 3 - 7 touch trusses below. Set function property of members like in table below. Rake members 9, 11 and 12 are ignored in engineering. Connect lower end of rafters 2-7 to top cord of truss below 1 with connection tie. Connect rafter 8 lower end with connection tie to valley rafter of the other roof panel.
|
Member |
Function |
|
1 |
Hip Rafter |
|
2 |
Rafter |
|
3 |
Rafter |
|
4 |
Rafter |
|
5 |
Rafter |
|
6 |
Rafter |
|
7 |
Rafter |
|
8 |
Rafter |
|
9 |
Rake |
|
10 |
Hip Rafter |
|
11 |
Rake |
|
12 |
Rake |
Case 3
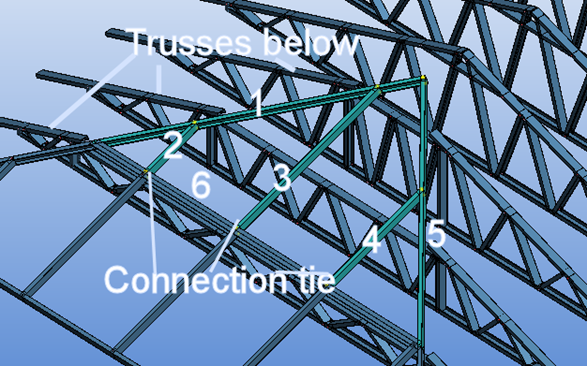
Make sure that members 1, 3-5 touch trusses below. Set function property of members like in table below. Rake member 6 is ignored in engineering. Connect lower end of rafters 2-4, hip rafter 1 and 5 to top cord of truss below with connection tie.
|
Member |
Function |
|
1 |
Hip Rafter |
|
2 |
Rafter |
|
3 |
Rafter |
|
4 |
Rafter |
|
5 |
Hip Rafter |
|
6 |
Rake |
Case 4
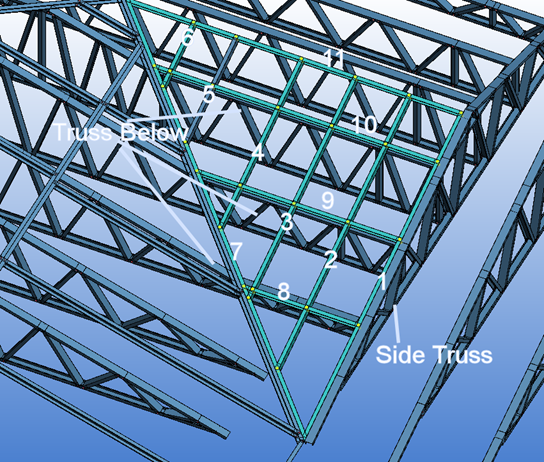
Make sure that members 1 and 7 touch exterior corner walls bearing frame below. Set function property of members like in table below. Rake members 8-11 are ignored in engineering. Upper end of rafters 2-6 and upper end of valley rafter 6 lie on truss below, there is no need of connection tie now. Make sure that rafter overhang is not more than allowed. Use truss backer connection plates to connect rafter 1 to side truss.
|
Member |
Function |
|
1 |
Rafter |
|
2 |
Rafter |
|
3 |
Rafter |
|
4 |
Rafter |
|
5 |
Rafter |
|
6 |
Rafter |
|
7 |
Valley Rafter |
|
8 |
Rake |
|
9 |
Rake |
|
10 |
Rake |
|
11 |
Rake |
Case 5
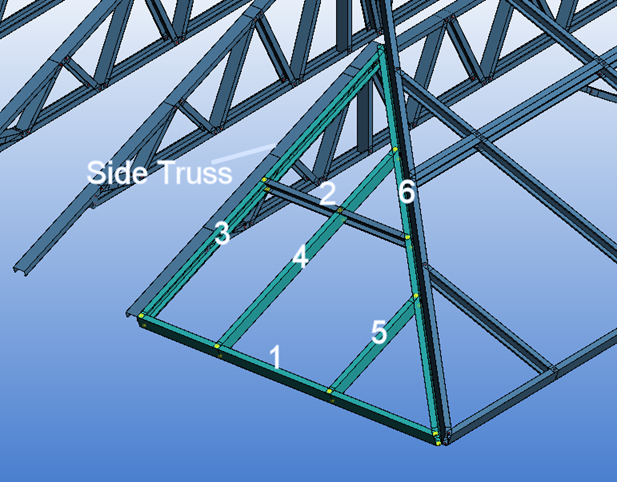
Make sure that members 2-5 touch truss below. Set function property of members like in table below. Rake members 1, 6-8 are ignored in engineering. Use connection tie to connect rafters 2-5 ends to side truss top chord.
|
Member |
Function |
|
1 |
Rake |
|
2 |
Rafter |
|
3 |
Rafter |
|
4 |
Rafter |
|
5 |
Rafter |
|
6 |
Rake |
|
7 |
Rake |
|
8 |
Rake |
Case 6
Make sure that hip rafter 6 touch exterior corner wall bearing frame below. Set function property of members like in table below. Rake members 3 - 5 are ignored in engineering. Use connection tie to connect rafters 1 and 2 ends to side truss top chord. Use connection tie to connect upper end of hip rafter 6 to side truss top chord.
|
Member |
Function |
|
1 |
Rafter |
|
2 |
Rafter |
|
3 |
Rake |
|
4 |
Rake |
|
5 |
Rake |
|
6 |
Hip Rafter |