
You can use height levels to manage the heights of building components in a project. Components added to the building are constrained to the height levels. When you move a height level, the components constrained to it will move along with the level. When you move a building component, it gets an offset in relation to the height level, but the constraint to the height level remains.
This topic describes how to move height levels in a project in order to change the room height.
Check the Height Level Name
If you are not sure to which height levels the components are constrained to, you can check the name of the height level as follows:
-
Select a building component.
-
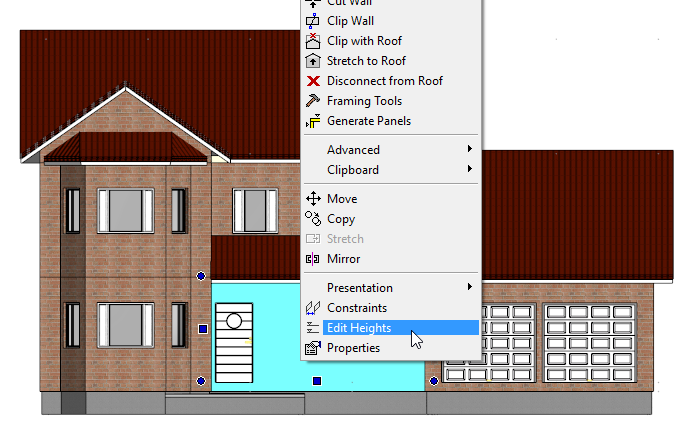
Right-click to open the context-sensitive menu.
-
Select Edit Heights.
-
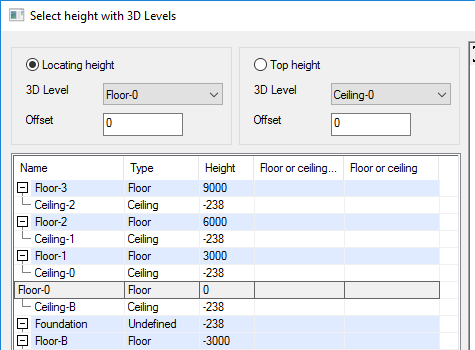
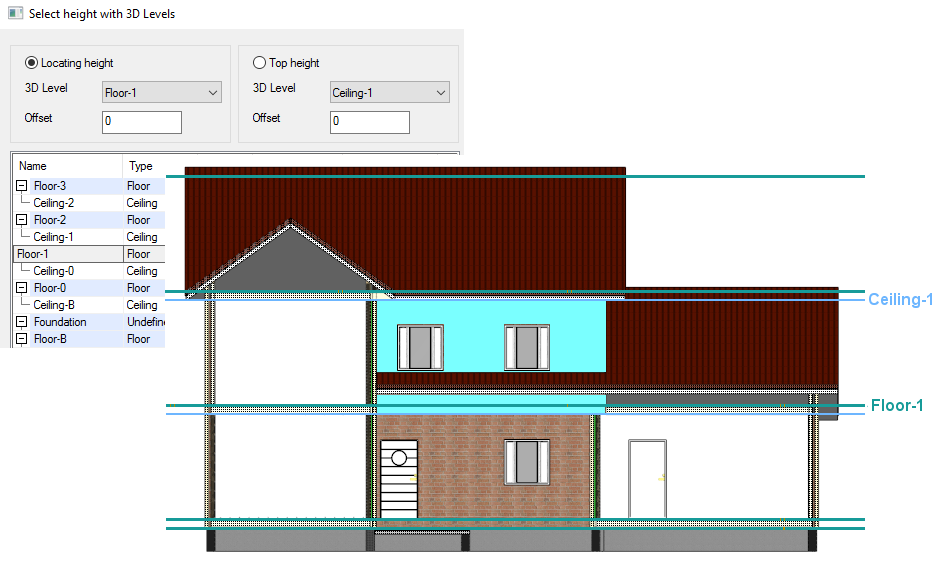
A dialog box opens where you can see the current height level the component is constrained to. In this example, the bottom of the ground floor wall frame is constrained to the Floor-0 level, and the top to the Ceiling-0 level.

-
Close the dialog box by clicking Cancel.
You can check the height level of the 1st floor wall in the same way.
Move the Height Levels
Move the height levels Floor-1 and Floor-2. When you move the levels
-
the sub-levels Ceiling-0 and Ceiling-1 will be moved along and
-
all the components constrained to these levels will move along
First press Esc to clear all selections.
-
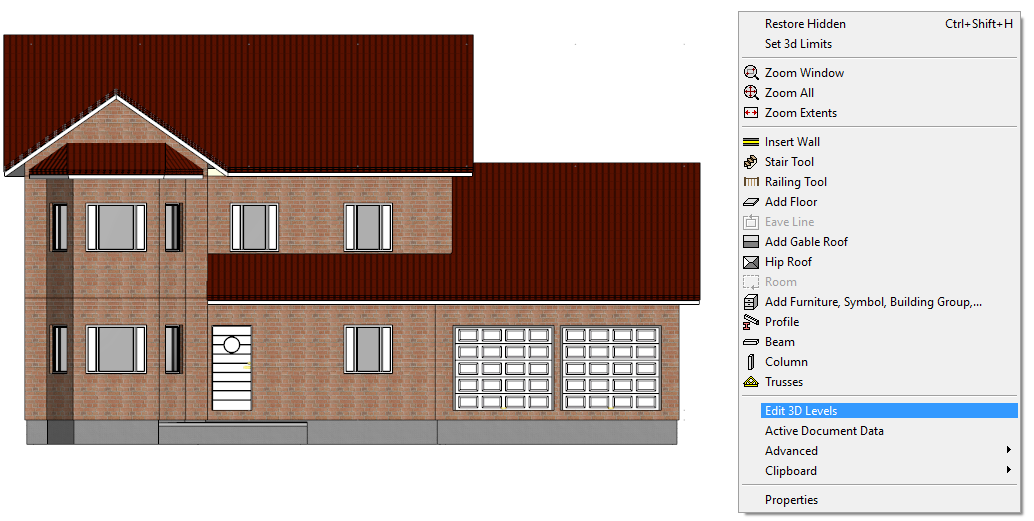
Right-click in the working window area to open the context-sensitive menu.
-
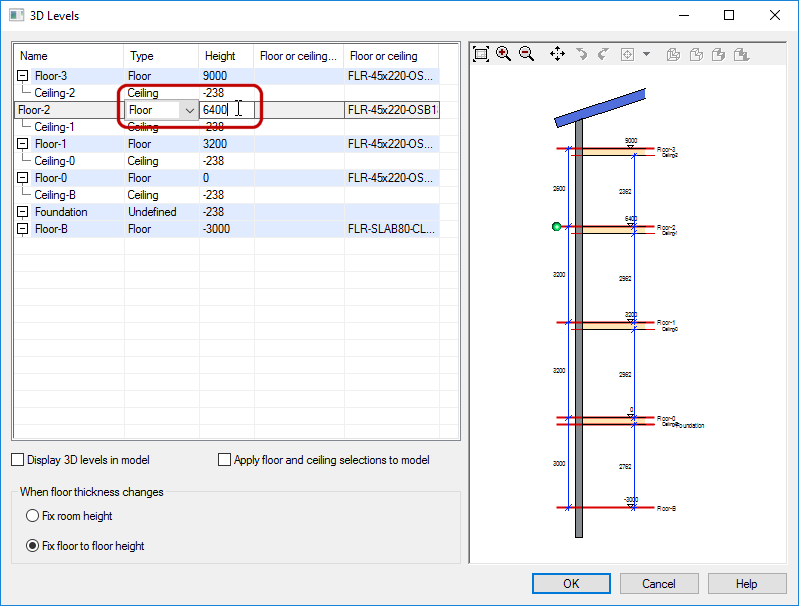
Select Edit 3D Levels.
-
Edit the height levels Floor-1 and Floor-2.
-
Click OK.