Change truss number to Unique number and in a sequence
-
Truss numbers can be changed to unique number.
Unique truss number can be set in a sequence ( For example 1, 2, 3... from left to right or right to left )
-
First you need to change truss numbers to unique numbers.
-
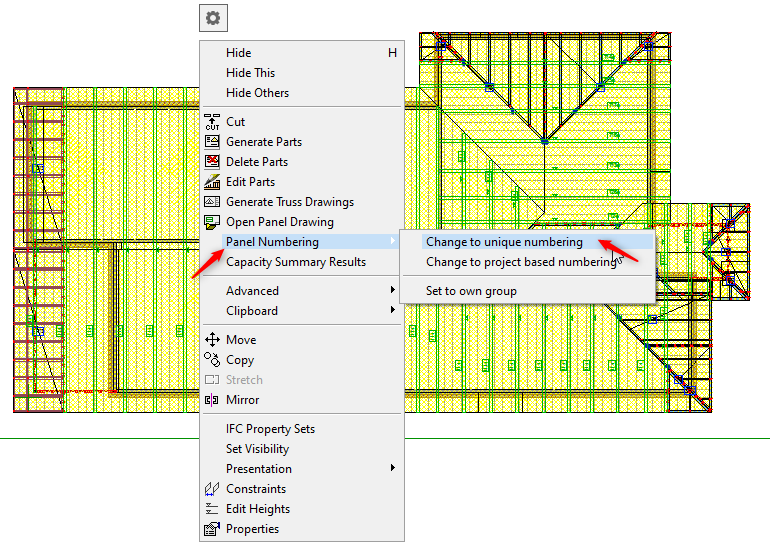
So select one truss, hold down CTRL A to select all trusses.
-
Right click and from the contractual menu click on 'Panel Numbering' → 'Change to Unique numbering'
-
Truss numbers have been changed to 'unique numbering'
-
Before you change the truss number sequence, you can hide items /objects ( in 2 D roof framing model pair ) for better visibility while you select the truss labels in a sequence.
-
Remember the renumbering will follow the sequence, in which you select the truss labels one by one. for example from left to right
-
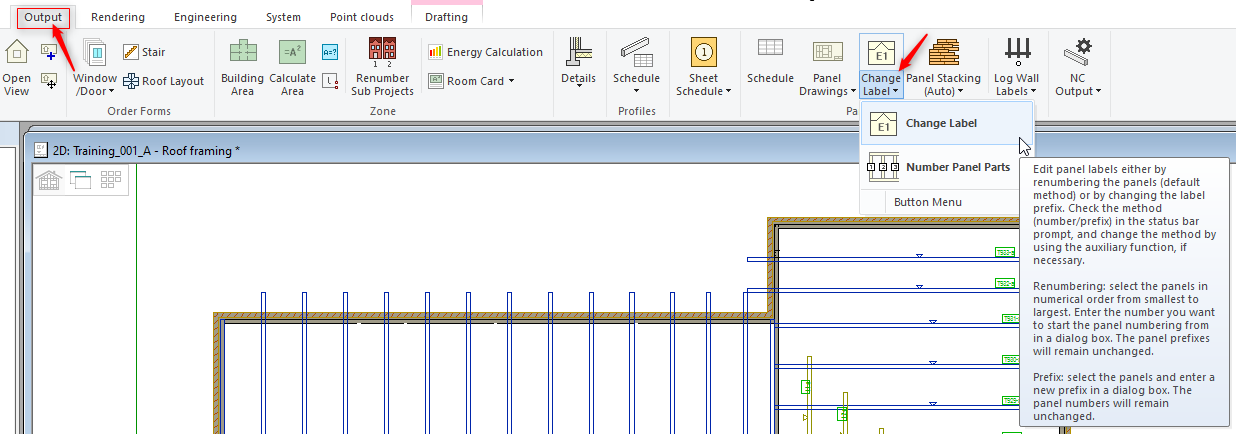
In 'Output' tab click on 'Change labels' and form the drop down list click on 'Change label'
-
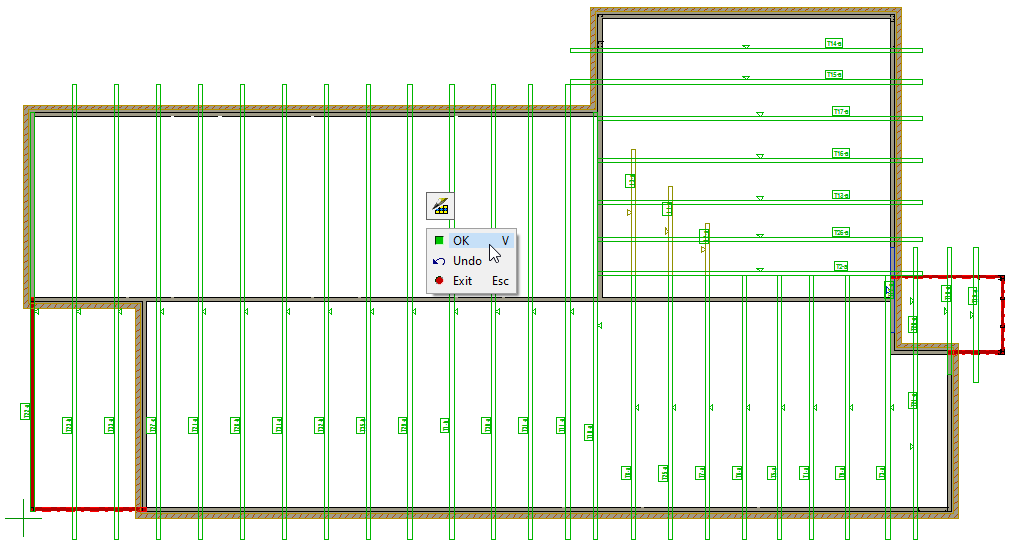
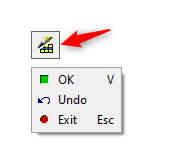
Select trusses one by one in a sequence from left to right. Once done right click and click on OK to confirm or press V.
-
In this case we will select truss labels from left to right.
-
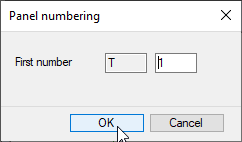
Choose the numbering that you want for the trusses to start with.
-
First you may have to change to 2. Since there are already truss labels that starts with 1, 2, 3... and so on.
-
Click on OK
-
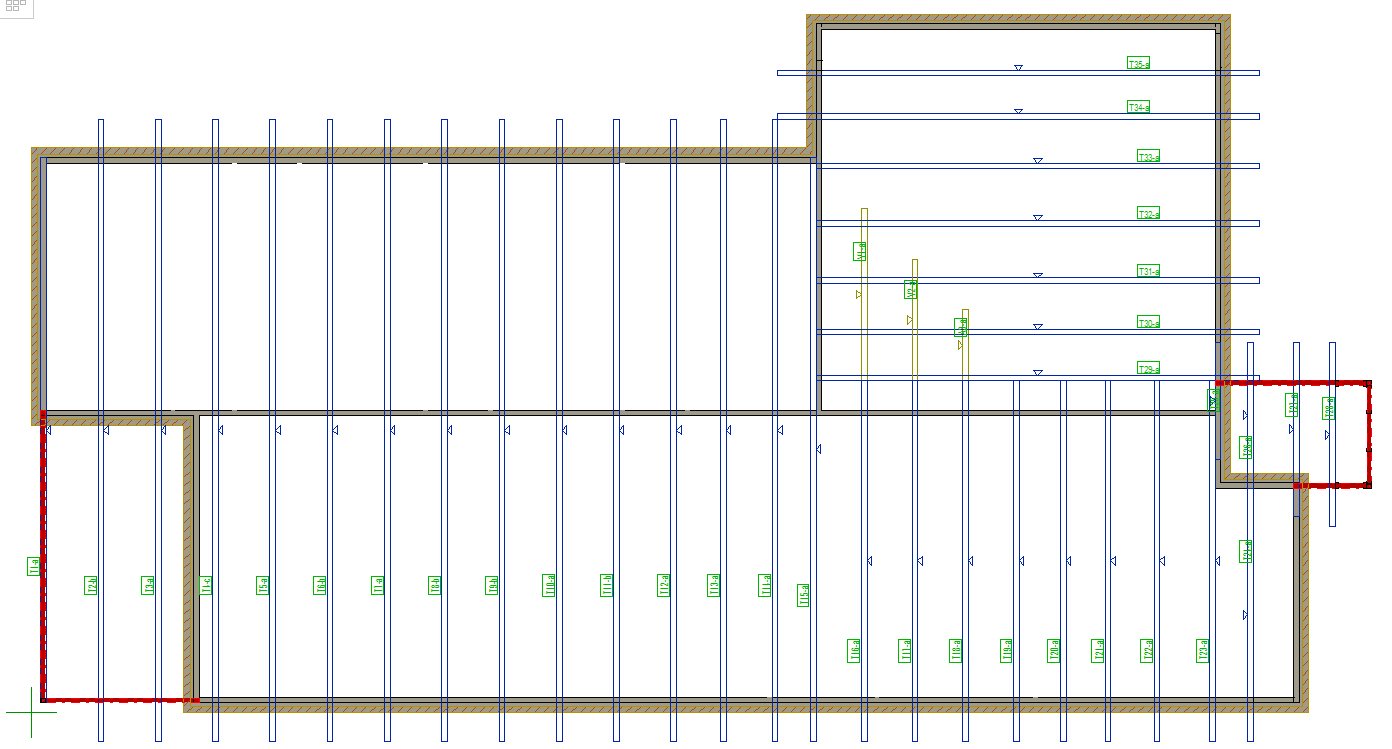
All truss labels of selected trusses ( in a sequence ) have been changed to 201, 202, 203.... and so on.

-
Now you follow the similar process shown above Only difference is that this time we will type 1 . ( Means truss labels will start 1, 2, 3... and so on )
-
Click on OK
-
All labels of selected trusses ( in a sequence ) have been changed to 1,2, 3.... and so on.
-
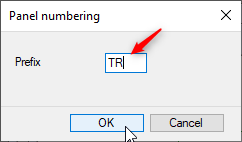
Similarly prefixes can also be changed ( for example T to TR )
-
In 'Output' tab click on 'Change labels' and from the drop down list click on 'Change label'
-
you can right click and switch to prefixes
OR
-
Select trusses ( hold down CTRL to select ore than one truss OR CTRL A to select all trusses ) right click and click on OK to confirm or press V.
-
You can change to any letter ( Prefix ) for example TR instead of T and click on OK
-
Selected truss/s Prefix will be changed to TR
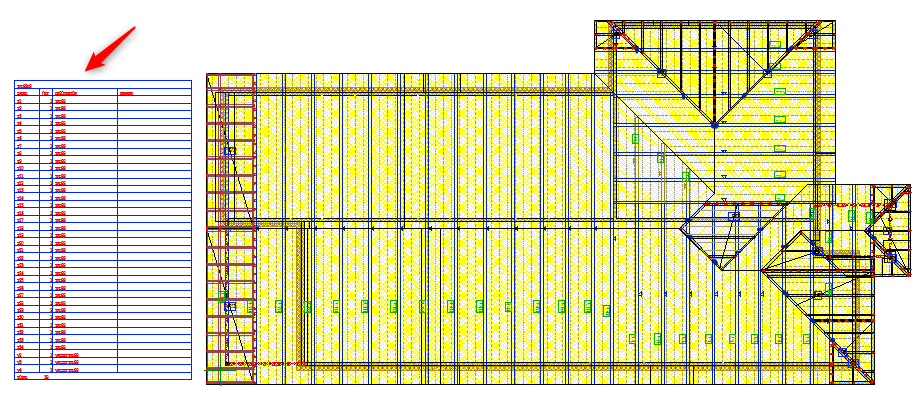
Create Truss Schedule
-
Truss schedule can be added to the Roof layout.
-
In 'Output' tab click on 'Schedule'

-
In the 'Select panel schedule' menu, select 'Trusses' and click on OK
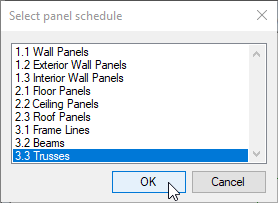
-
Place the schedule anywhere on roof framing layout to suit
Create truss engineering Drawings
-
Once you have finished engineering all trusses and the labels of all trusses have turned green, hit 'Save'.
-
Now truss engineering results drawings can be produced.
-
Go to 'Engineering' Tab, click on 'Trusses'
-
Select one truss and hold down CTRL A to select all trusses.
-
Right click and click on OK to confirm OR press 'V'.

-
Panel template drawings box opens. Select the template and click on OK
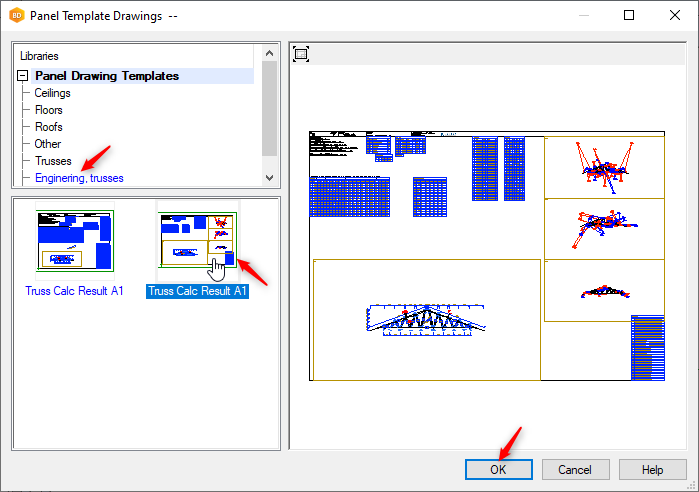
-
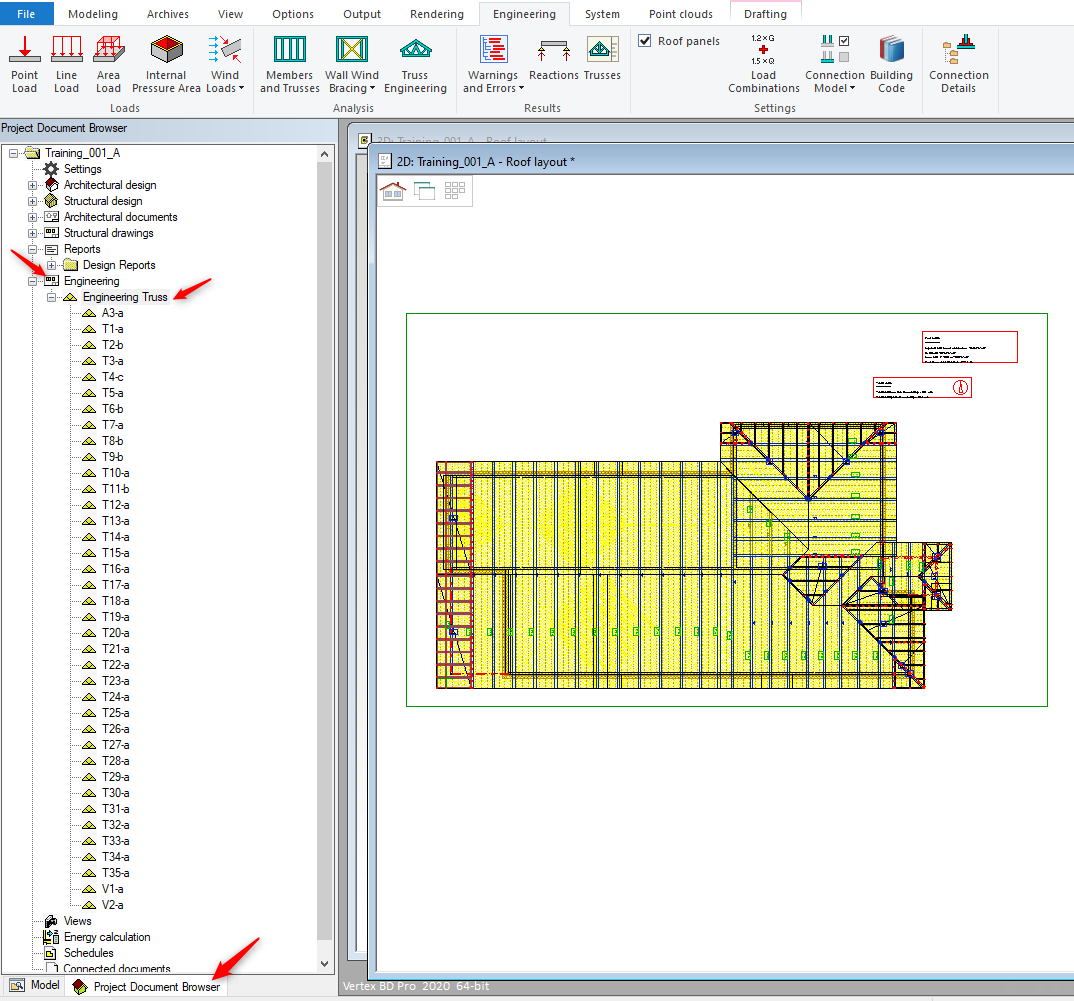
Vertex will take time to update all the truss drawings. When done you can open truss engineering drawings from 'Project Document browser' → 'Engineering' → 'Engineering Truss'
How to printout engineering drawings
-
Engineering results can be printed. You can check moment and axial force diagrams. Check presented supports are in correct locations etc.
-
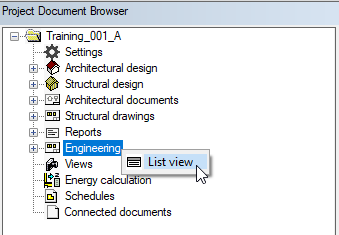
In 'Document Browser Window' right click on 'Engineering' and select 'List View'
-
Document Schedule box select the truss/s ( hold down CTRL key to select more than on truss) and click on 'Print'
-
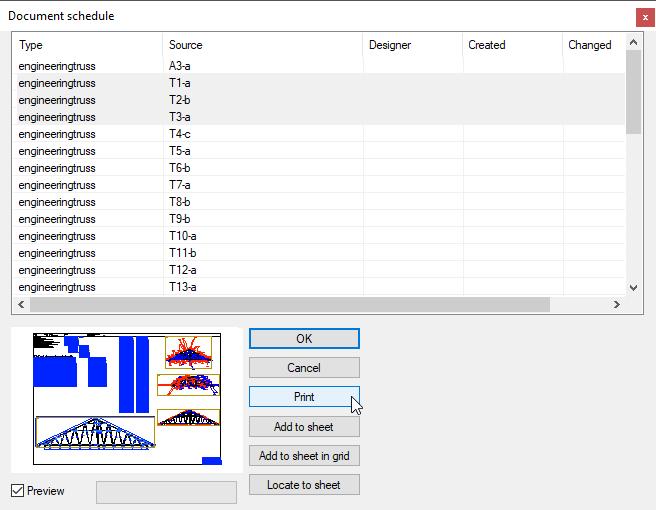
Select the printer, sheet and scale and click on OK
-
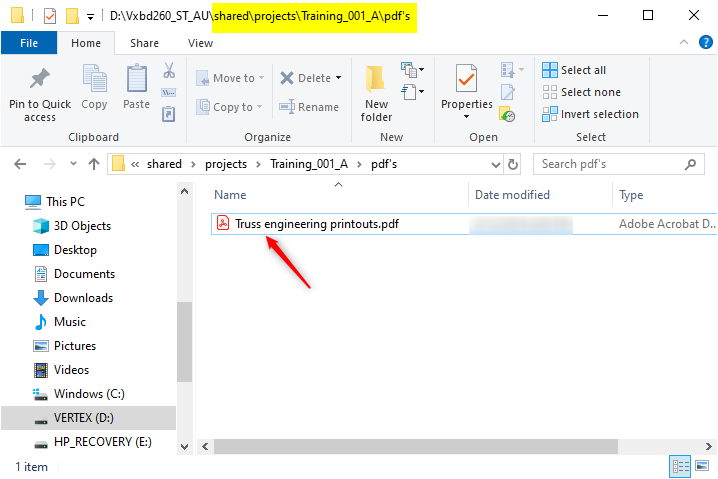
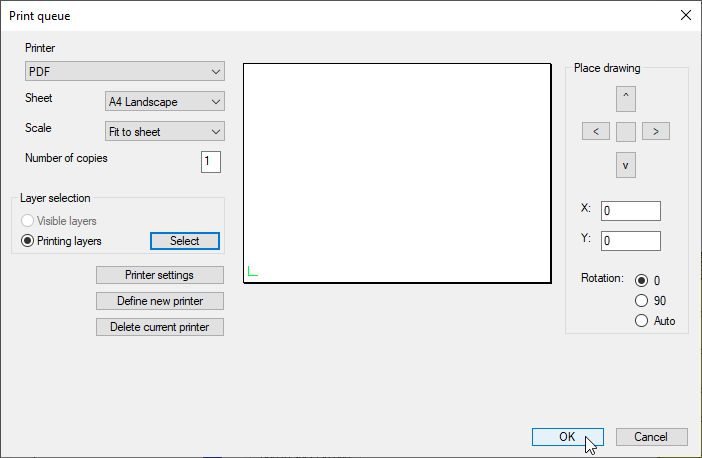
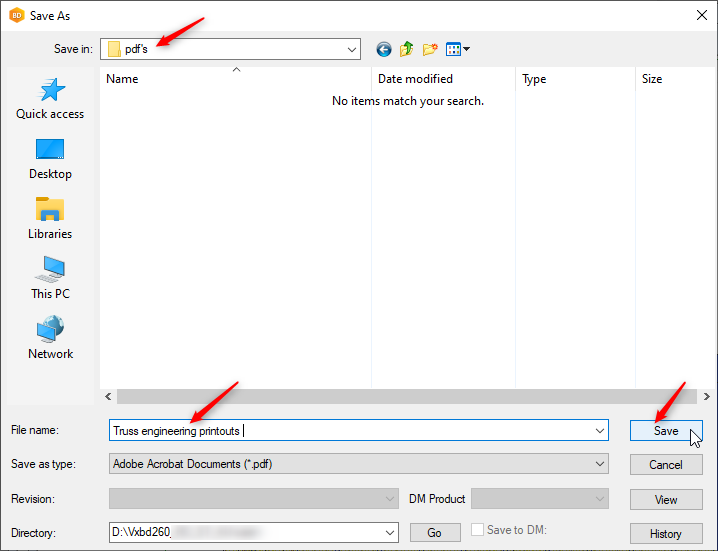
It is a good practice to save all the pdf drawings in Shared \ project \ project name \ pdf's
-
Create folder called 'pdf's' if it doesn’t exist.
-
Save all the PDF drawings in this 'pdf's' folder. That way if you export the the project and open in new computer all the PDF drawings stays with the project.
-
Now if you go to your shared \ projects \ project name \ 'pdf's' folder, you will find recently saved 'Truss engineering printouts' in there