
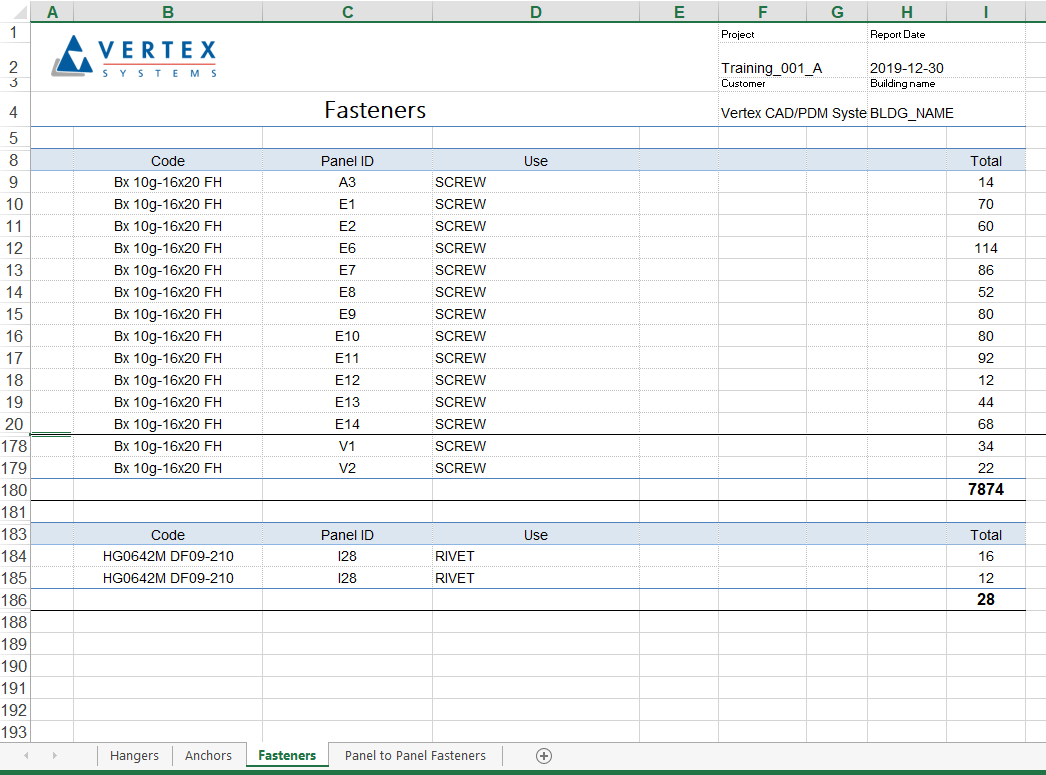
Material Reports
You can create a material report of a project in two different ways
1. Generate a material report to a Microsoft Excel file ( .xlsx ).
2. Collect the materials used in the project or the active drawing-model pair, and create a listing to a text file.
1. Generate a material report to a Microsoft Excel file
-
The source of the report is an XML file ( components.xml ). The components and attributes to be collected from the file, as well as the data sorting and the sheet layout, are defined in a template report, which is an xlsx file.
-
The basic software delivery includes preset template reports saved in a component library.
-
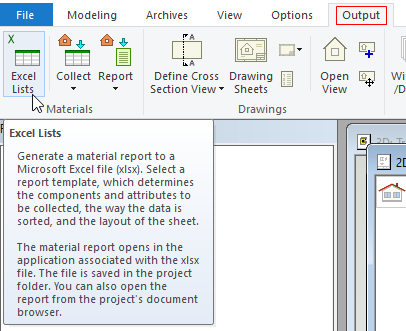
In 'Output' tab → click on 'Excel Lists'.
OR
-
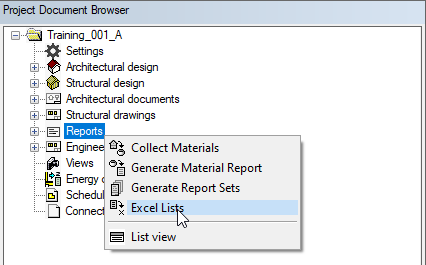
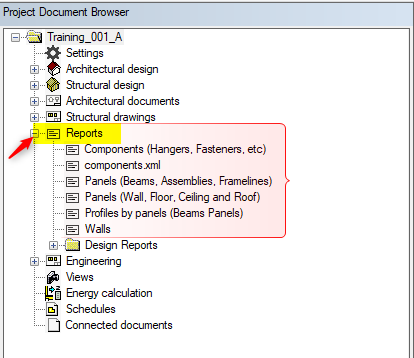
Select the function in the project's document browser:
-
Move the cursor over the title 'Reports'.
-
Right-click to open the context-sensitive menu.
-
Select 'Excel Lists'
-
-
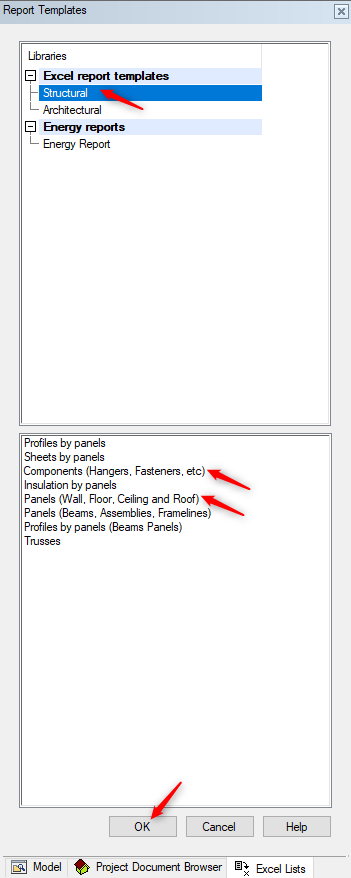
Select the library and selection group.
-
Select template report in a dialog box
-
Confirm by clicking on OK.
-
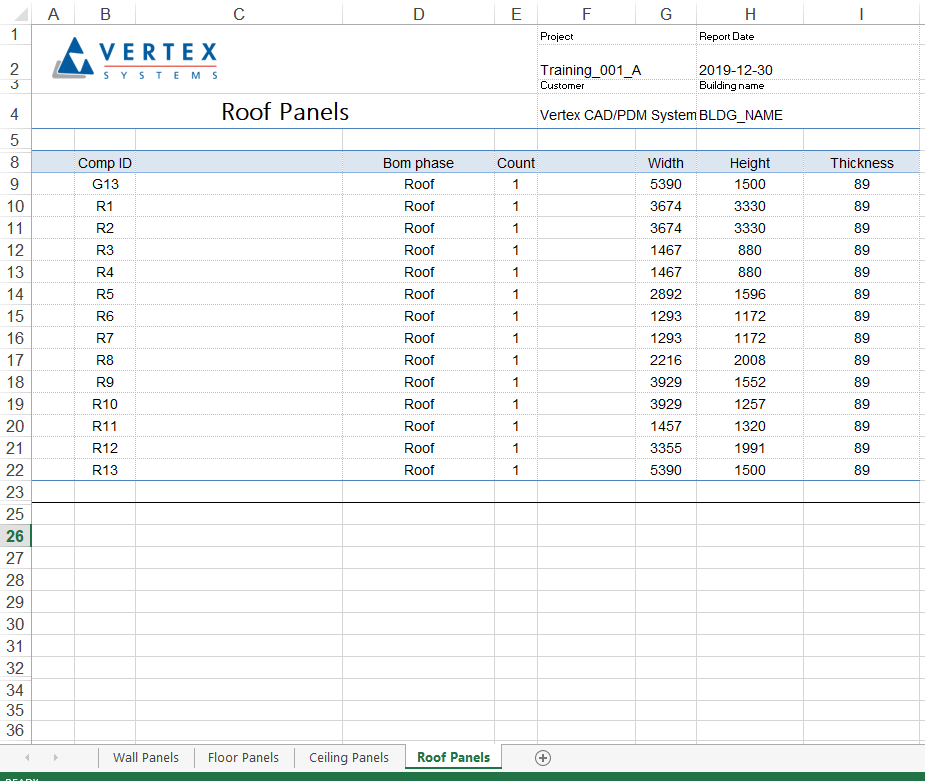
The material report is opened in Microsoft Excel.
-
The file is saved in the project folder.
-
You can also open the report from project's document browser.
-
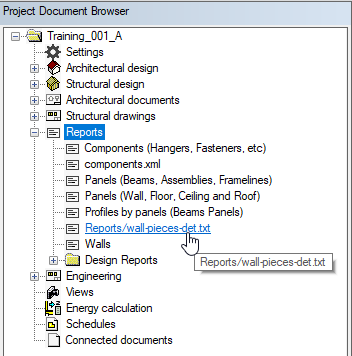
open the 'Reports' branch in the document browser, and double-click on the name of the report
Template Report Library can be edited. You can create your own library to which you can copy a template report from the system library. Change the parameters of a template report, such as the description text that will be shown in the template report list and in the project's document browser. Create a new template report to your own library by using an xlsx file saved in the custom \ complibs \ [ library ] folder.
2. Collect the materials used in the project or the active drawing-model pair, and create a listing to a text file.
-
Material data is automatically included in the geometry of the objects used in a project ( windows, doors, walls, etc. ). Material data is saved into the drawing-model pairs of the project as design work proceeds.
-
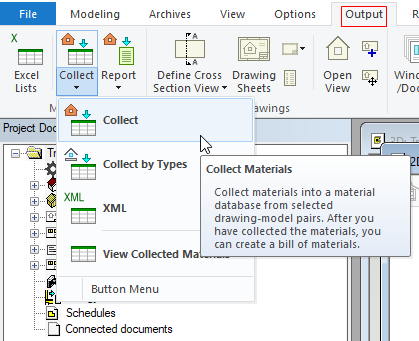
Begin creating a material report by collecting the materials into a material database. You can collect the materials in the following ways:
-
Collect the materials of all objects in the selected drawing-model pairs
-
Collect the materials of only the selected elements
-
Collect the materials of all objects of the selected object type
-
-
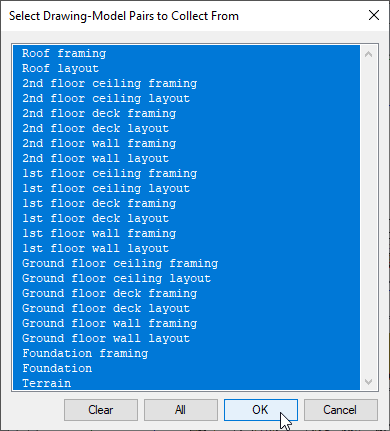
In this scenario we will collect materials for all the objects in the project.
-
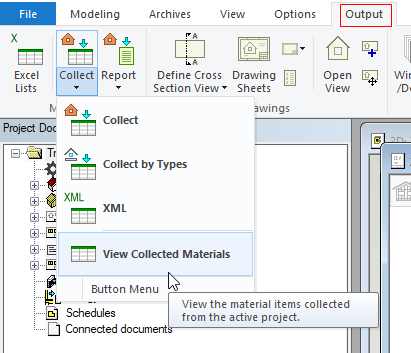
In 'Output' tab → click on 'Collect' icon and from the drop down menu click on 'Collect'
-
In this dialog box we will select 'All' and click on OK.
-
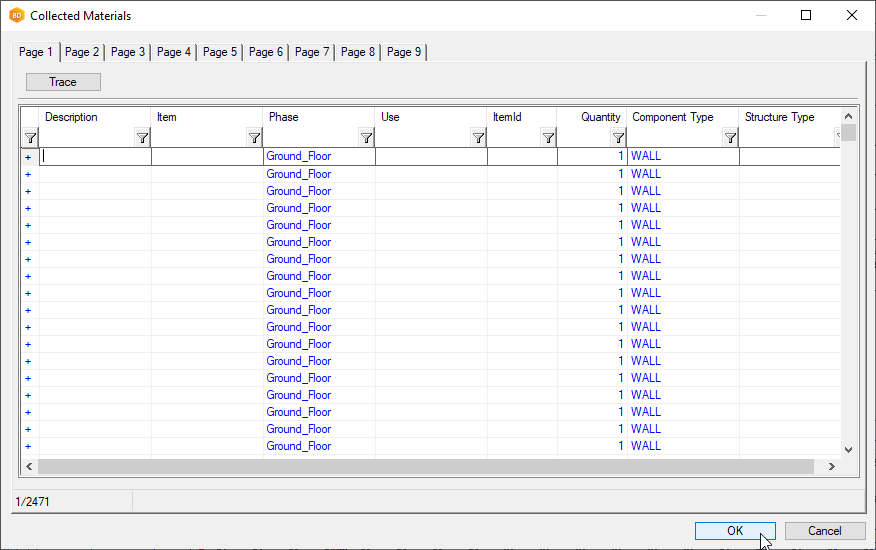
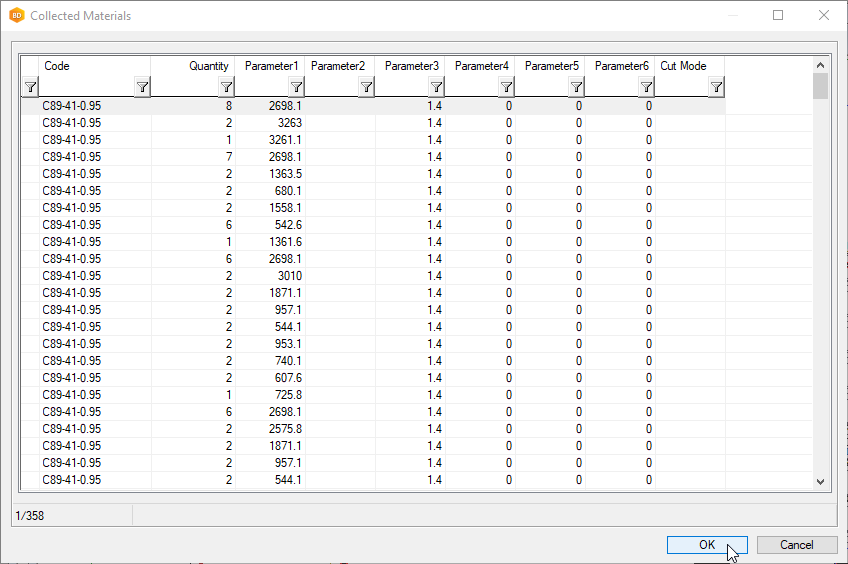
Vertex will collect the material and the 'Collected Materials' database view opens.
-
Click on OK and vertex saves the collected material in the database.
-
You can reopen the collected material register in 'Output' tab → click on 'Collect' icon and from the drop down menu click on 'View Collected Materials'
The material data collected in the material register is customer-specific. The register typically contains the following fields.
|
Code: |
The material code. |
|
Layer: |
The drawing-model pair in which the material is located. |
|
Quantity: |
The material quantity, which can be e.g. an area or a number, depending on the building component type. |
|
Component type: |
The component type of the element, e.g. WALL (wall), COMP_WINDOW (window). |
|
Parameter 1, 2, 3, etc.: |
The dimensions and properties of the material. For example, the parameters of a window include width, height, perimeter, area, frame depth and grille type. |
You can trace the element from which the material was collected as follows:
1. Move the cursor over the desired row in the database view.
2. Click the Trace button. The database view is closed, and the window that was active when you started collecting materials is activated again. If the selected element has existing geometry in the working window, its color will change.
3. You can return to the database view by selecting the Confirm function.
Save the material database by closing the database view with the OK button
Generating a Material Report
After you have collected the materials in the material register, you can create an individual bill of materials.
-
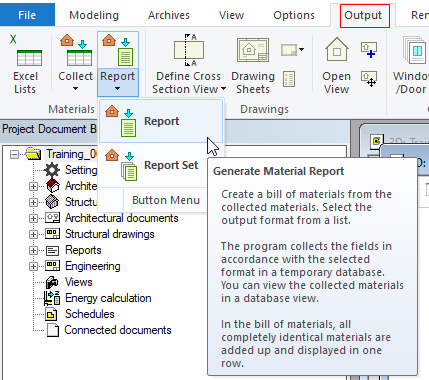
In 'Output' tab click on 'Report' and from the drop down menu Select 'Report'.
-
Select the output format for the Material Report.
OR
-
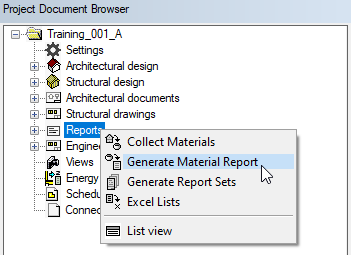
Select the function in the 'Project's Document Browser':
-
Move the cursor over the title 'Reports'.
-
Right-click to open the context-sensitive menu.
-
Select 'Generate Material Report'.
-
-
Select the output format for the Material Report

-
The program collects the fields in accordance with the selected format in a temporary database. You can view the collected materials in a database view.
-
Close the database view by clicking OK.
-
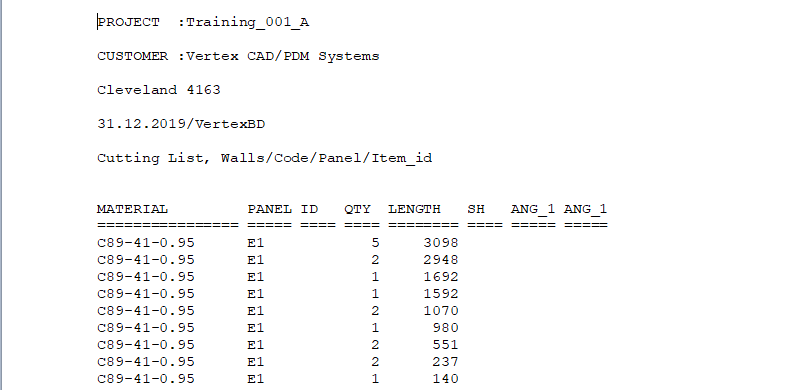
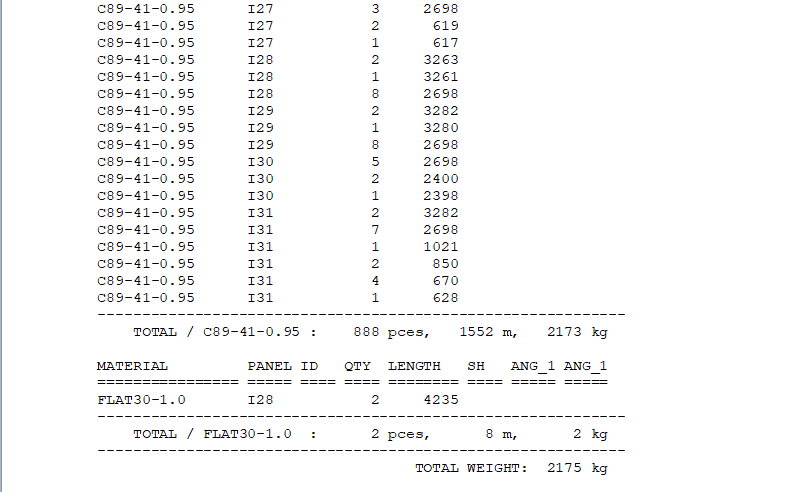
The bill of materials is opened in the text editing program defined in the setup file.
-
Close the text editing program.
-
Save the project by pressing Ctrl+S, and the project document browser is updated.
-
You can open the file for viewing from the document browser. Open the Reports branch in the document browser, and double-click the name of the file
The output formats for the bill of materials are customer-specific.
The different output format options have been defined in the setup file KOMPOT.
KOMPOT file determines the data to be collected in each bill, the list format file determining the layout of the bill, and the name of the file in which the bill is saved. The files are saved in the project folder with the .txt file extension.
Generating Report Sets
-
Several bill of materials can be combined to a material report set.
-
Different combination options and the material reports are defined in the REPORTS setup file. The material report set is a text file with the .txt extension. The material report set is opened in the text editing program defined in the setup file. The material report set can also be exported into other external applications, such as Excel.