One User Installation
These instructions cover the one user installation of Vertex CAD 2024 (30.0) program to a workstation computer.
Installation Package and Software License
Follow the instructions you have received to download the installation package, and save it to the C:\TEMP folder, for example.
Extract the compressed file as follows, for example: select the file and Extract All... from the right-click menu. (Extract All…).
- Start the installation or update by double-clicking the installation program install.exe in the extracted folder.
Make sure you know the protection method of the software and have the required license. Depending on the protection method you need one of the following:
Protection method What you need NetVID license Activation code for the license License server Name of the computer working as the license server and the number of the port using the license service HASP protection module License file LICENSE.TXT Time limited license file tied to the computer's identification code License file LICENSE.TXT
Installation Progress
Close all applications
- Close all applications before the installation.
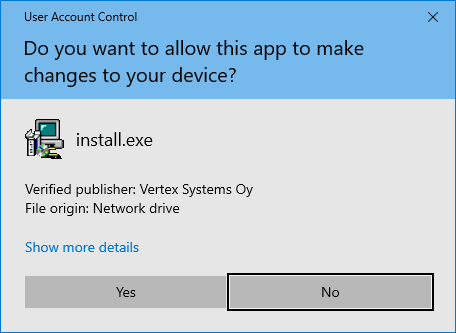
Start the installation
- Double-click the installation program install.exe in the installation package.
- Confirm the installation if prompted by user account control.
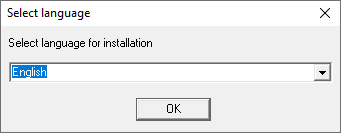
Select the installation language
- The options are Finnish and English.
- However, the installation package solves the language of the installed program, for example folder structure and the names of library components.
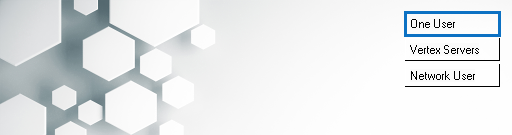
Select the installation option
- Select One User.
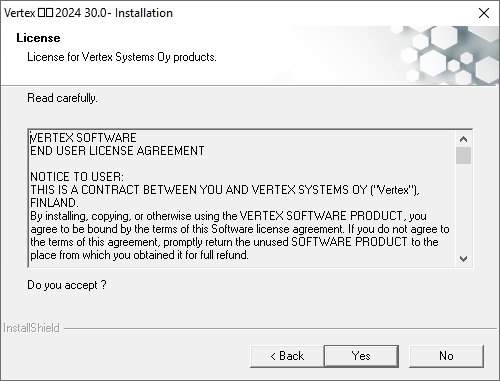
Accept the license agreement
- Read the license text and accept it.
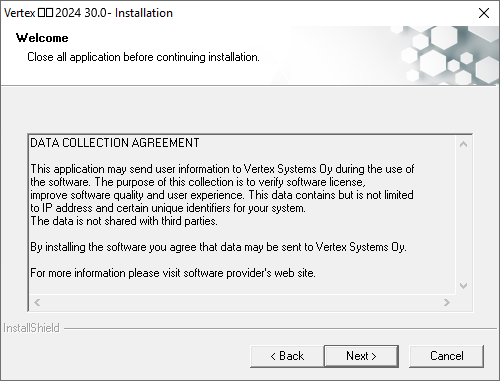
Accept the data collection agreement
The program sends user information to Vertex Systems Oy during the use of the program.
- This data is used for verifying the software license (NetVID license).
- The data is also used for improving the software quality and user experience.
- This data contains but is not limited to IP address and certain unique identifiers for your system.
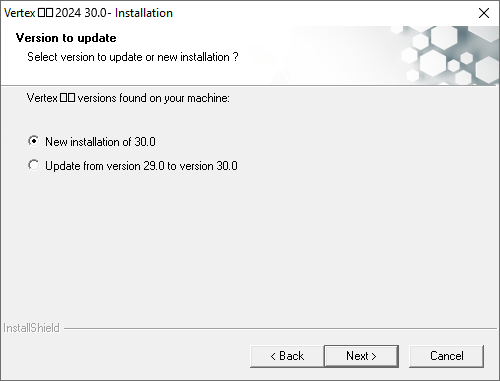
Version to be updated
If the installation program asks for the version to be updated, select either of the following:
- Select New installation if you wish to install a new program.
- Select Update from version if you wish to update the program.
The Reinstall option is rare, and it should not normally be used, as it will remove the old files.
Vertex BD and Vertex InD user:
Always select New installation.
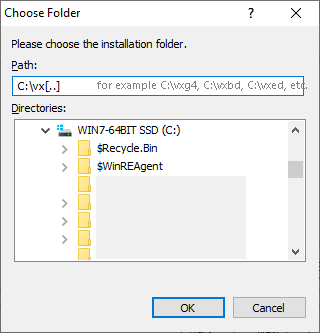
Select the installation path
- The default folder is C:\vx[..] (we recommend the default folder).
[..] = label of Vertex application, for example g4, g4plant, g4pi, bd, ed, ind. - If you want to change to another installation folder, click Browse.
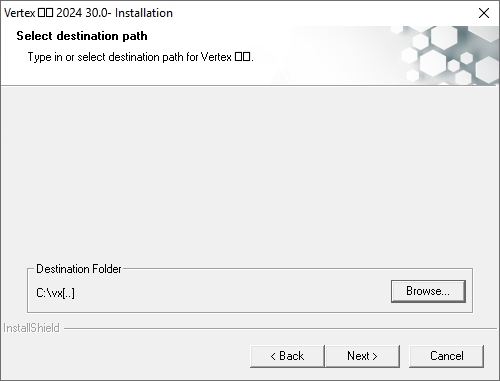
If you are using more than one Vertex CAD program or more than one installation from the same program, you can first create a folder where you install all Vertex programs. For example, folder C:\vertex.
- C:\vertex\vxg4plant (Vertex G4 Plant and Piping Design)
- C:\vertex\vxed (Vertex ED Electrical Design)
- C:\vertex\vxbd (Vertex BD Building Design)
Note
- Allowed characters in the folder names of the installation path are alphabets (a-z, A-Z), numbers 0-9 and underscore (_).
- Use a backslash (\) as a folder separator in the installation path.
Change the installation folder
If you change the installation folder, select the folder in either of the following ways:
- Select a new folder.
- Type the name and path of the folder to the Path field. Do not change the name of the actual installation folder (vxg4, vxbd, vxed etc.), even if you change the path.
Write down the new installation path.

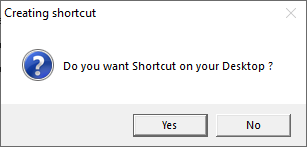
Shortcut icon
- Select Yes, if you want a shortcut icon for the program on your desktop.
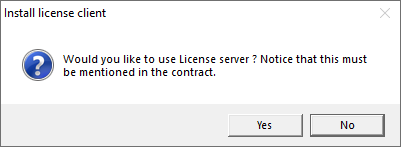
Select whether to use a license server
- Select No.
- The license server is only used when it has been separately agreed upon and when several Vertex licenses are in use.
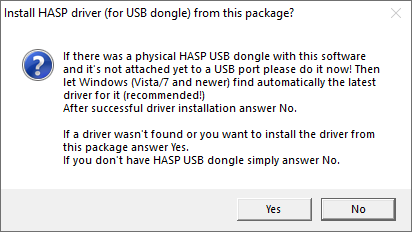
Install or skip the HASP driver
The installation program asks if the HASP driver included in the installation package is installed.
- If you are using a NetVID license, select No.
If you are using a HASP module, and Vertex has been previously installed on the computer, select No. The driver has already been installed earlier and you do not have to reinstall it.
If you are using a HASP module, and this is the first time Vertex is installed on this computer, select Yes.
- See the installation of the HASP driver in the section Protection Module on the page Licensing Methods of Vertex CAD Software.
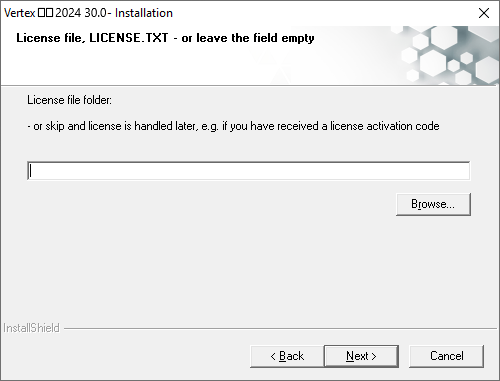
The location of the license file
The installation program asks for the location of the license file LICENSE.TXT associated with the HASP module.
- If you are using a NetVID license, skip this step.
- Enter the location of the protection file LICENSE.TXT, if you use a HASP protection module.
- You can also copy the license file to the user folder after the installation. In this case, skip the question by selecting Next.
Check the installation data
- Check the installation data.
- Click Next to confirm the installation.
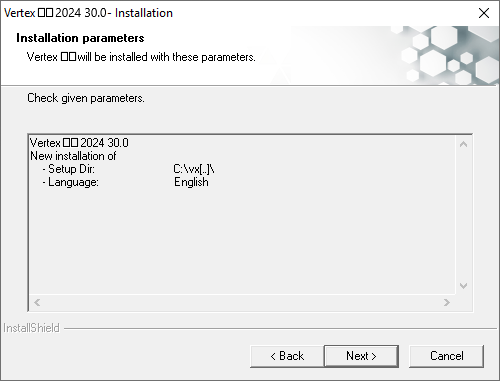
The program shows the duration of the installation.

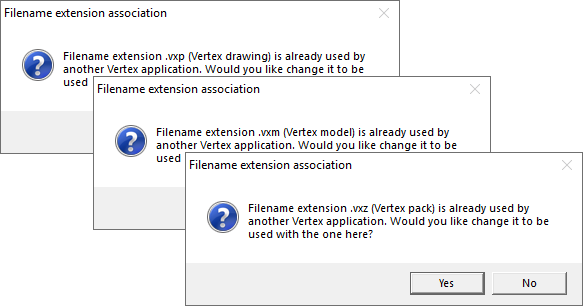
File extension association
- If the Vertex file extensions (.vxp, .vxm, .vxz) have already been associated to a Vertex program, the installation program asks if you would like to change the association to the program now being installed.
- If you are installing the latest version of the same program, select Yes.
- If you are using different Vertex applications (for example BD and G4), select the association according to the application you mainly use.
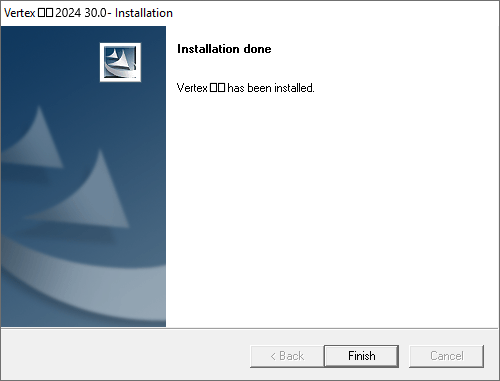
Installation done
- Confirm by clicking Finish.