General
You can start the export from an individual object's card or trolley the necessary objects into a trolley and start the export from there.
Exporting an object's data is a good way to generate a correctly formatted Excel file to use as a template for importing objects.
Export object data
(1) Select the object to export or the trolley containing the objects you want to export.
(2) Choose Tools > Export.
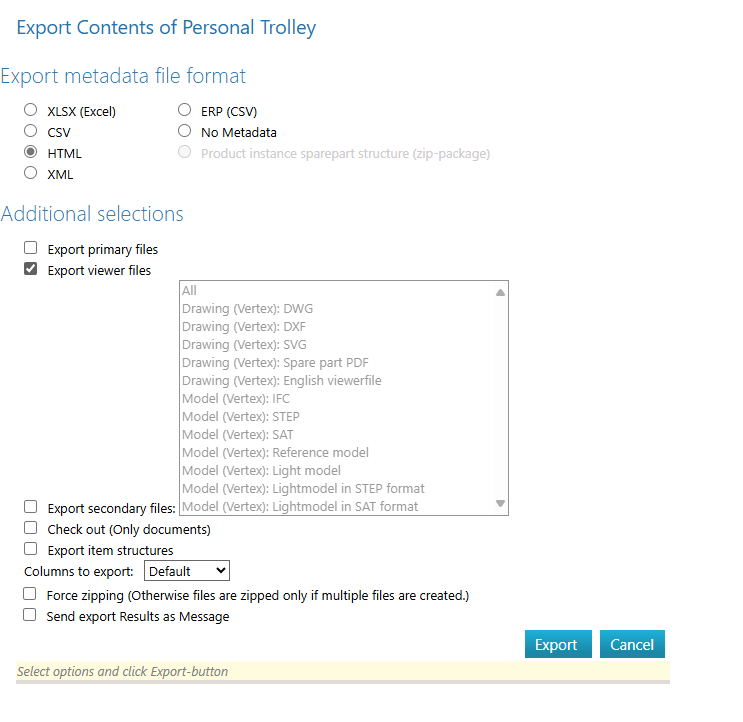
(3) Select the file format for the archive data to be exported.
(4) If needed, select Export main files.
-
If you're exporting object types that include files (e.g. models, drawings, text documents), you can choose whether to export the files as well or just the object metadata.
(5) If needed, select Export view files.
-
If you're exporting documents (e.g. models, drawings, text documents) that have associated PDF view files, you can choose to export those as well.
(6) If needed, select Export alternative file formats.
-
If you're exporting models or drawings that have alternative view file formats (e.g. DXF, DWG, SAT, STEP), you can choose to include those file types in the export.
(7) If needed, select check-out (Documents only).
-
This check-outs the exported documents so no one else can modify them.
-
Use this option if you plan to edit the documents in a location where Flow is not accessible and want to prevent other users from making changes simultaneously.
(8) If needed, select Export item structures.
-
If you're exporting items, you can choose to export their first-level structures as well.
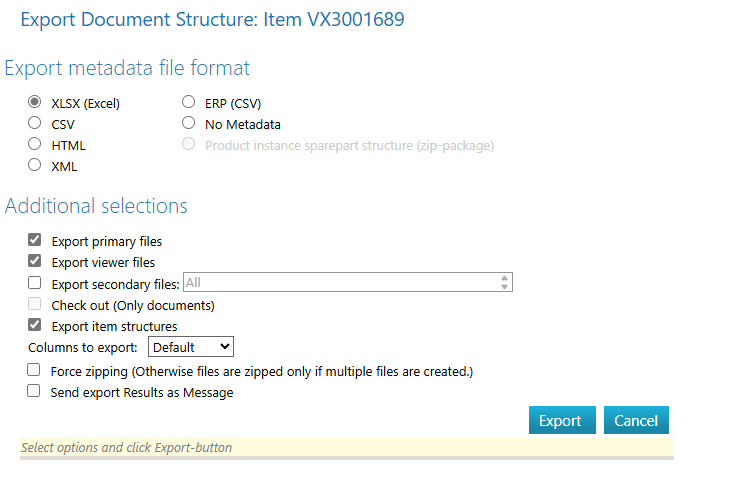
(9) Select Fields to Export.
-
You can choose which fields to include, for example, in a model and drawing list—such as ID, Revision, Name, Description, Status, Modified By, Modified Time.
-
To find the field names, use the Edit Object Card function on the object card.
-
-
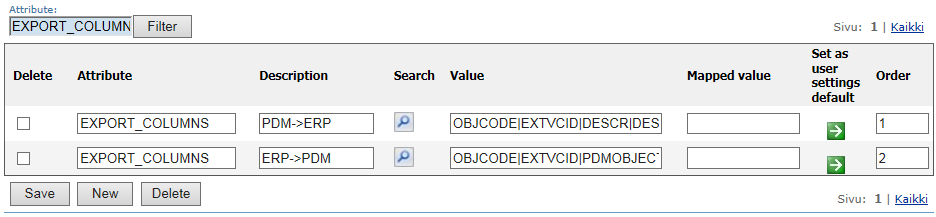
Go to Portal > System Administration > Miscellaneous > Attribute Values.
-
In the Filter menu, enter the value EXPORT_COLUMNS.
-
Create a new EXPORT_COLUMNS definition using the New option.
-
Enter a name for the list in the Description column.
-
In the Order column, define the dropdown menu order for the user interface.
-
Add the fields to be listed in the Value column, separated by vertical bars:
OBJCODE|EXTVCID|DESCR1|STATUSID|AUTHOR|MODIFIEDTIME| -
Click Save.
-
(10) If needed, select Always compress (if not selected, files are only compressed when there are multiple files).
-
By default, compression into ZIP format is done only if the export generates more than one file.
-
With this option, you can force compression every time.
(11) If needed, select Send export results as a message.
-
You can send the export results via email.
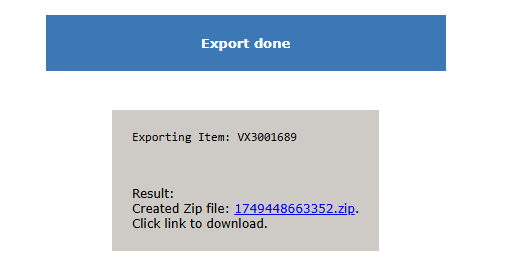
(12) Select the Export function.
-
Flow will confirm whether the export was successful.
Example: Export in HTML format
Let’s assume that a company’s sales representative is going to present products to a customer who does not have network access to the company’s Flow system.
-
Since the Flow system cannot be accessed in this case, the presentation materials must be available on the sales representative’s own computer.
-
While still at the office, the sales representative opens in Flow the item structure they plan to present to the customer.
-
Then they select the Fetch Documents function.
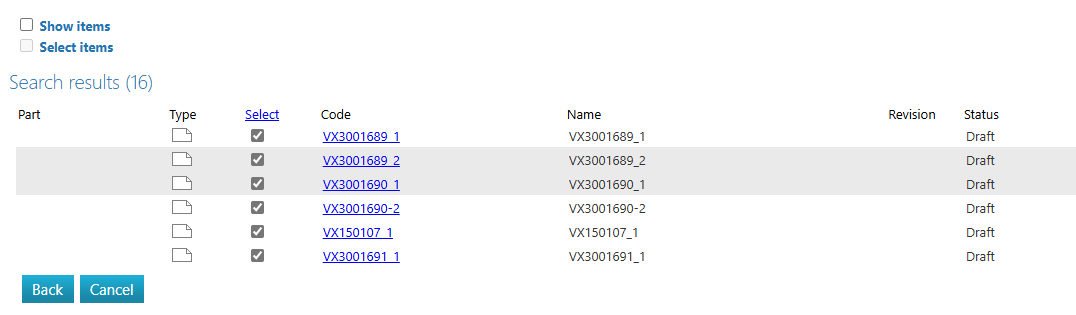
When the resulting list appears, they deselect the items and place only the found documents into a trolley. -
The Export function is then used from the trolley, and only view files are selected for export.
-
When exported in HTML format, the metadata is written into a text file that can be opened directly in a browser.
-
The files are packaged into a folder alongside the transfer file, and the HTML transfer file refers to these files.
-
The export process compresses both the HTML file and the folder into a single ZIP file, which the sales representative can extract once at the customer site.
-
When the HTML file is opened in a browser, the user sees a table.
-
It contains the metadata of the exported objects, with the rightmost column showing the files linked to each object.
-
The file described in the metadata can be opened by clicking it with the mouse.
-
Files open in the applications associated with their file type.
-
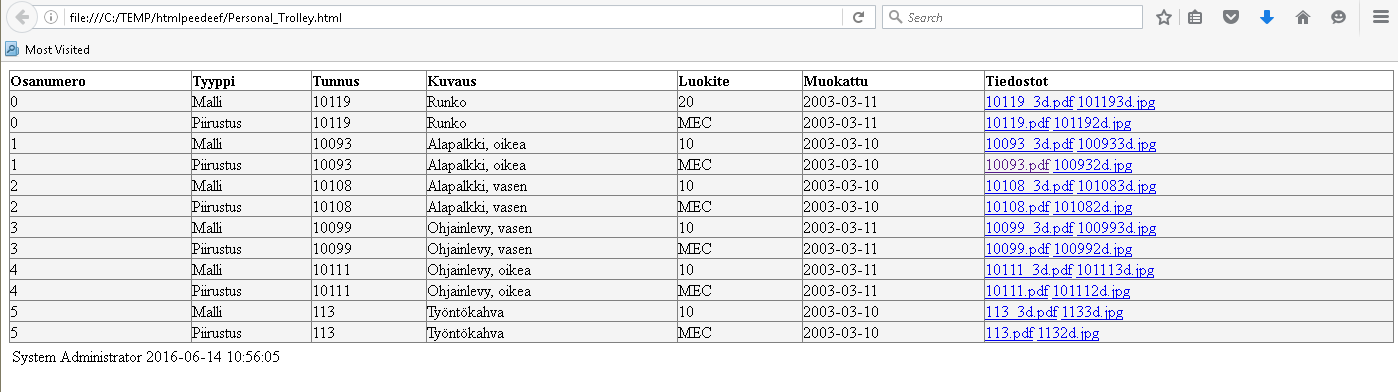
HTML listing
-
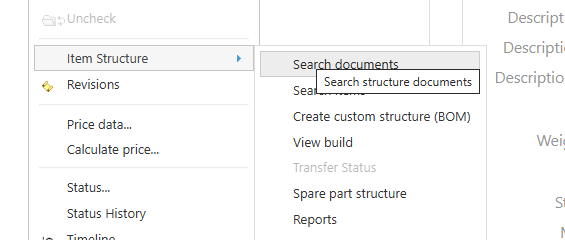
Go to the main item's card
-
Select the function Item > Item Structure > Fetch Documents
-
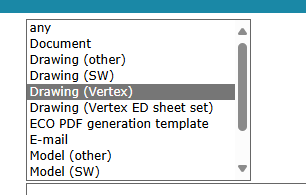
In the search window, select both Model (Vertex) and Drawing (Vertex) from the Type dropdown menu
-
Confirm the search window with OK
-
In the Search Results window, check the box in the lower-left corner labeled Deselect items
-
Select Add to Trolley
-
In the trolley, select Tools > Export
-
Choose HTML as the export format and, under additional options, check the box Export view files (5)
-
Finally, select Export and save the file in HTML format.